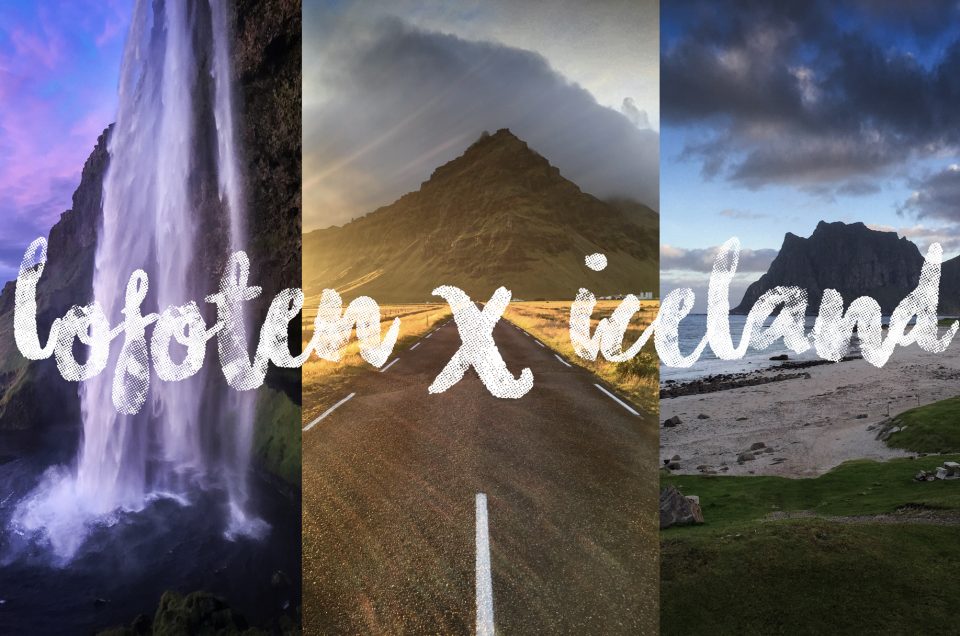
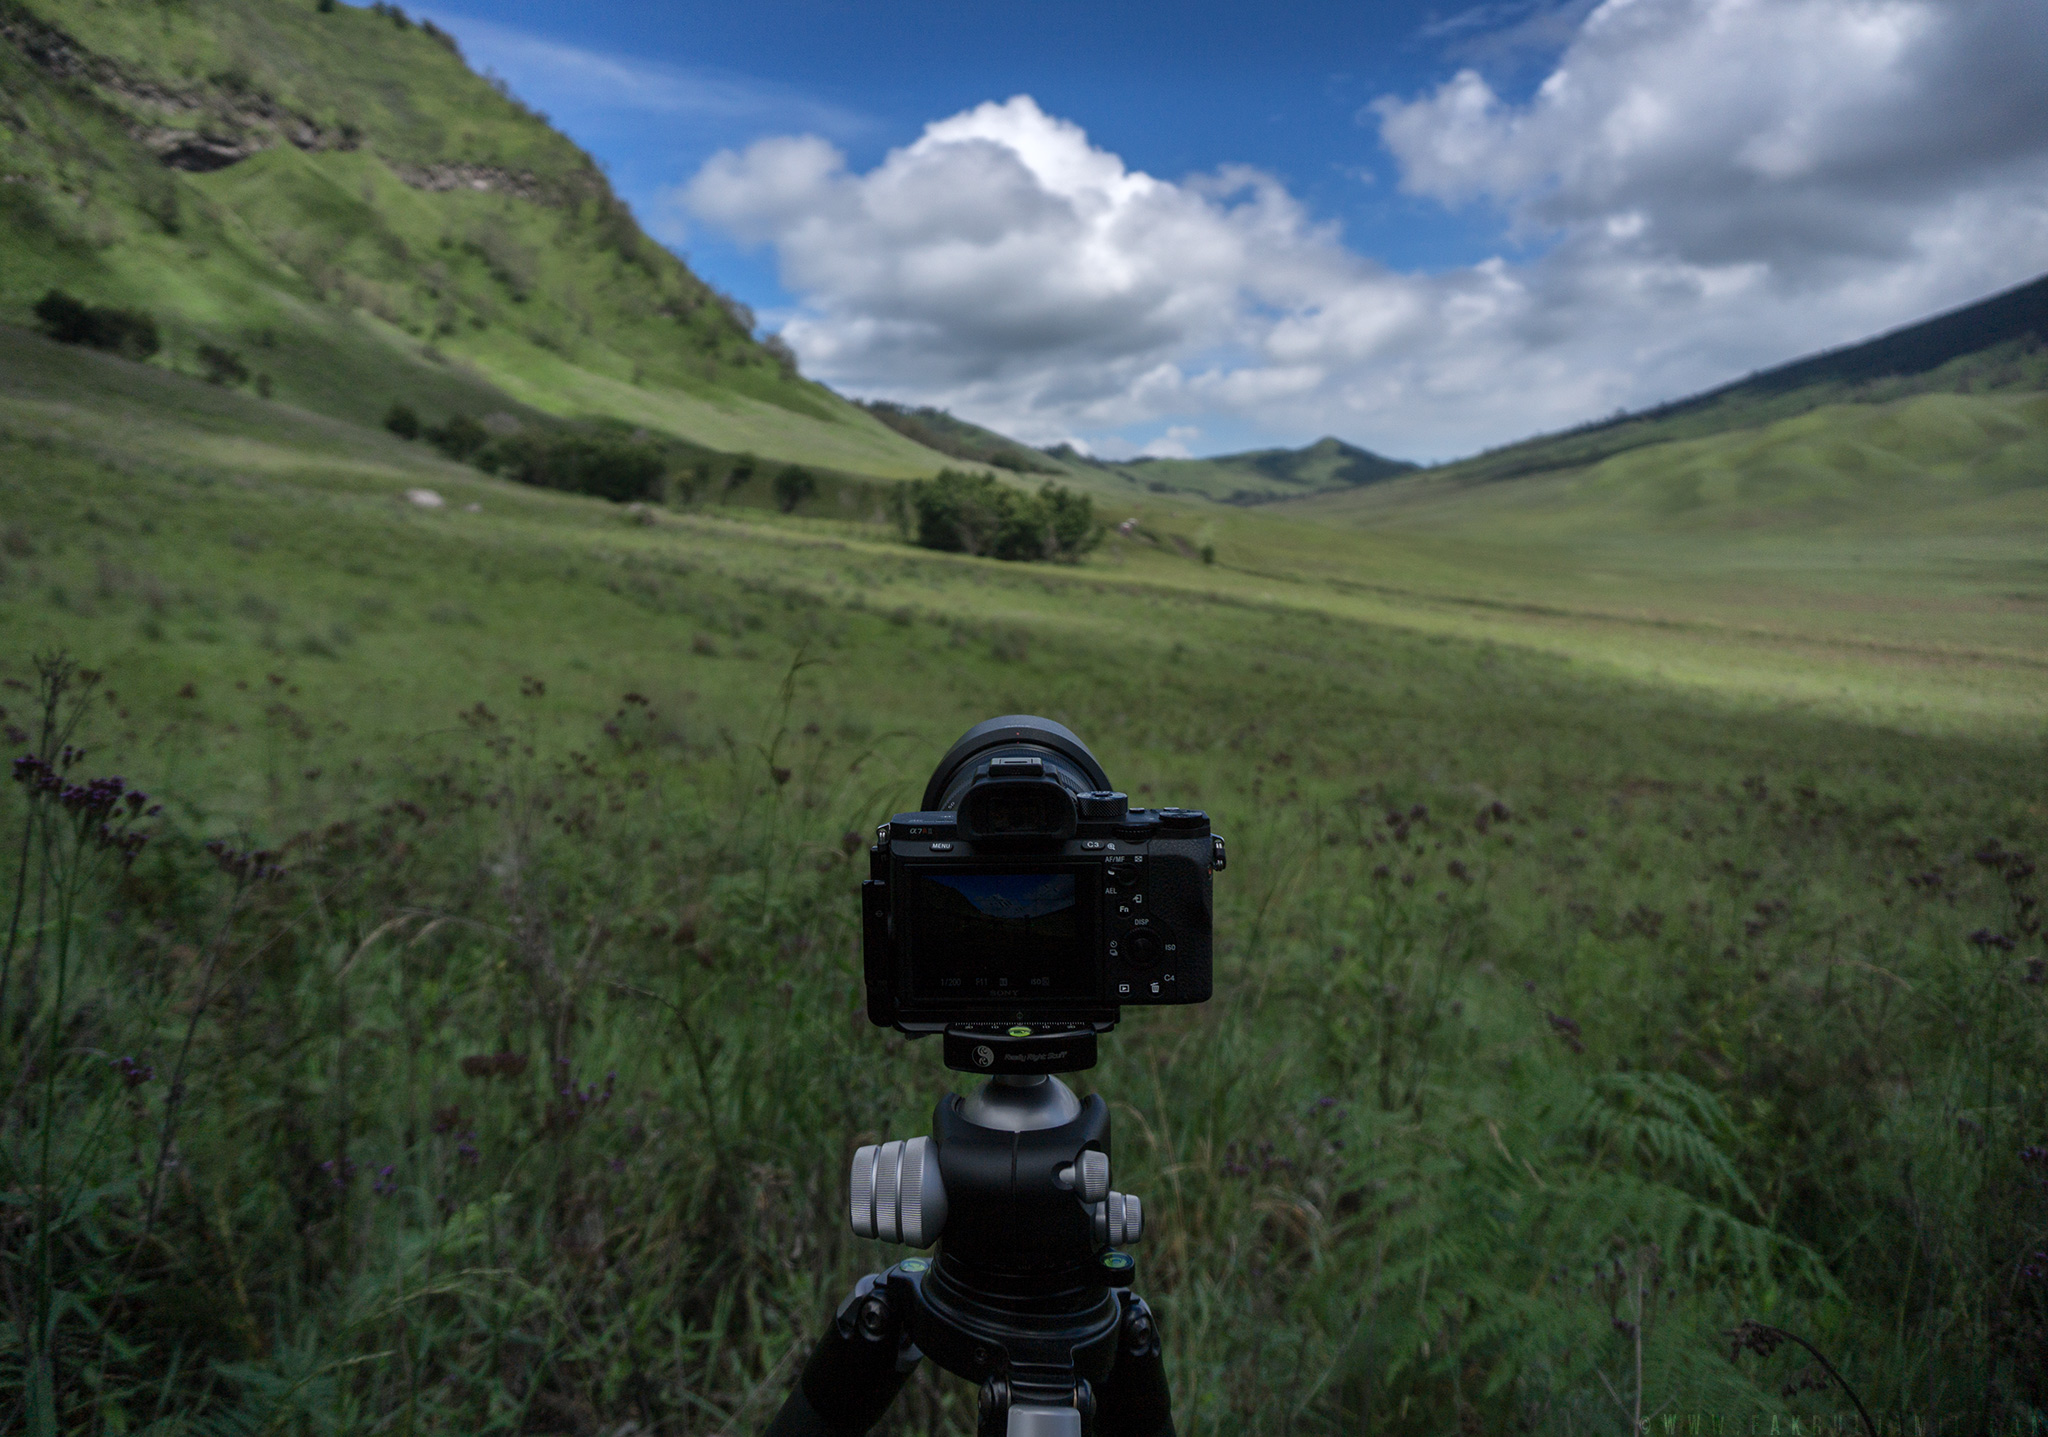
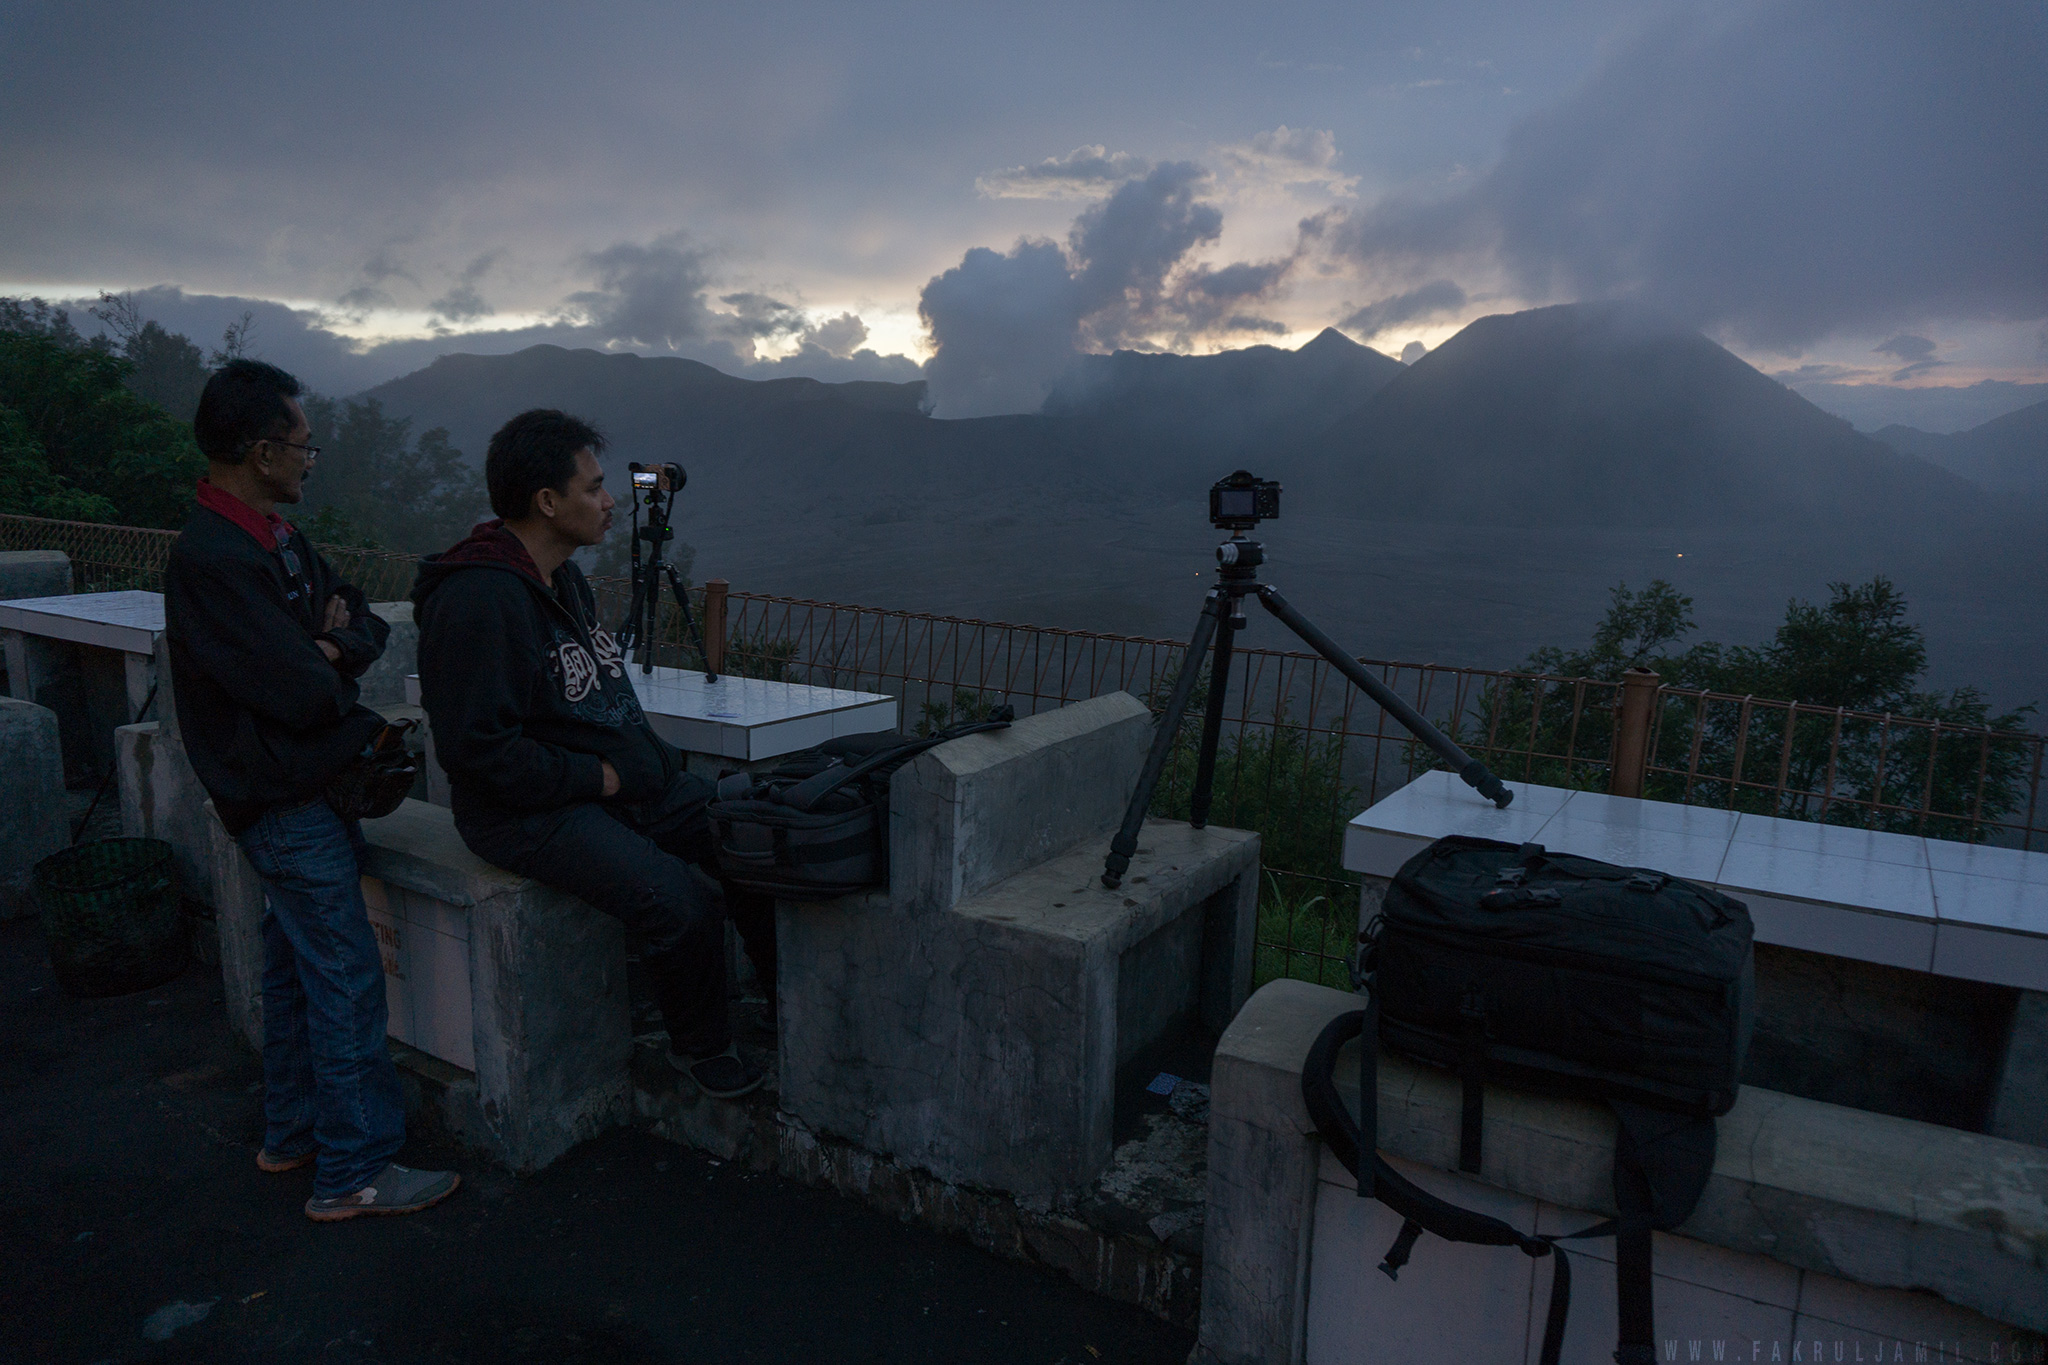
Random Instagram moments captured from behind the scenes photographing Lofoten Islands and Iceland. Follow me on Instagram: @fakruljamil
Random Instagram moments captured from behind the scenes photographing Lofoten Islands and Iceland. Follow me on Instagram: @fakruljamil
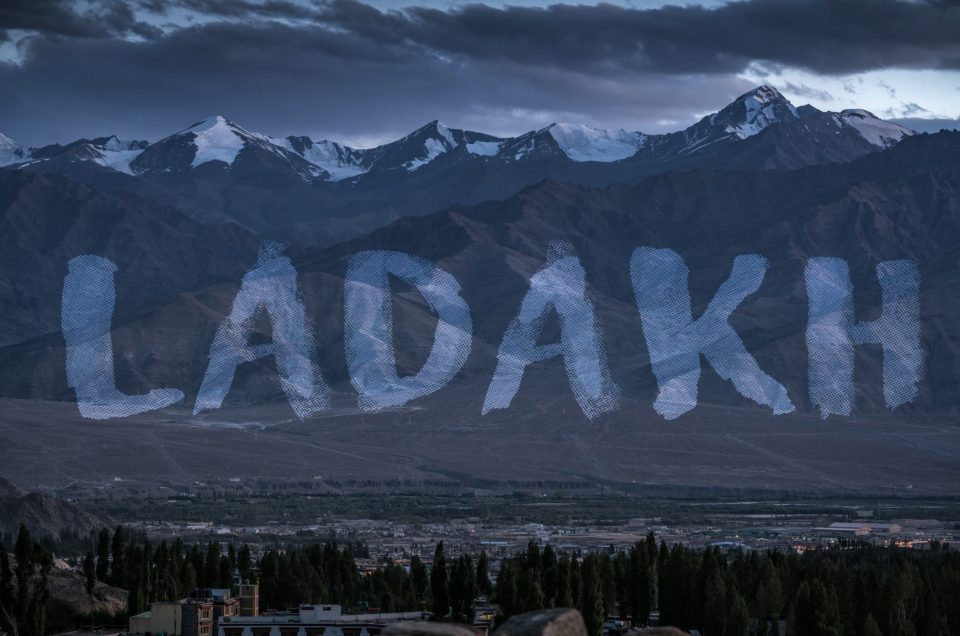
A timelapse compilation taken during my trip to Ladakh, Land of The High Passes on August 2017. Definitely a majestic place high in the mountains!

When Sony release this lens, I got the chance to take it with me for my trip to Lofoten and Iceland last year. This lens is part of the G Master series, which not only makes you sound kind of like a rapper but also represents the best quality that Sony has to offer. While the first round of FE lenses were designed to be compact and portable at the expense of aperture capability, these GM lenses make no compromises: they are designed to be the best of the best.
The Sony FE 70-200 GM 2.8 includes optical image stabilization (Optical SteadyShot, OSS), which allows you to work at longer shutter speeds. As a landscape photographer, I found the OSS really useful when shooting handheld (sometimes I stumble upon a great view, but I don’t have time to set my tripod).

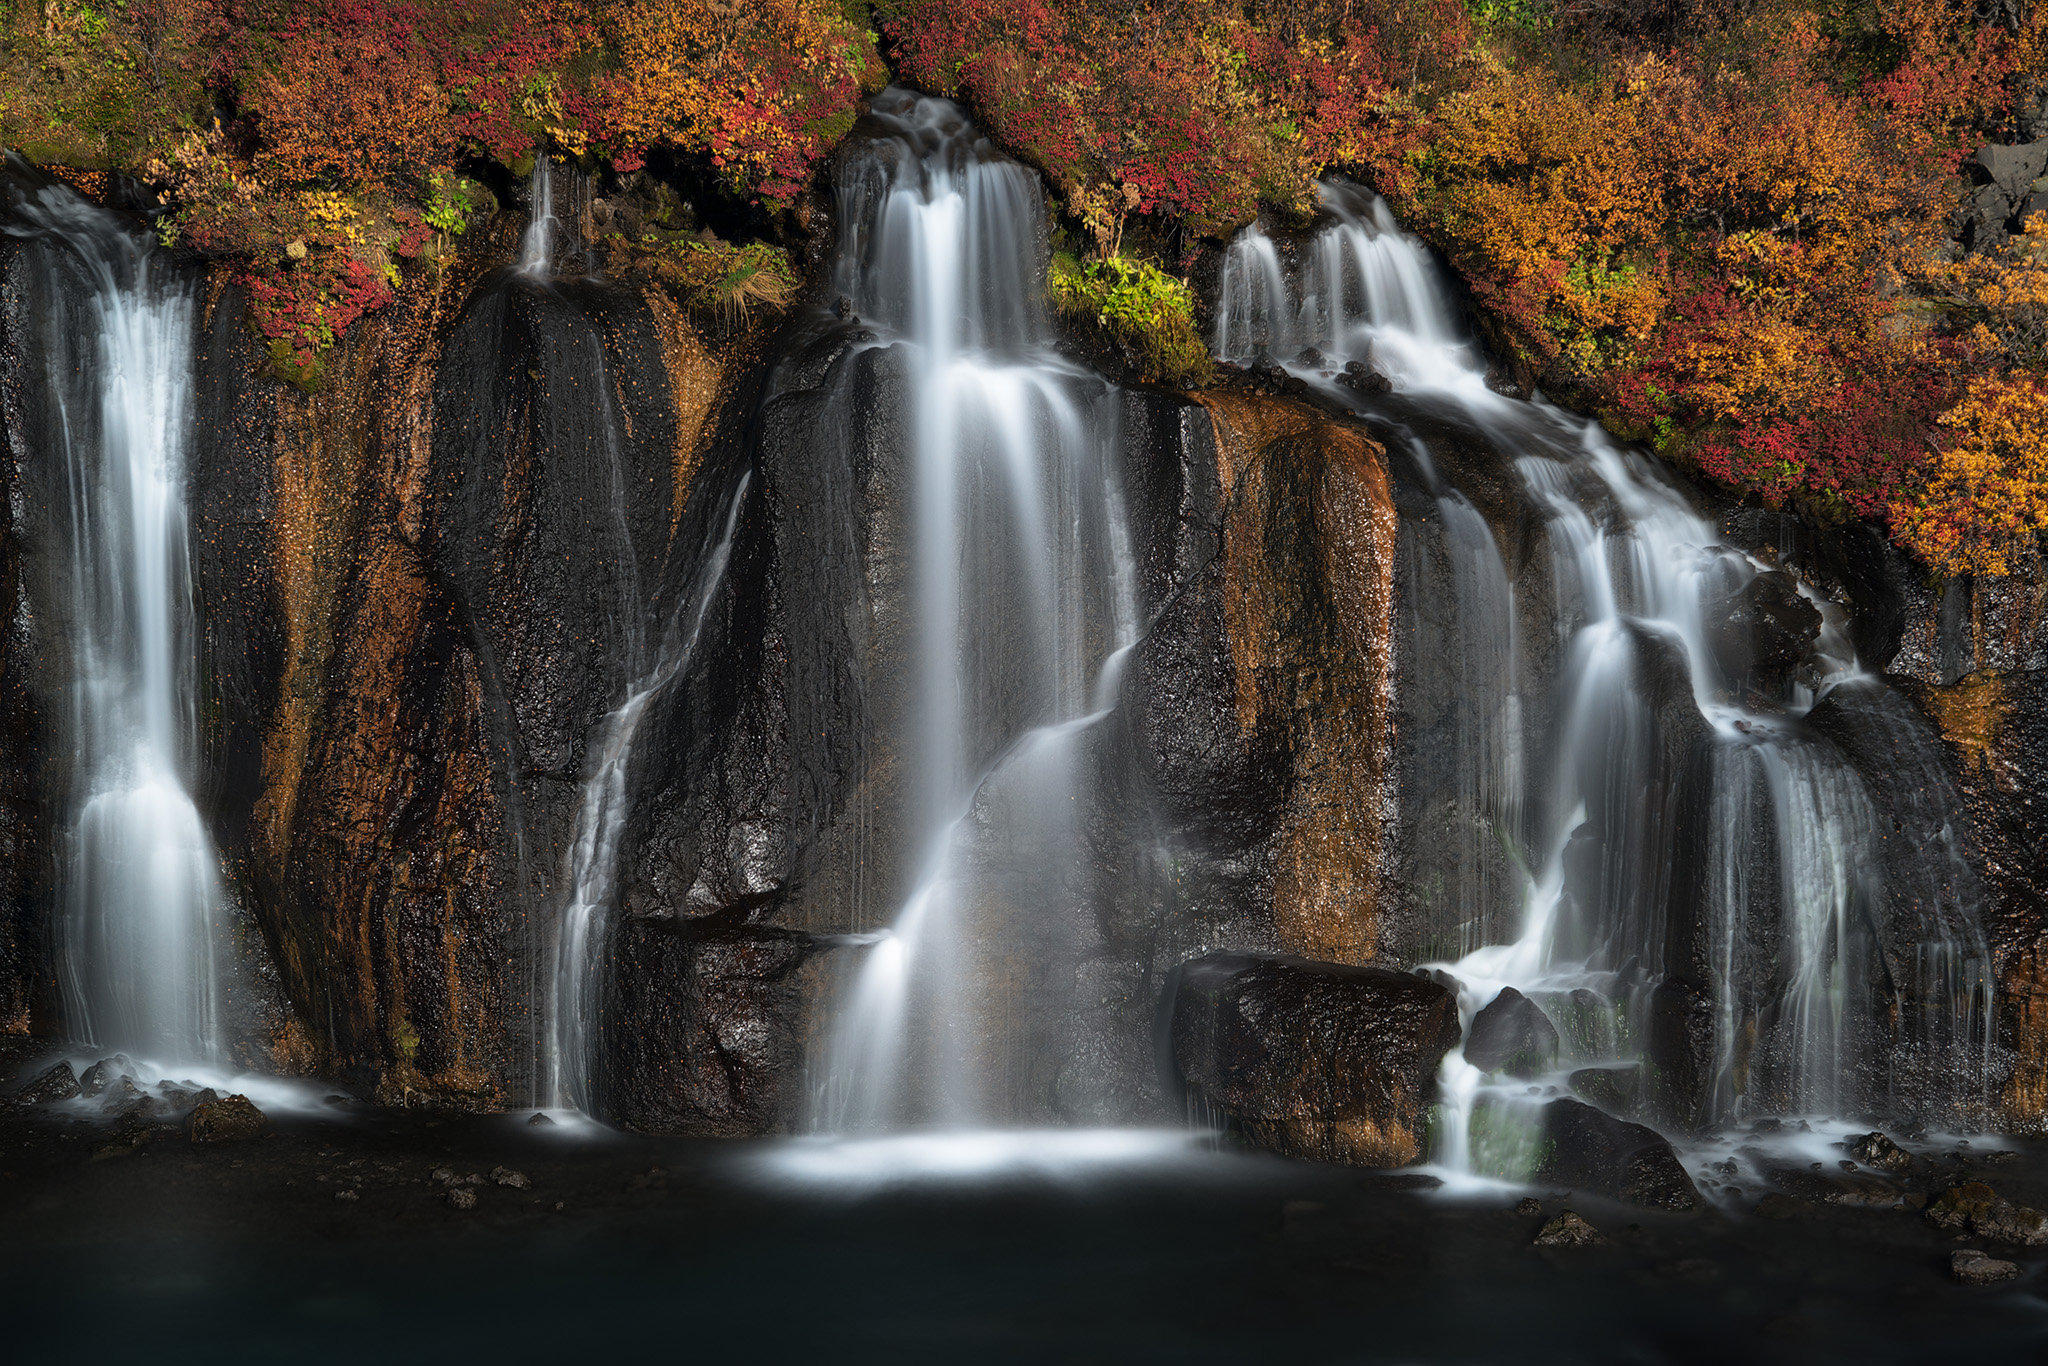
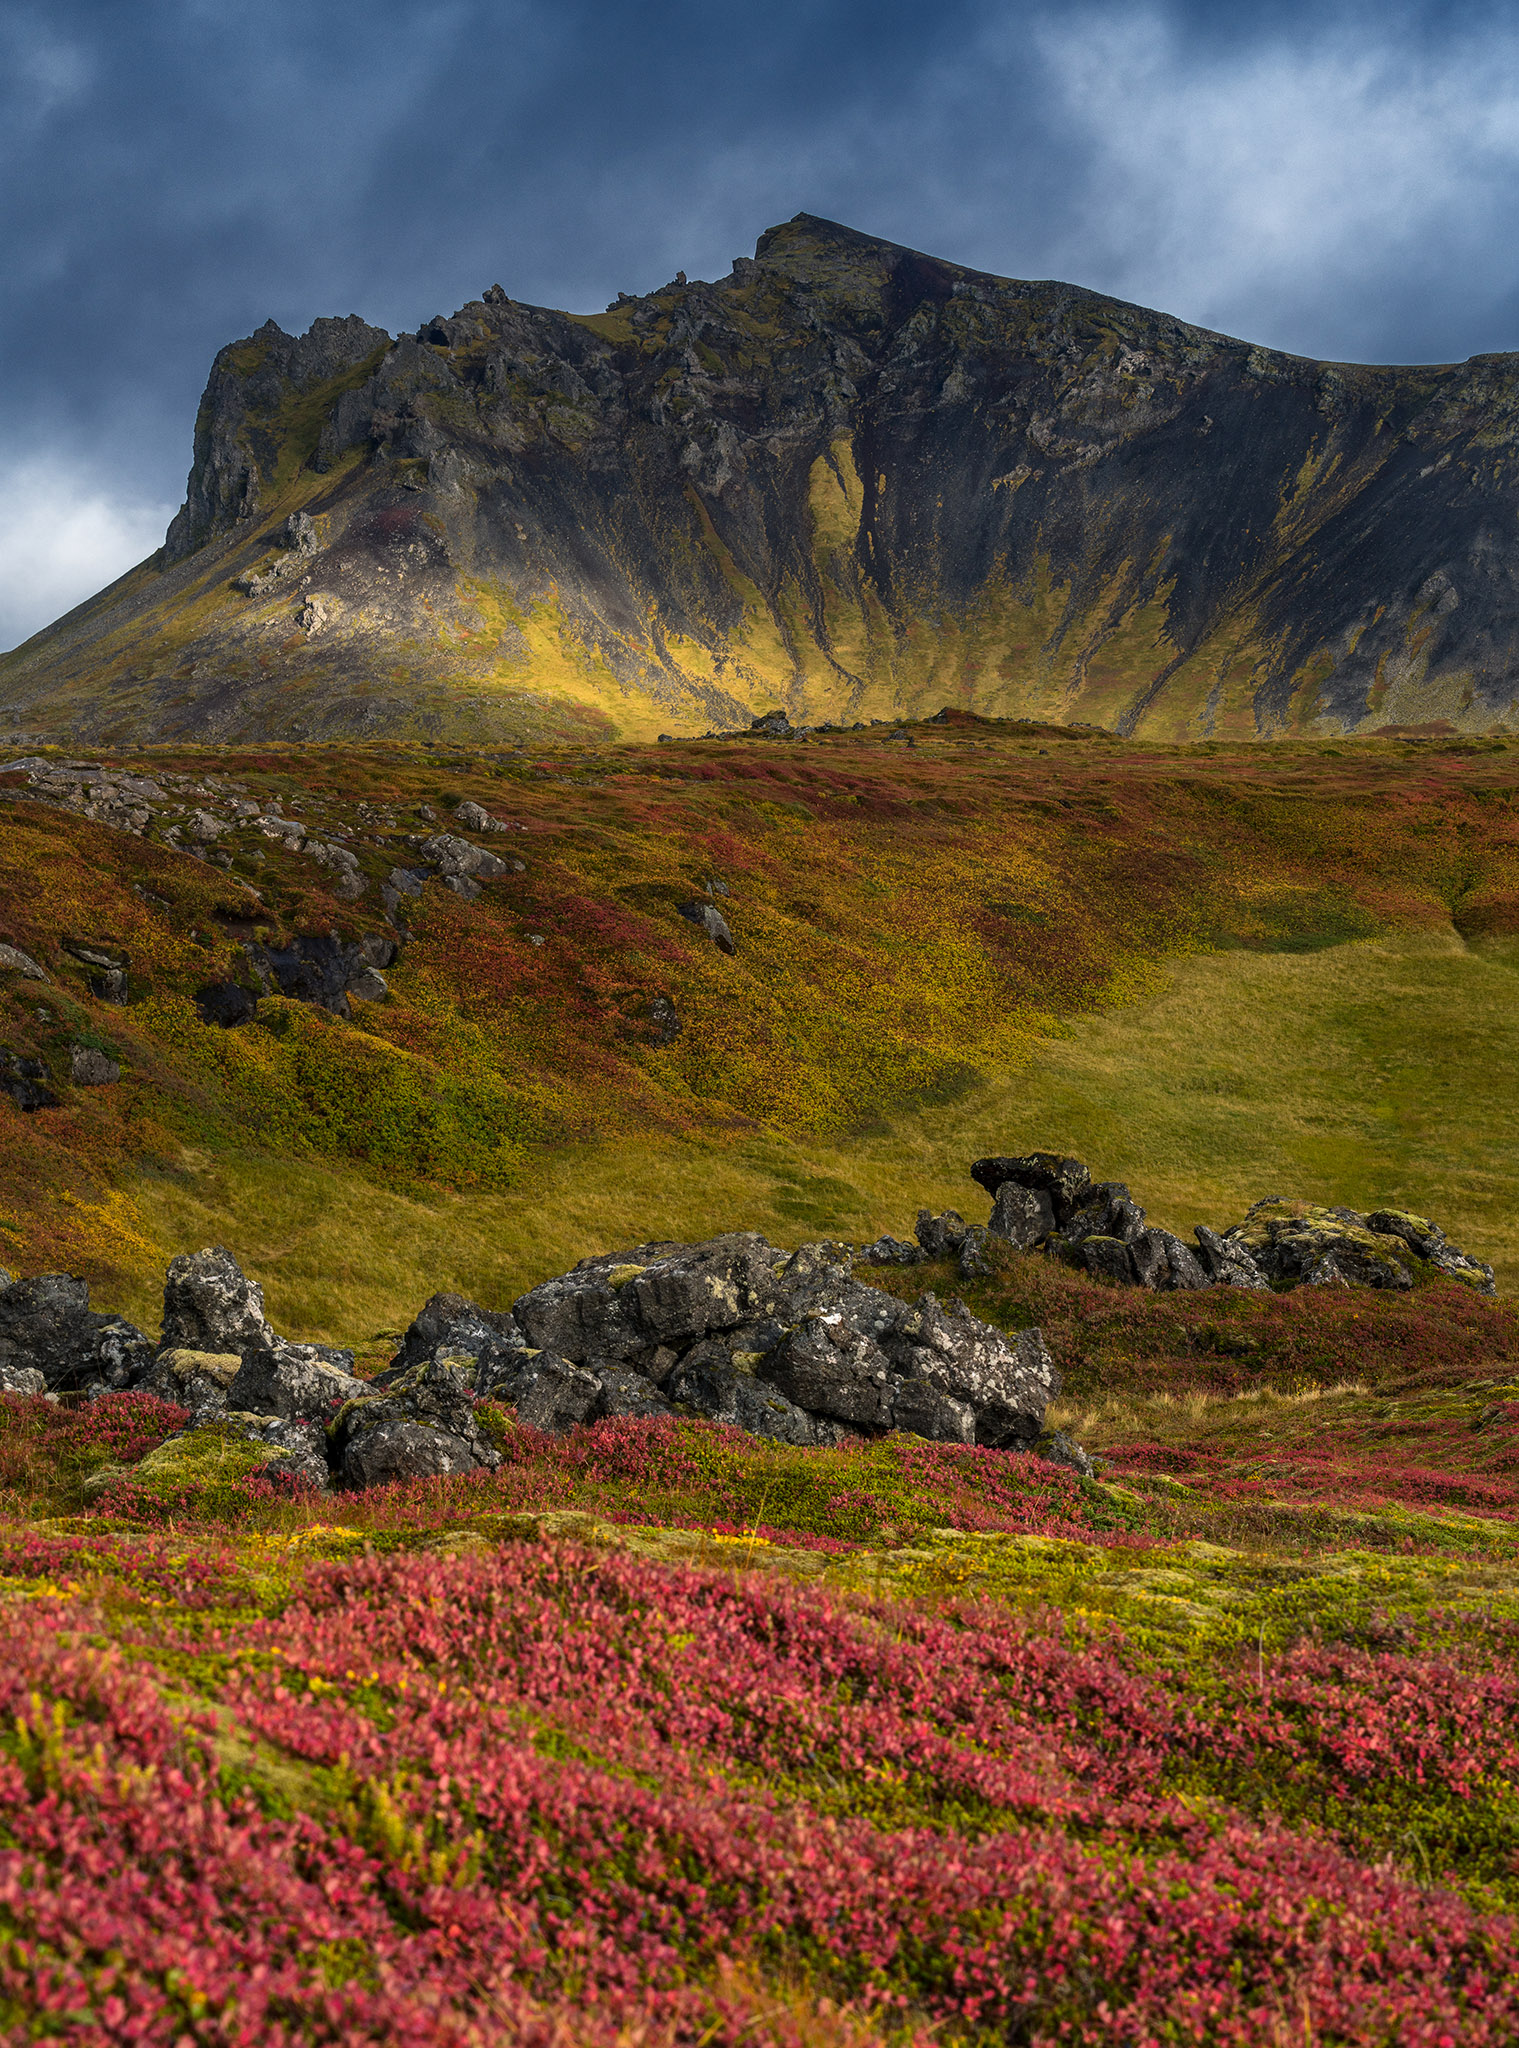
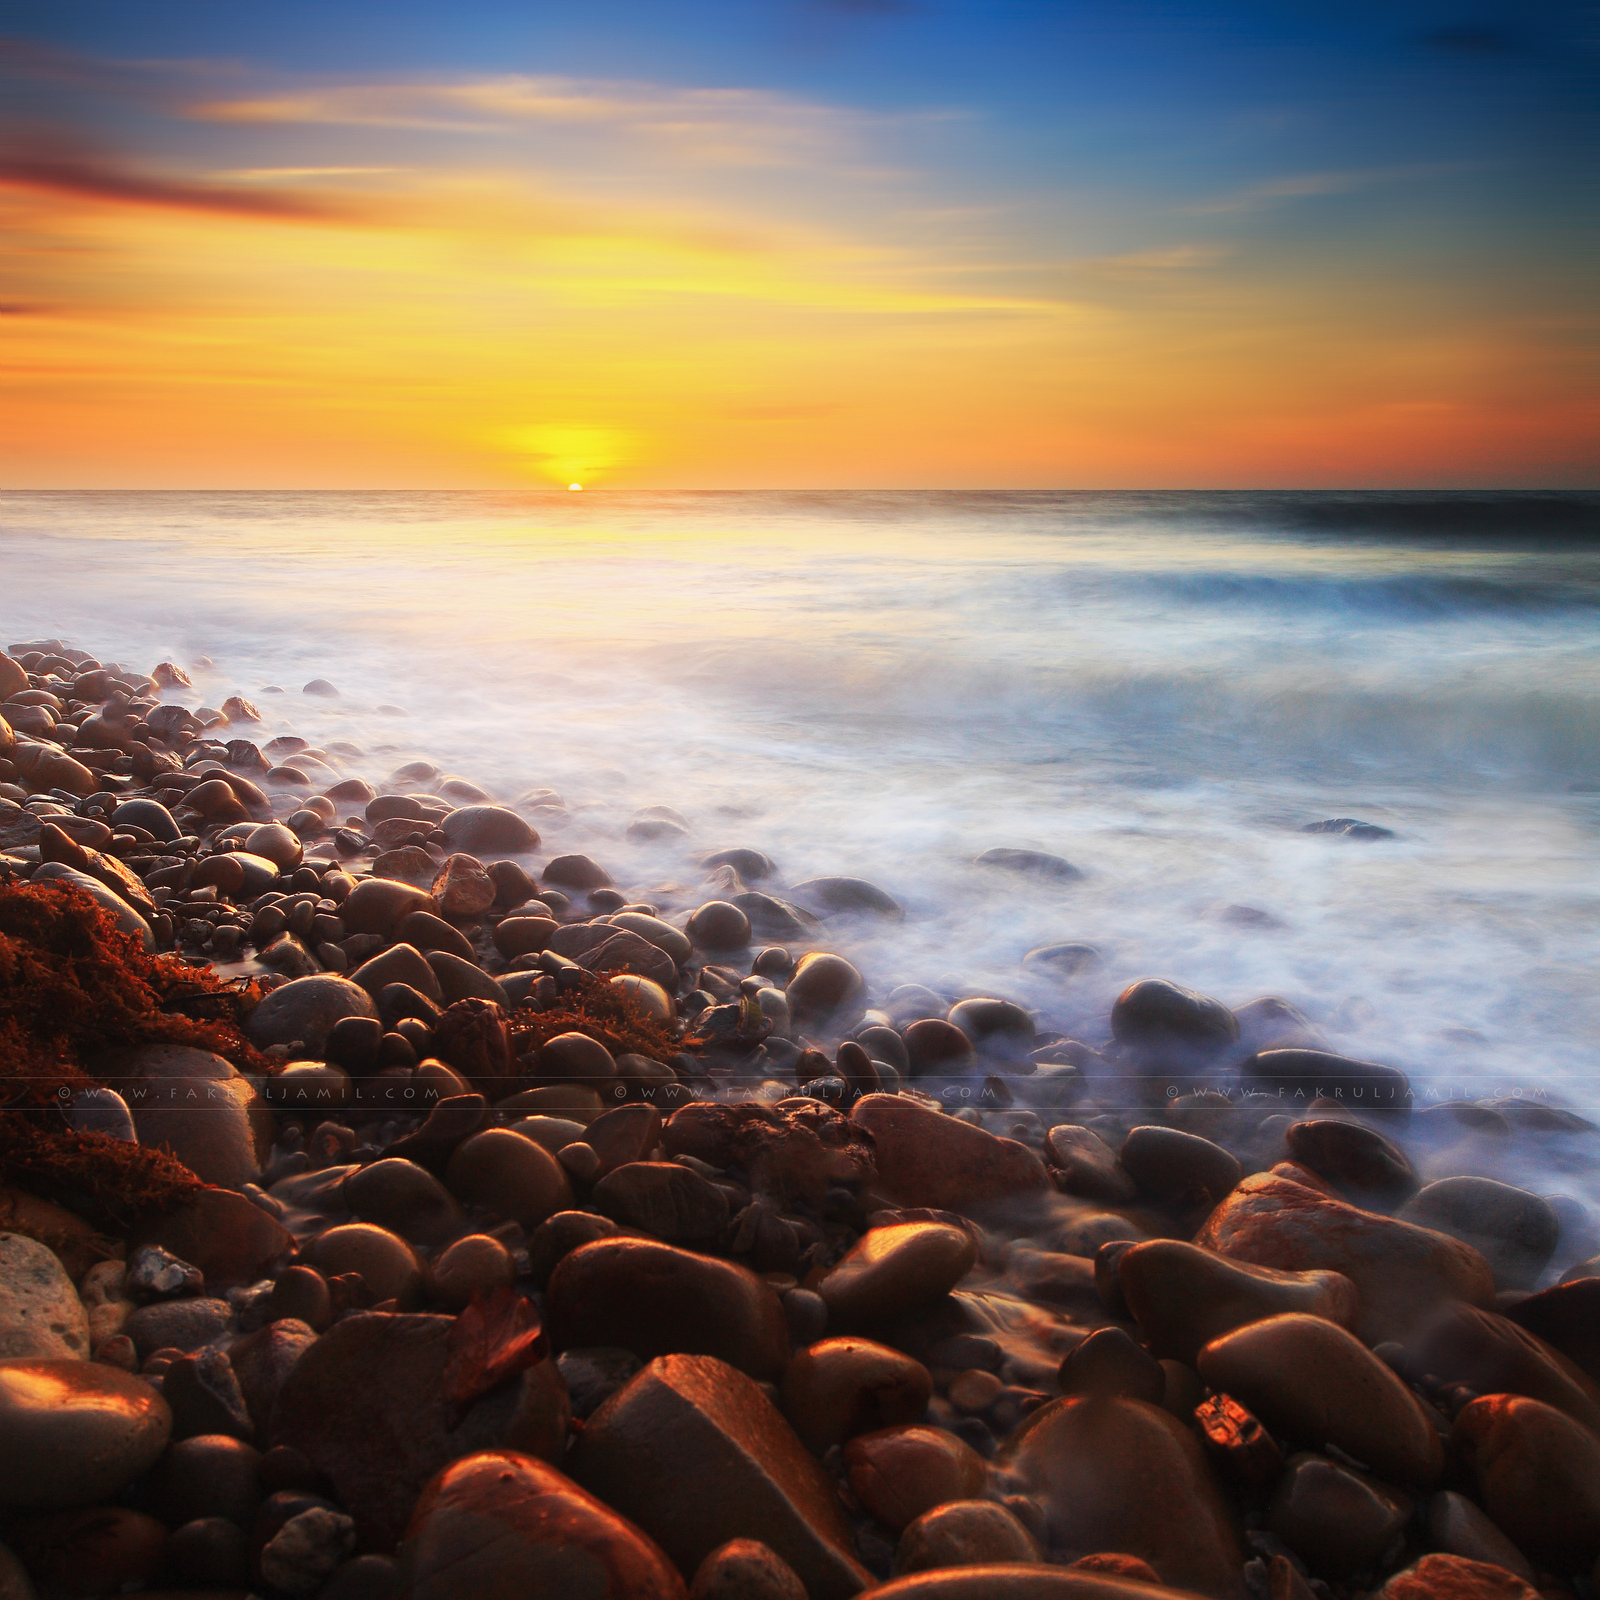
This lens produces images with excellent color and contrast at every setting. Color is rich and vibrant and contrast is excellent as shown in above image where I shot this in Iceland during Autumn season. I was extremely pleased with the contrast profile of the lens right out of camera.

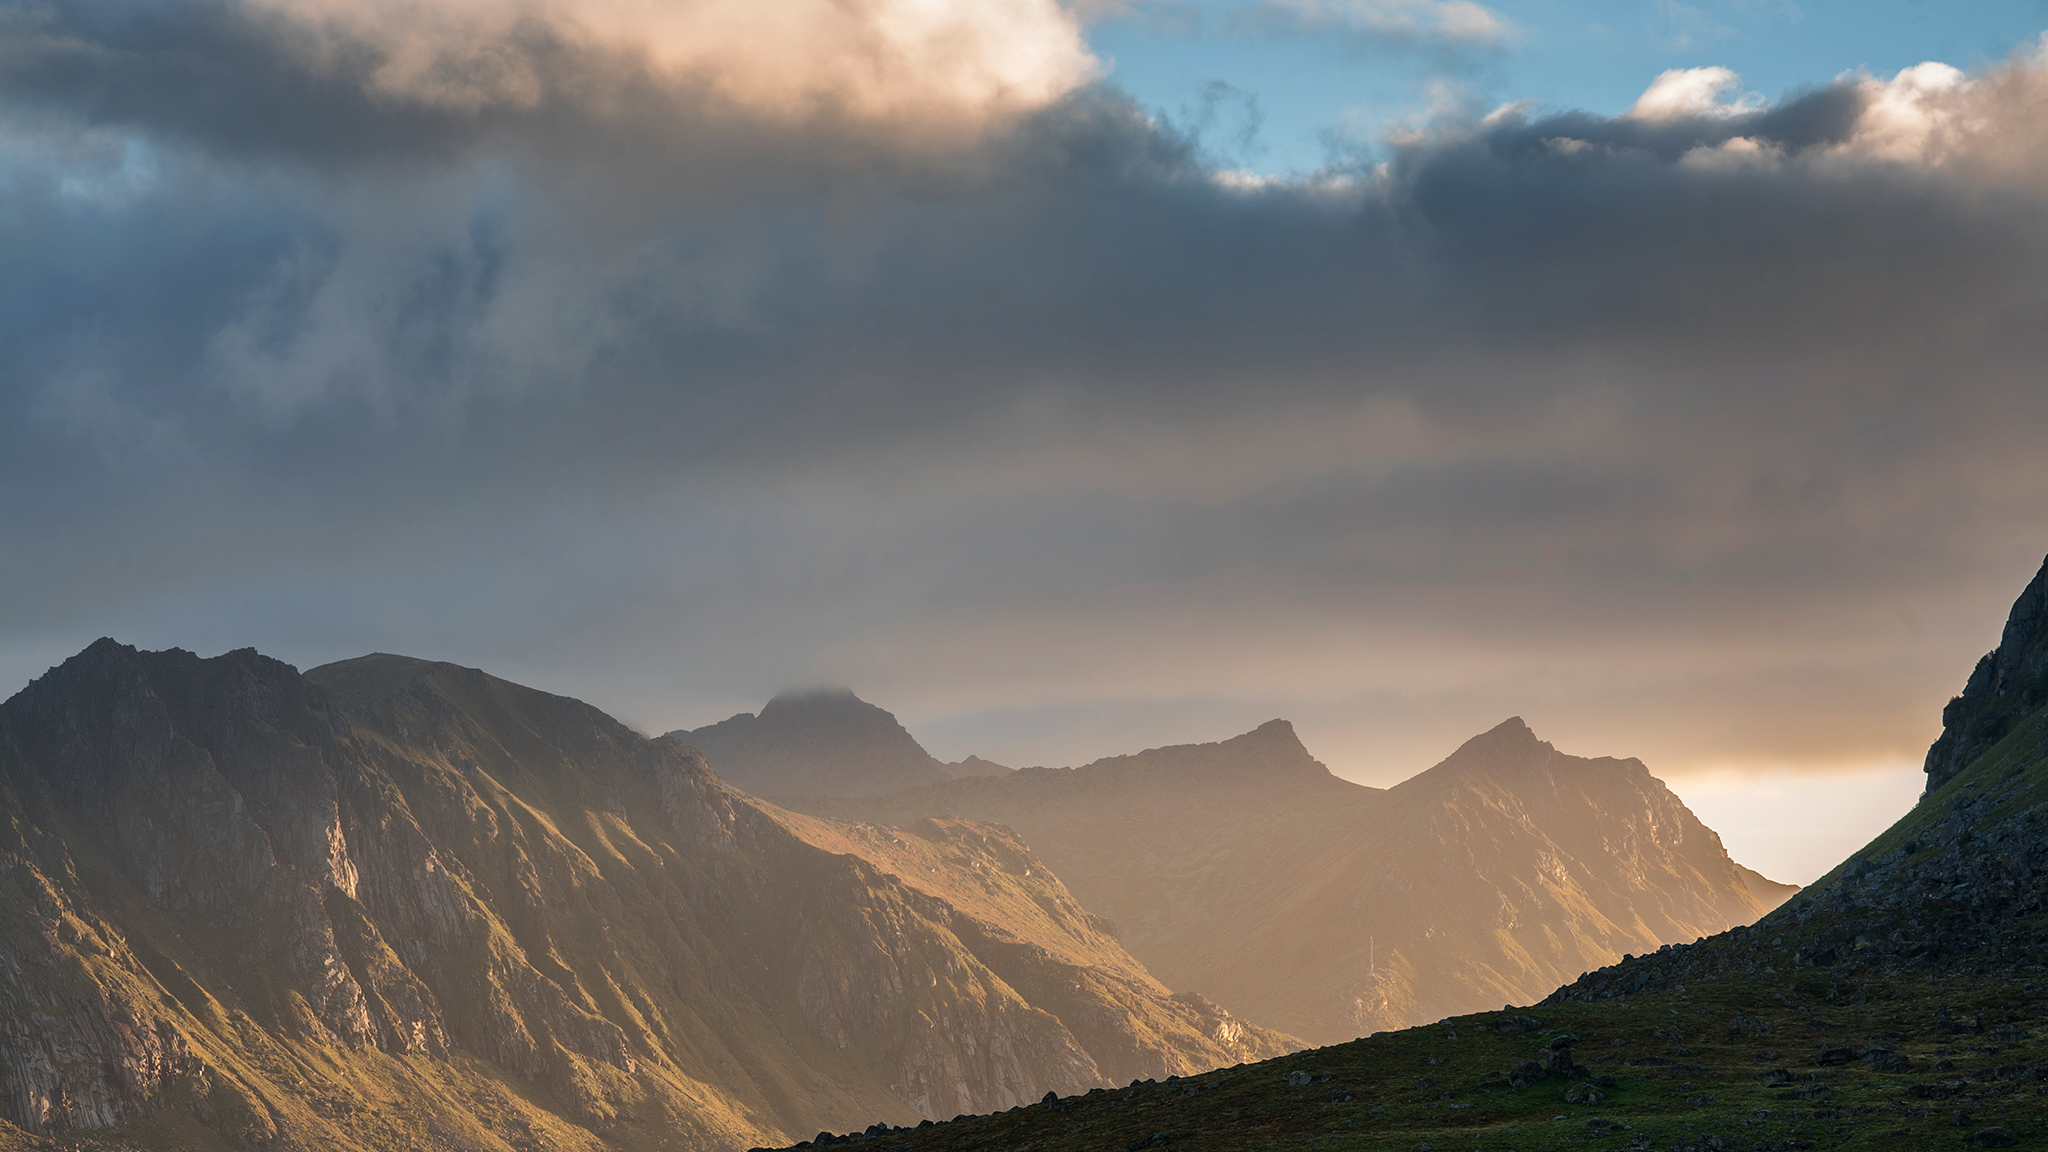
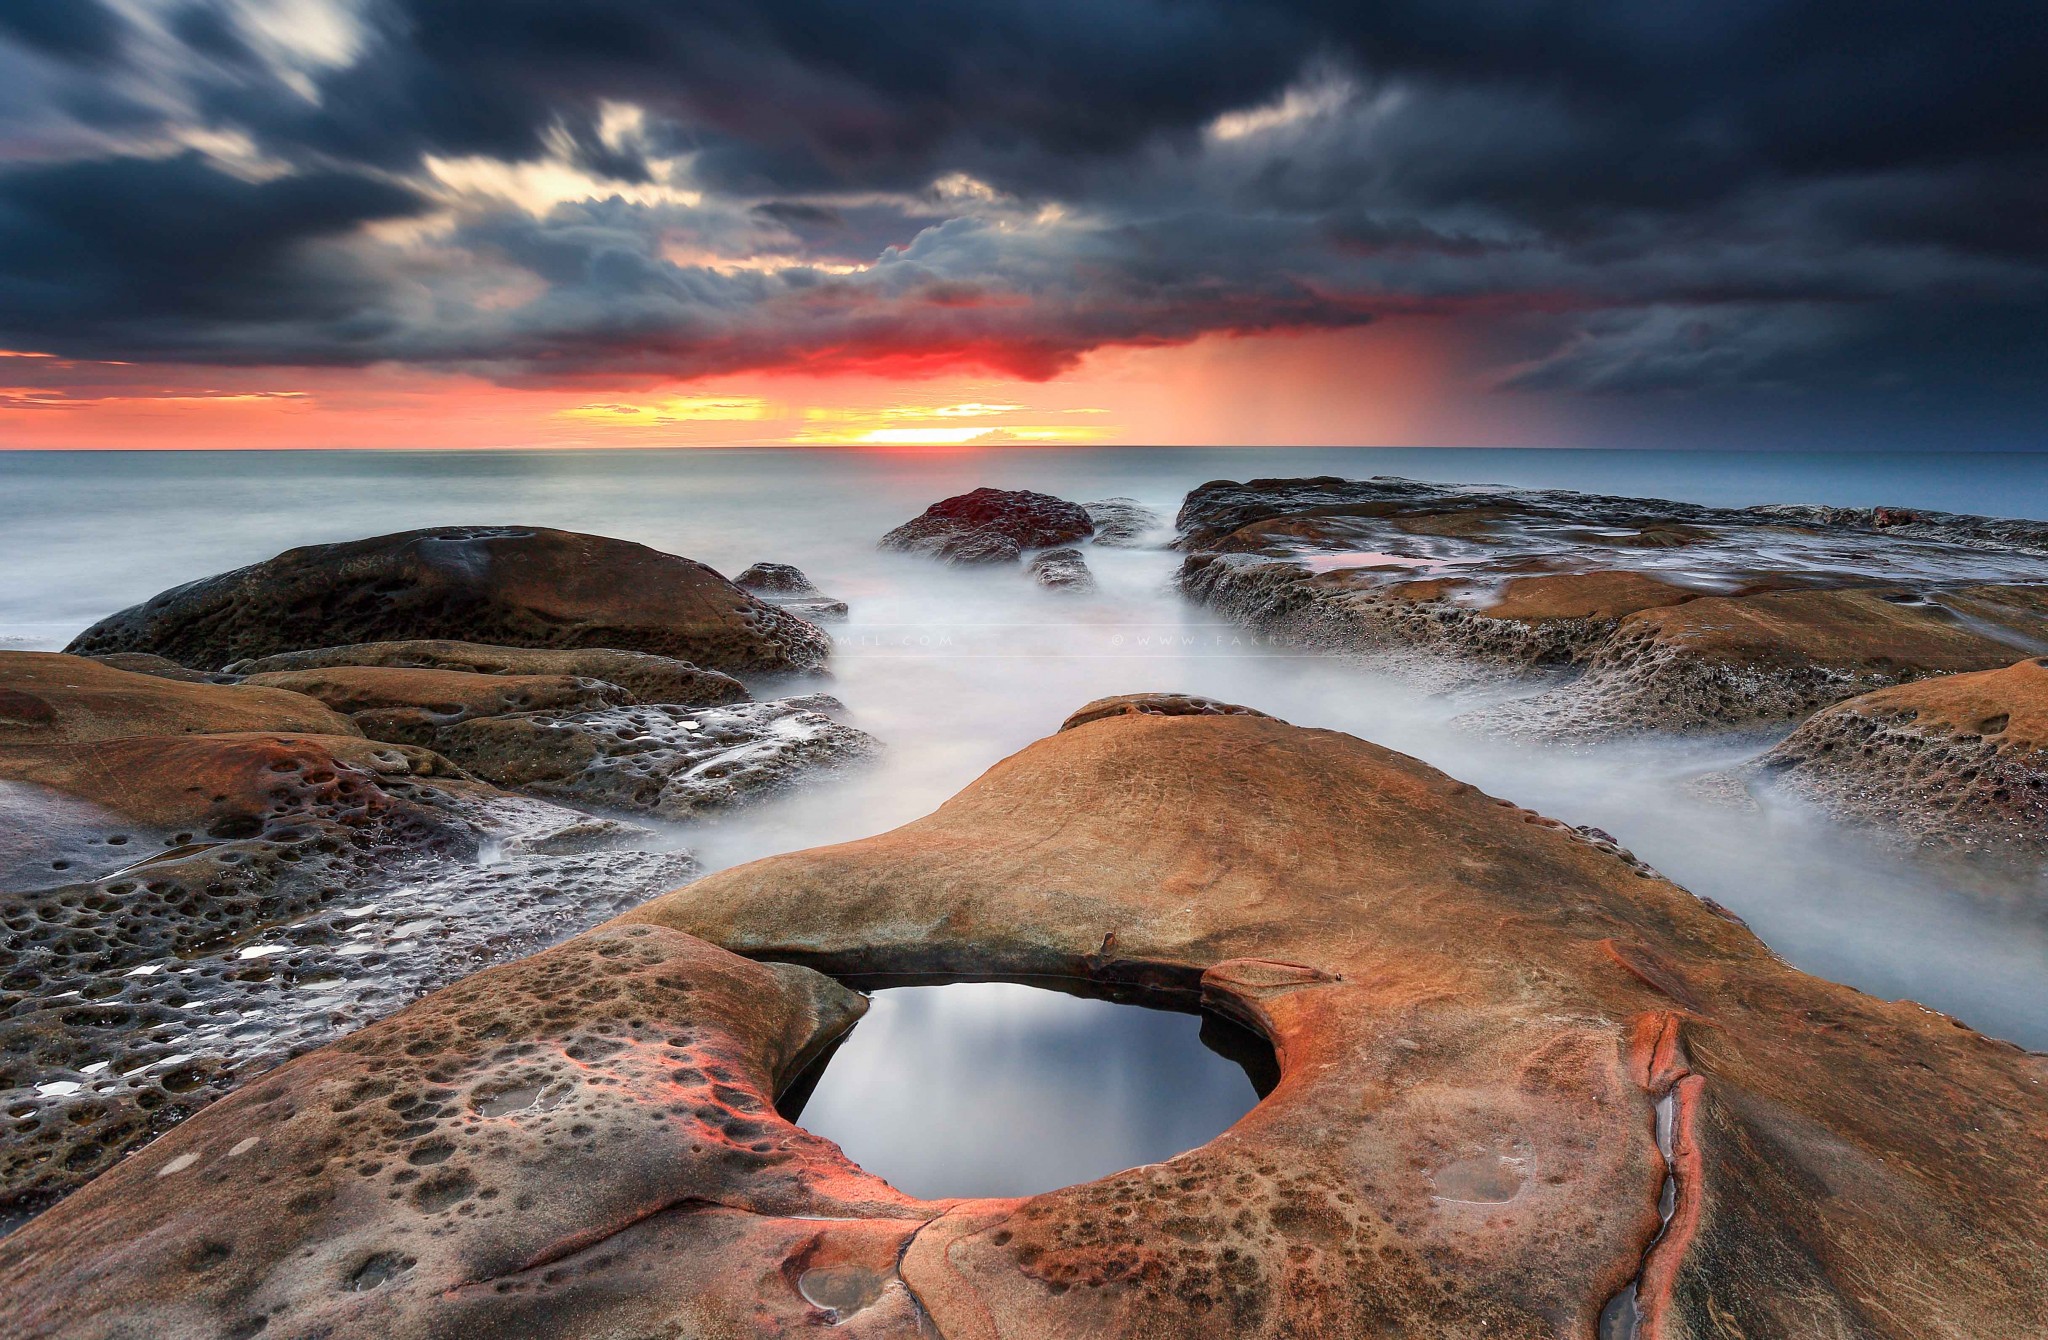
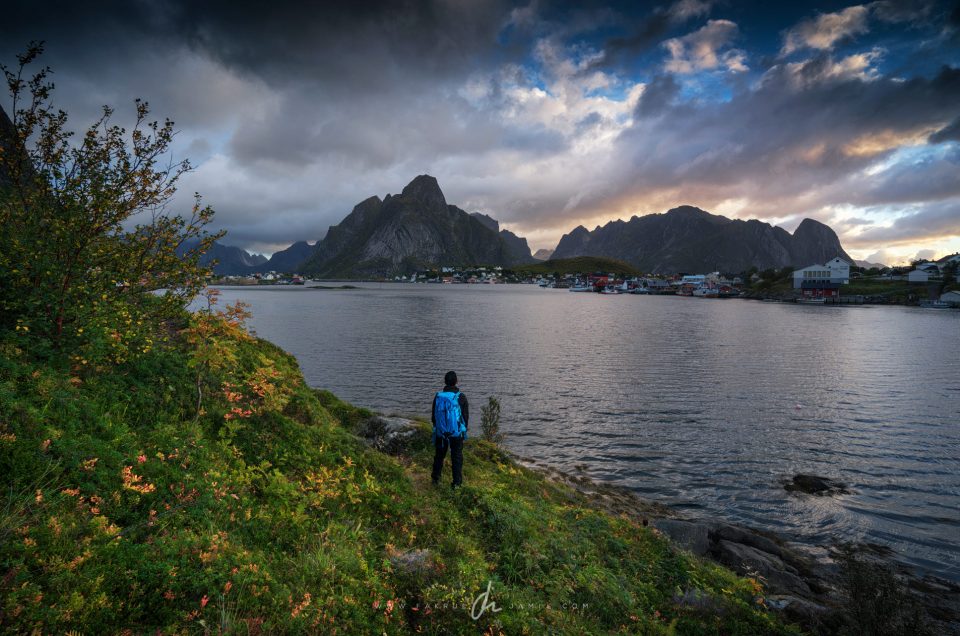
In landscape photography, sometimes I have to change my point of view from wide to something little closer. In image above, I was at atop of Reinebringen mountain in Lofoten, Norway where I switched from my wide angle lens to the Sony FE 70-200 GM 2.8 and shot this at 70mm focal length. It is a very sharp lens. Right from wide open, the lens maintains very high sharpness in the central 2/3 of the image, and still very good sharpness at the edges. This is true both at the wide end and the telephoto end, which is great. Stopping down a touch brings the edges to excellent territory, with even sharper corners.

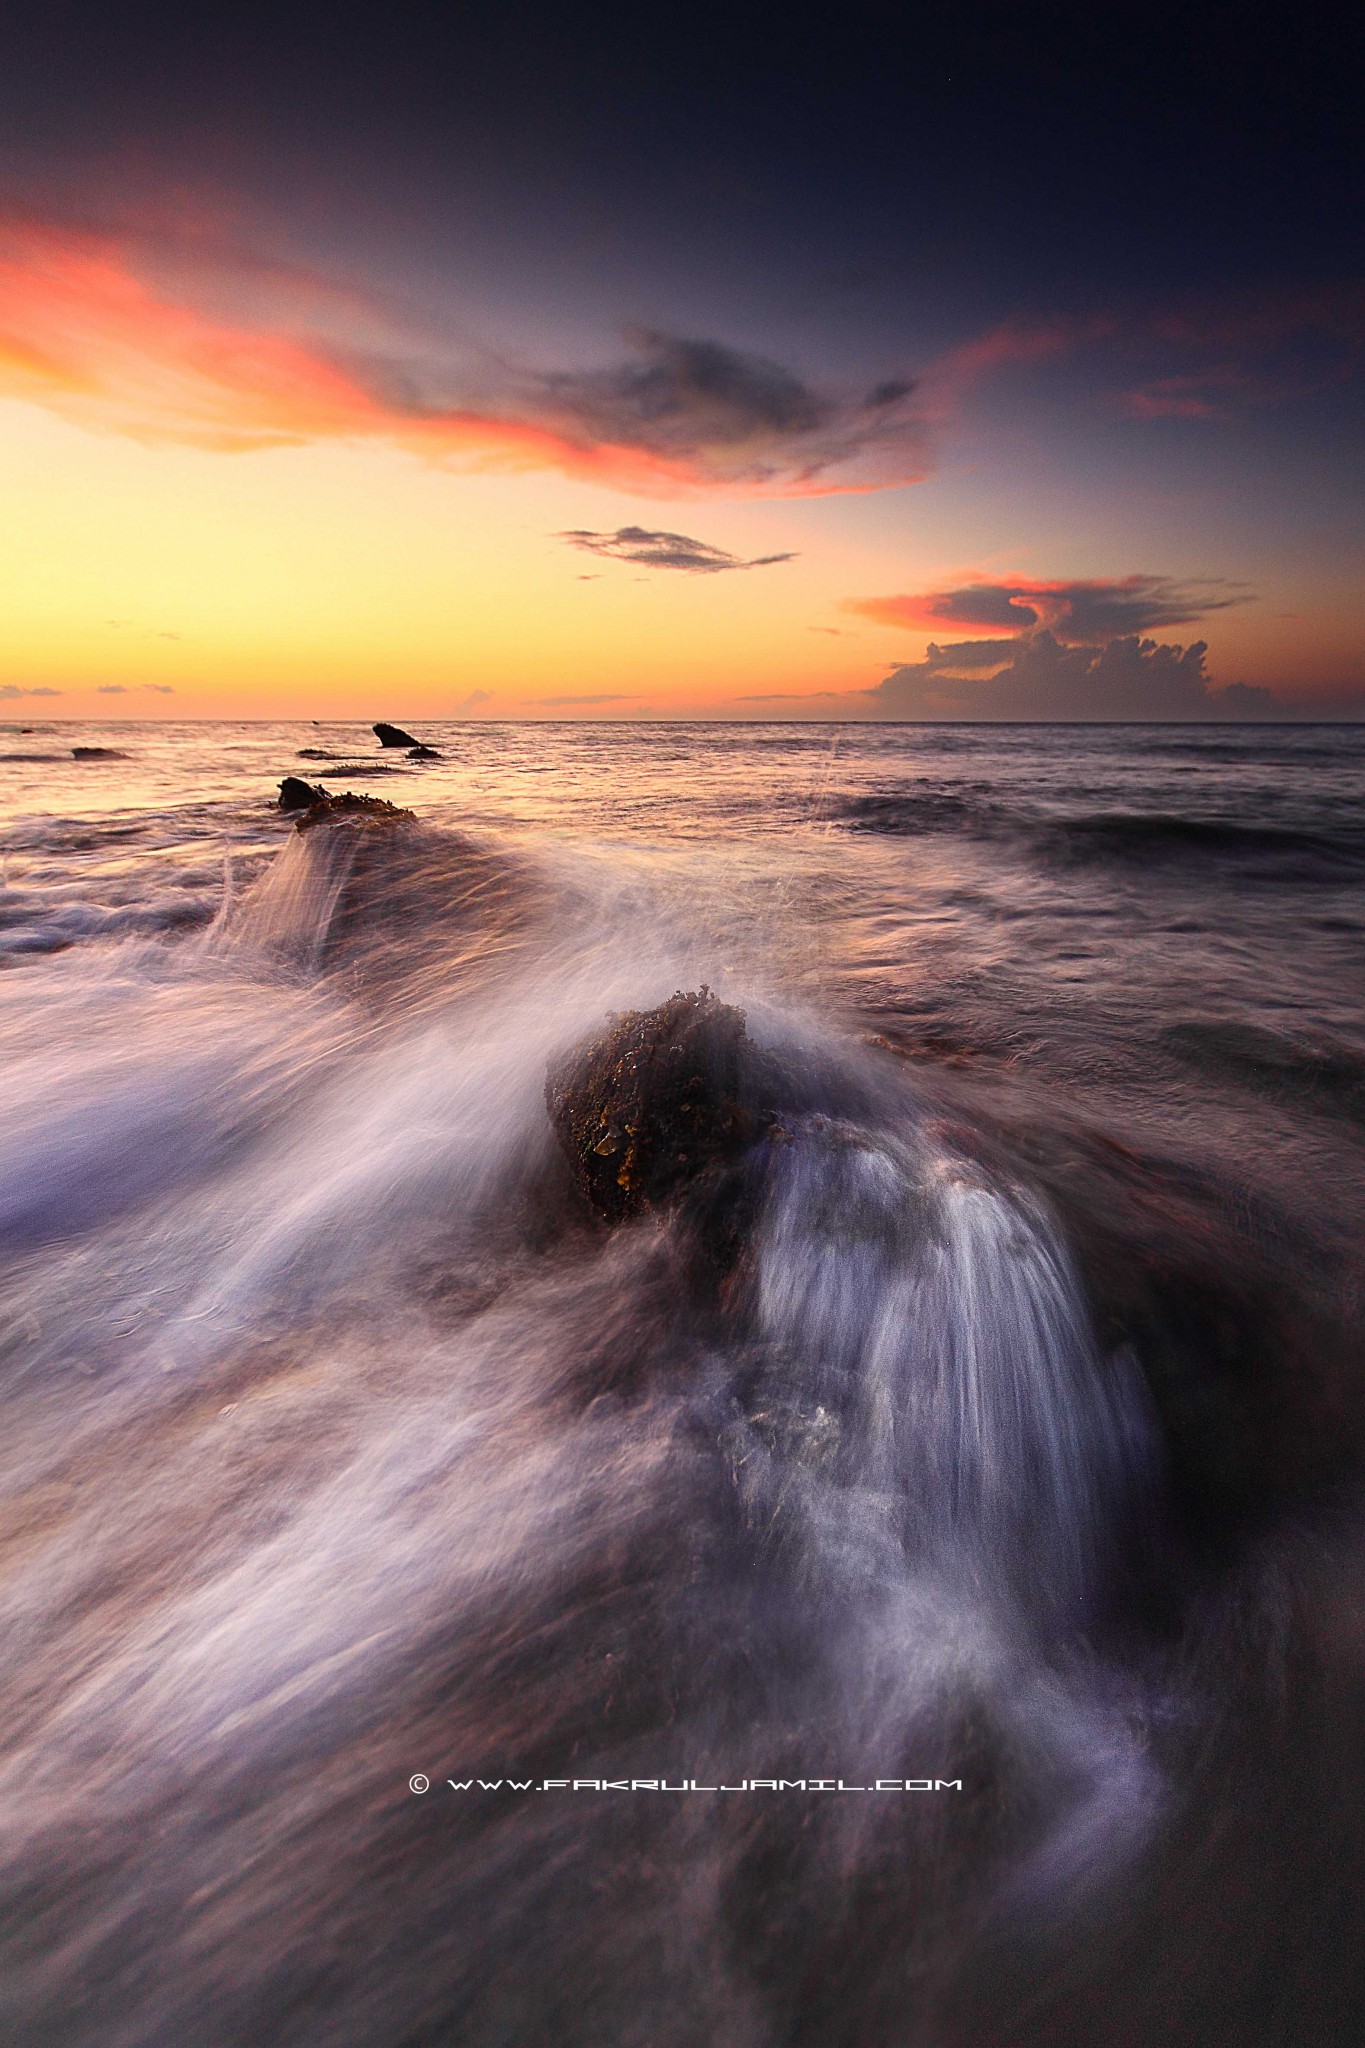
Image above was shot at slightly wider aperture of f/4, handheld. The out-of-focus-area look smooth and eye-pleasing. That eleven-bladed diaphragm certainly seems to be plus for this lens, and this tele-zoom can often capture images that could be mistaken for those shot with a prime lens. The smooth character is most pronounced up close, but while backgrounds maintain high contrast, things still look fairly smooth even at further focus distances throughout the focal range.

The Sony FE 70-200 GM 2.8 is a perfect combination with my Sony A7R Mark II for creating high quality images. The weather seals on this lens also a bonus where it can handle quite a bit of dust and moisture which I encounter during my trip to the Arctic circle. While I’m pretty sure this lens is a definite choice for wedding/portrait photographers, no doubt it is an excellent choice for landscape/nature photographer as well.


Random Instagram moments captured from behind the scenes photographing Ladakh on a 9 day road trip, August 2017. Good times indeed!

A short video of my trip to Mount Bromo National Park in East Java, Indonesia. Such a great place for landscape photography!
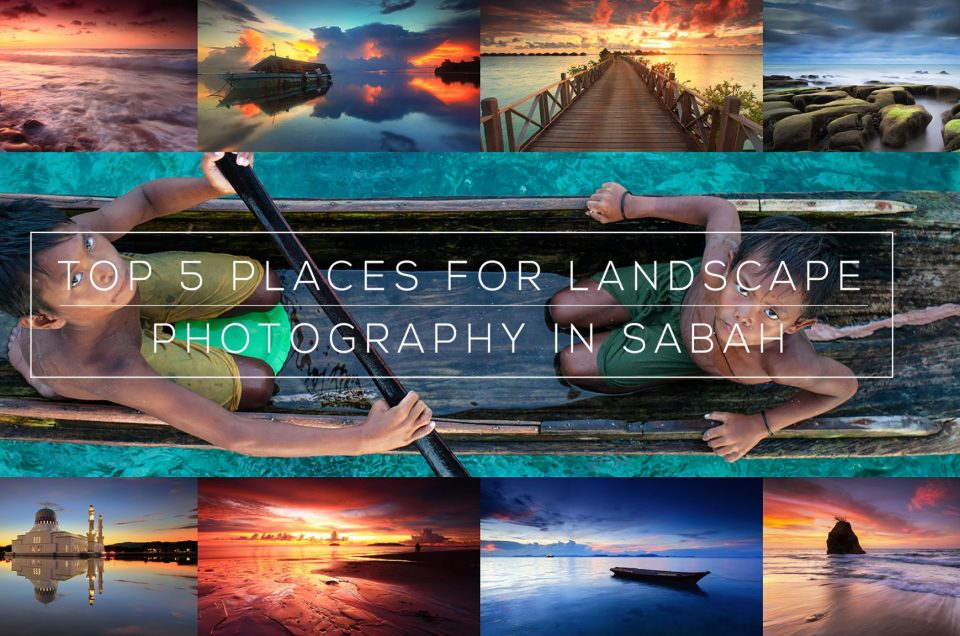
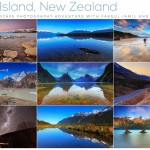
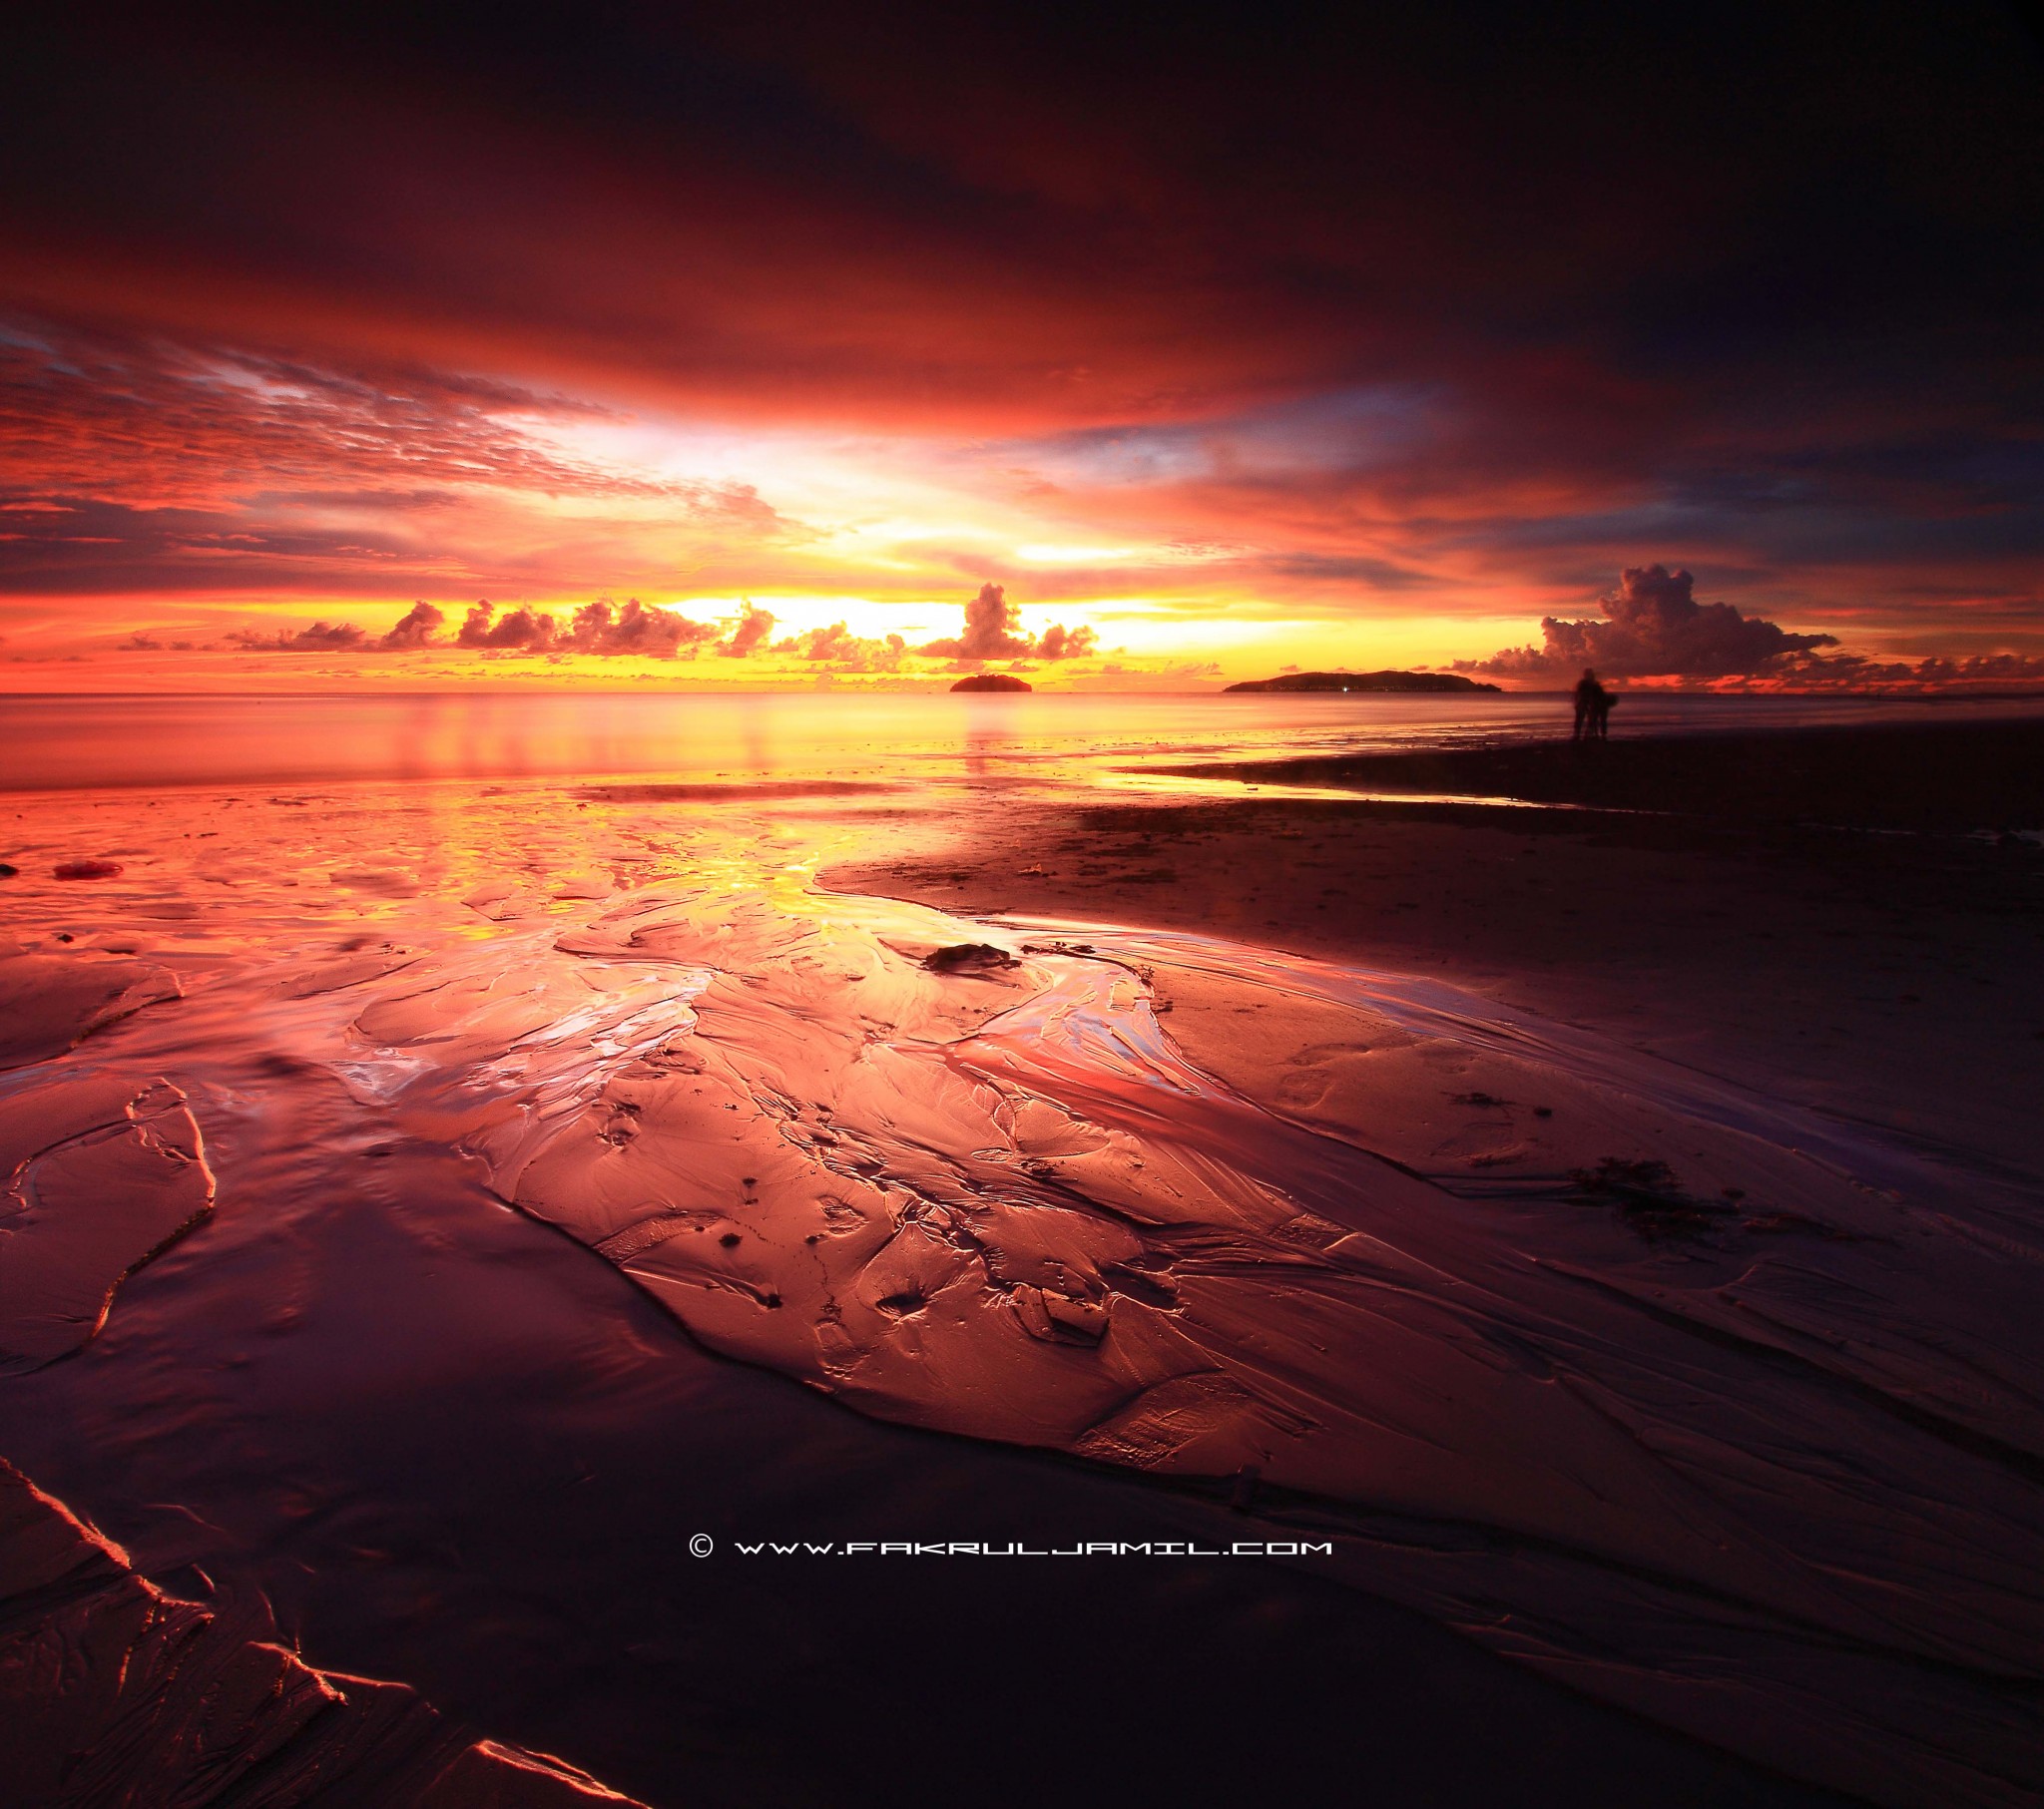
Sabah is truly a magical place for landscape photography or even sightseeing activities. It’s nicknamed Negeri Di Bawah Bayu (“Land Below The Wind”), Sabah is one of the two Malaysian states on the island of Borneo and they are richly blessed with nature diversity, unique cultures, fun adventure, beautiful beaches, and many more.
As a landscape photographer myself, I have been to Sabah for more than five times now and it never fails to amaze me. There are so many beautiful locations for landscape photography lovers up here. So on this post, I would like to share 5 places to do landscape photography in the Land Below The Wind .
1. Kota Kinabalu
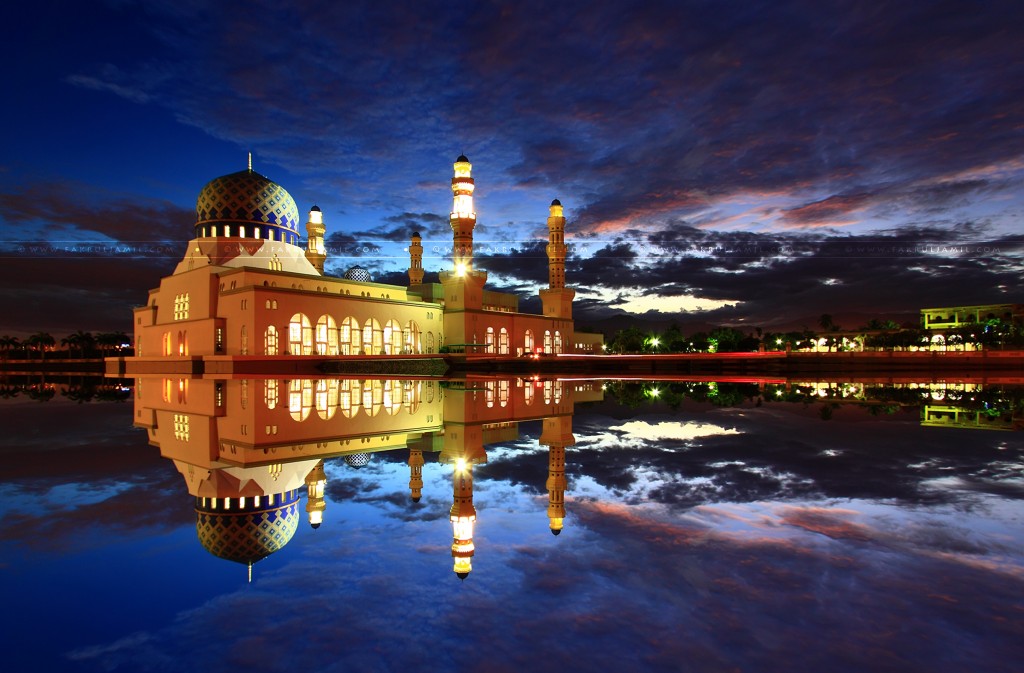
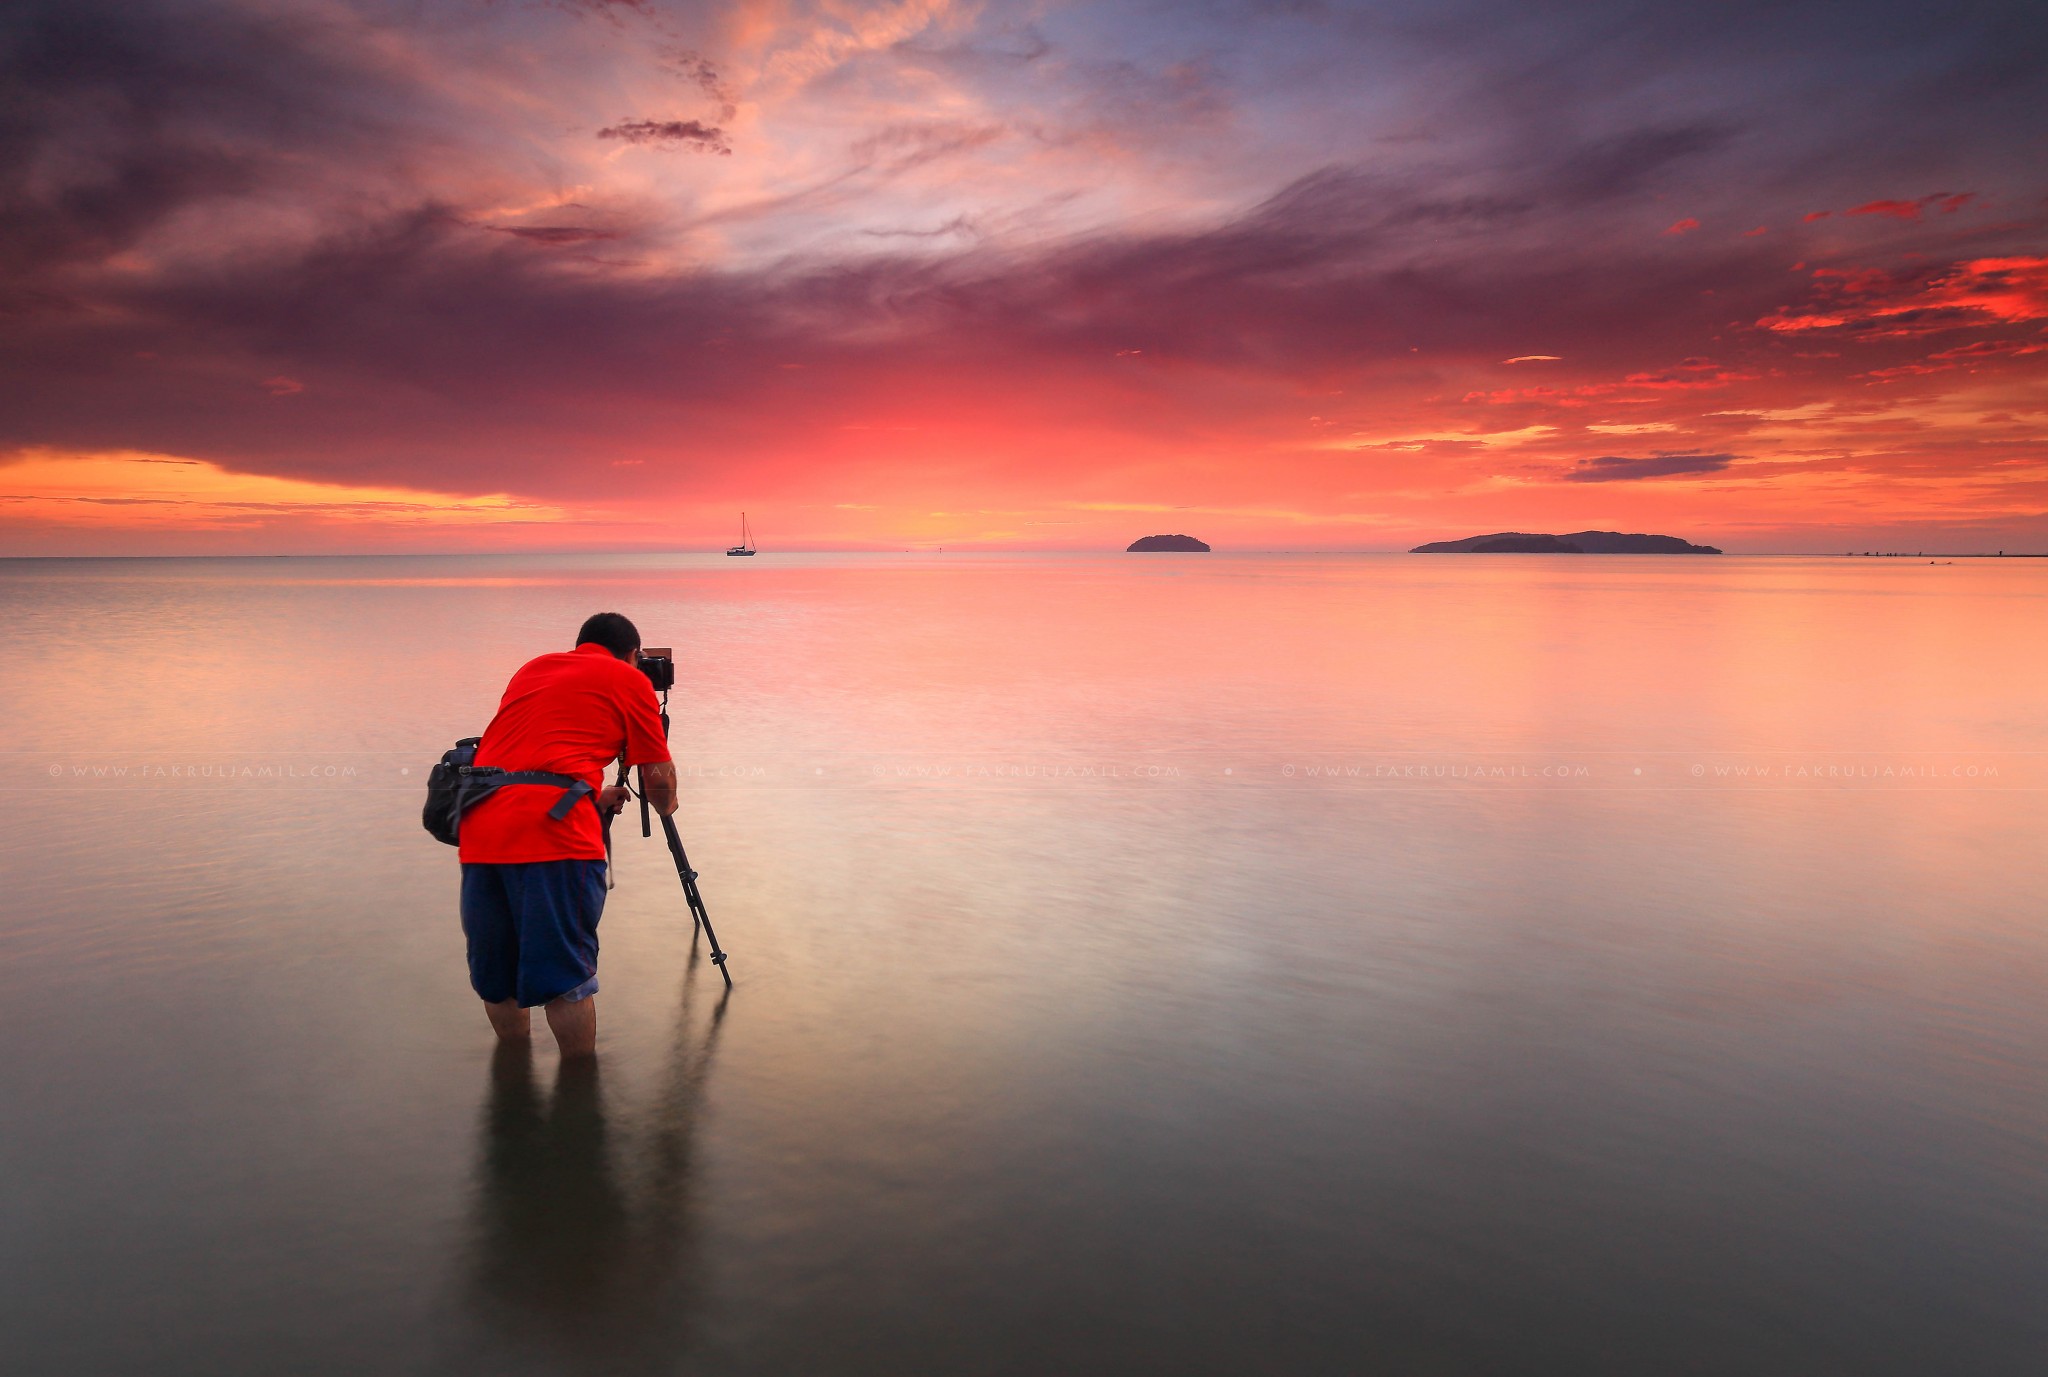
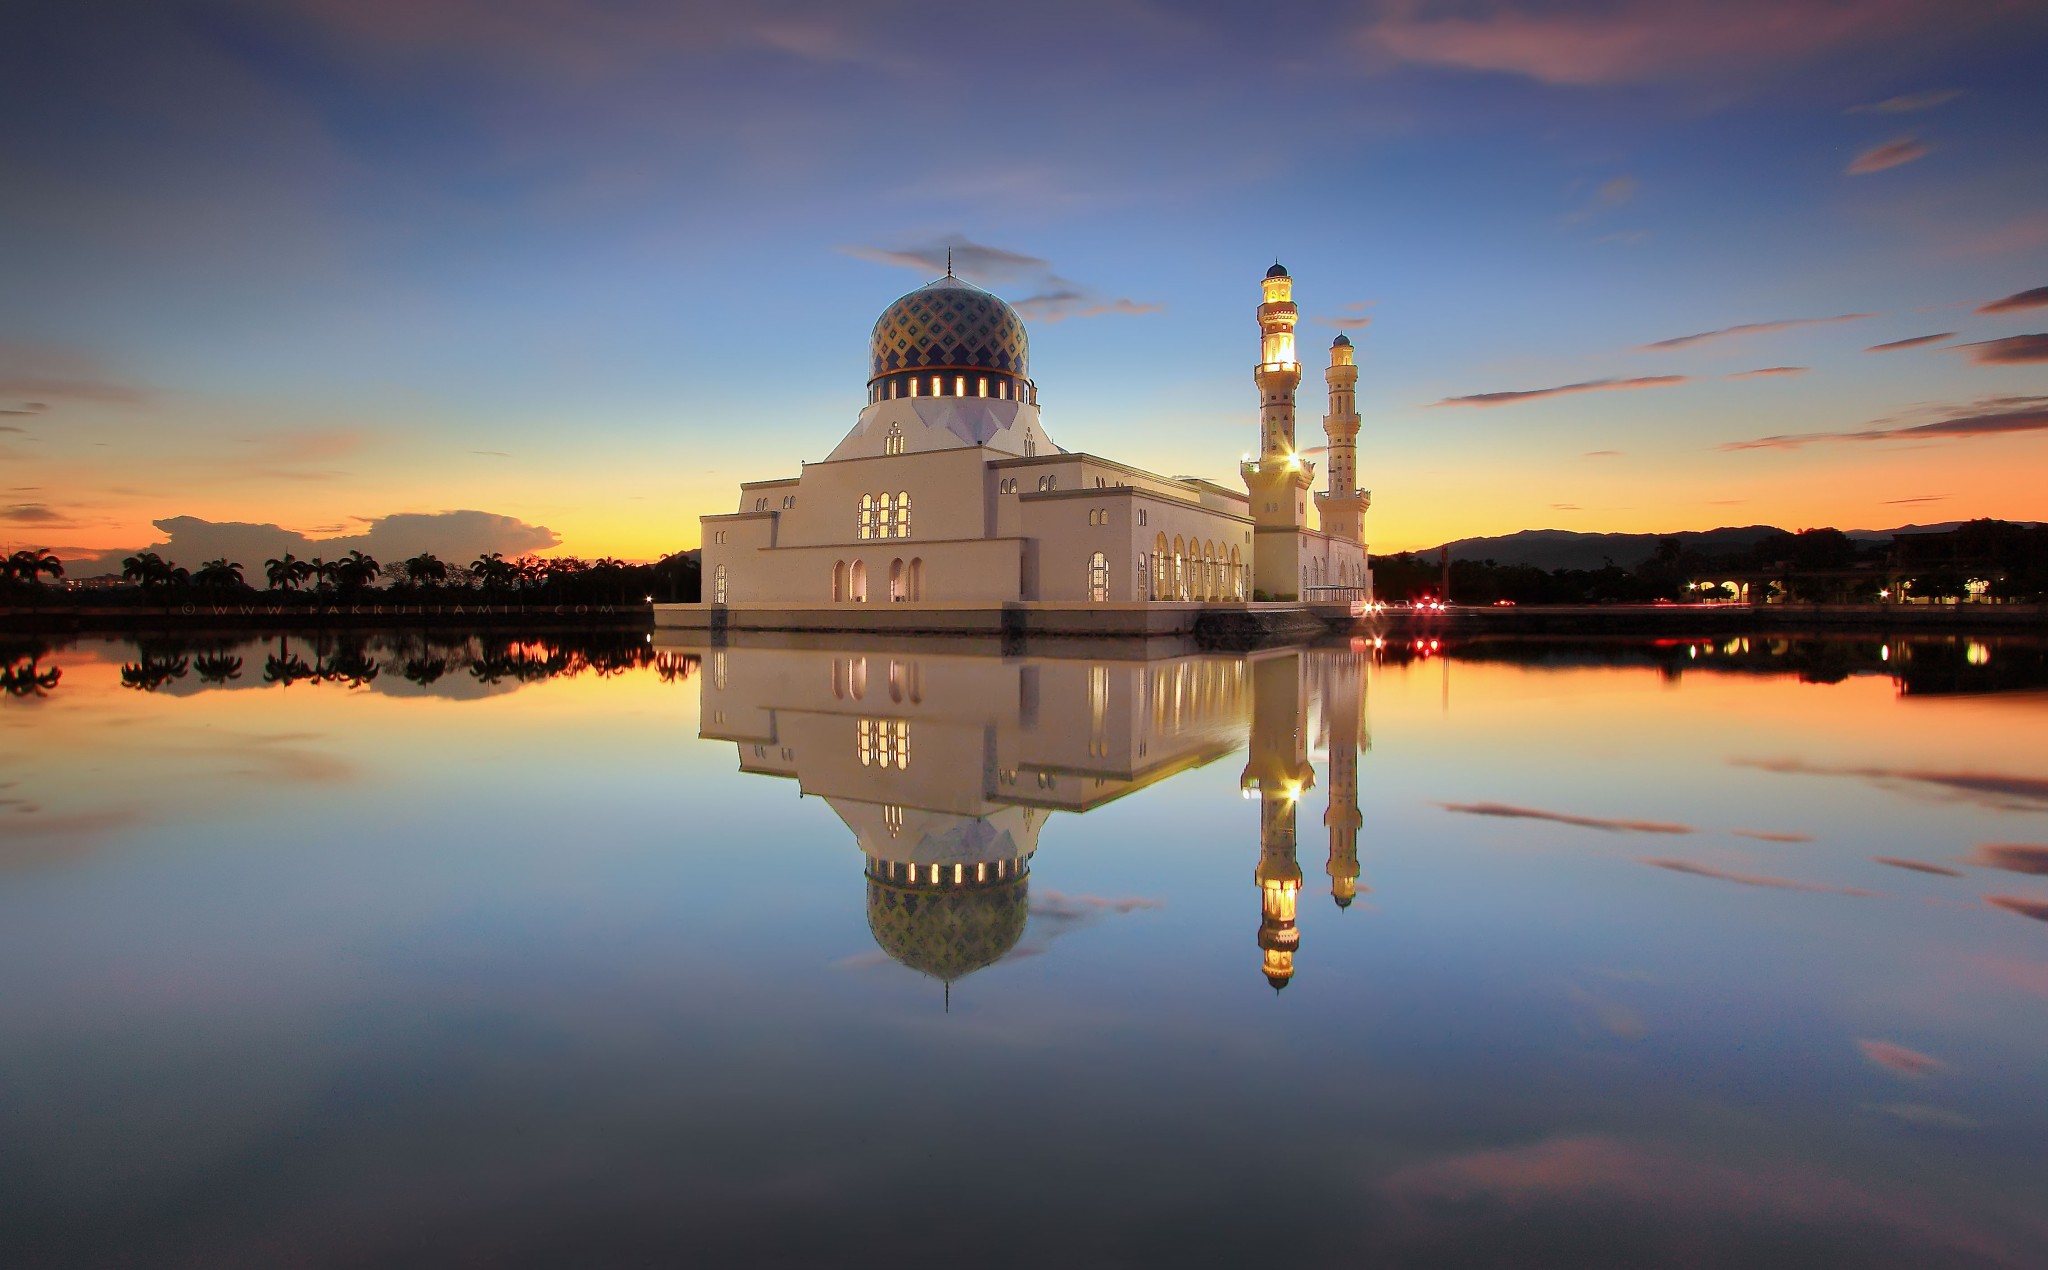
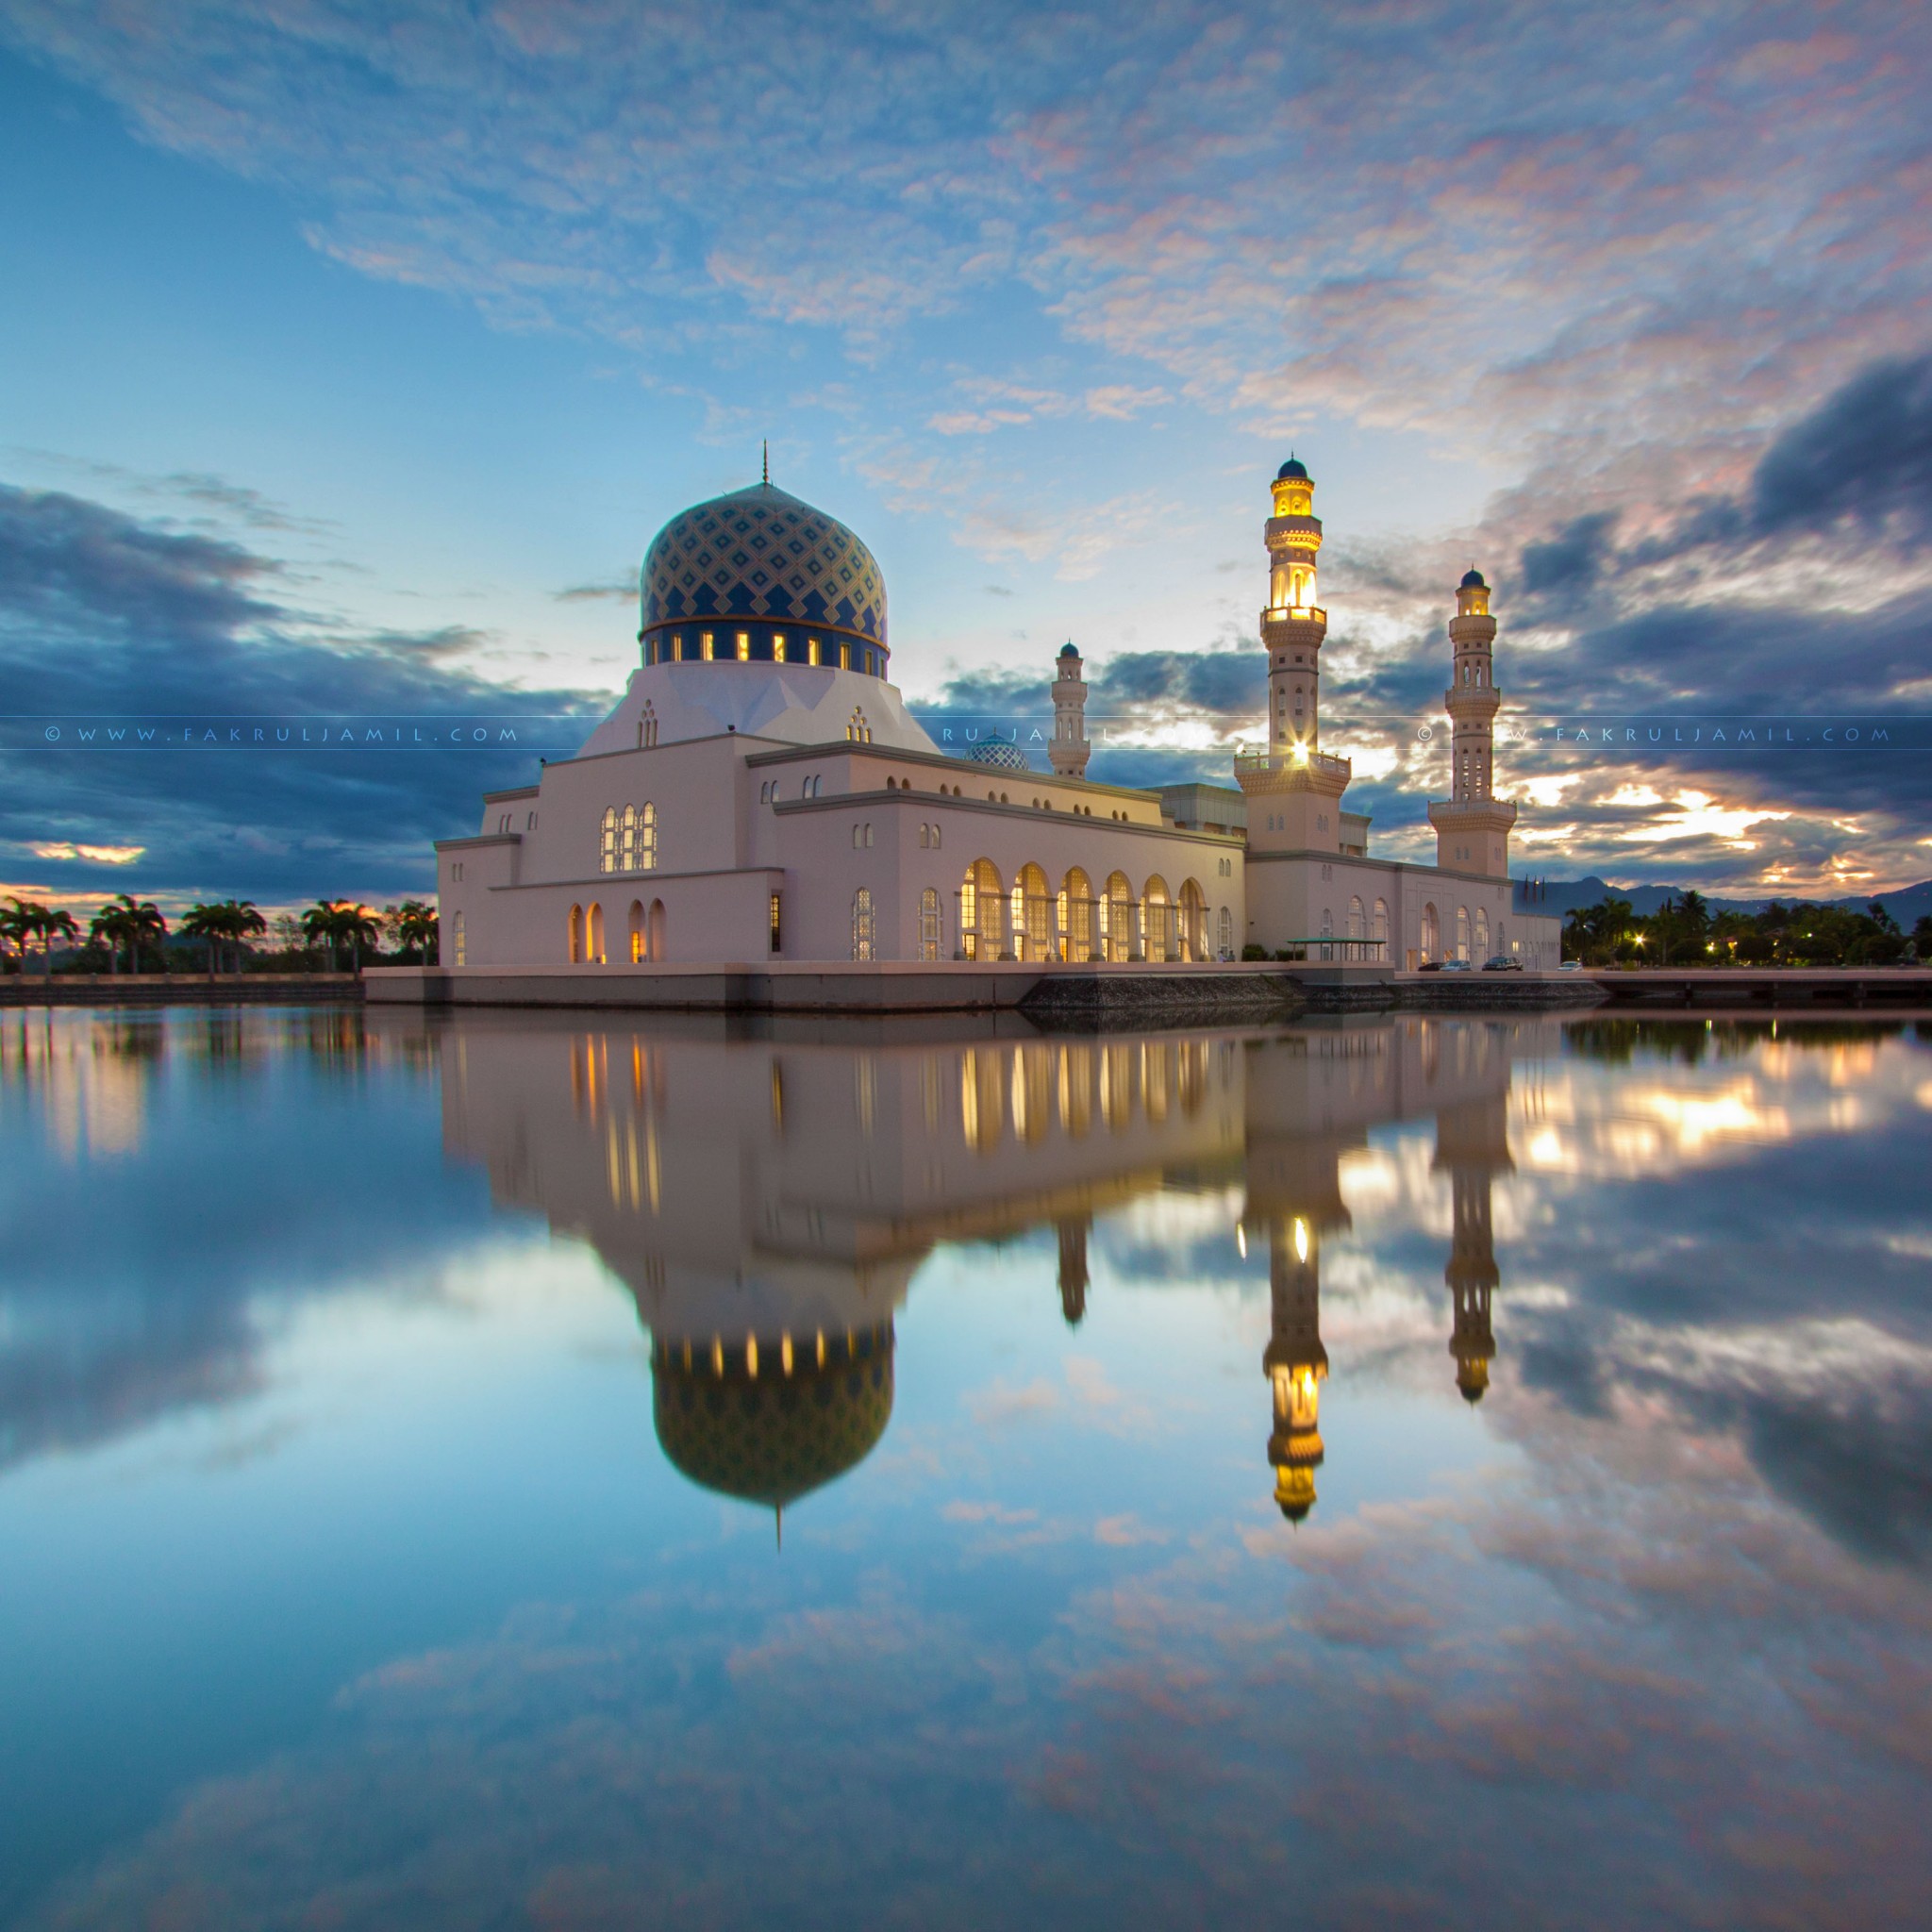
Kota Kinabalu is the capital city Sabah state in northwestern Borneo, is often referred to as “KK” in short. In KK city itself, there’s a few good spots for landscape photography. Masjid Bandaraya Likas is a great spot to shoot sunrise or even sunset. The mosque is surrounded by a man-made lake which produce a tranquil reflection usually between dawn to sunrise. If you lucky, you might catch the reflection during sunset as well. There’s also few other spots like ODEC which located inside University Malaysia Sabah (UMS) compound where you can shoot sunset with rocky shoreline on the foreground. But I must warned you, the scattered rock is very slippery! Tanjung Aru beach is also good for sunset, but there is barely any good foreground here, just a plain beach with sands. There might be some drift woods laying on the shore though. Click at each photos below to reveal their location.


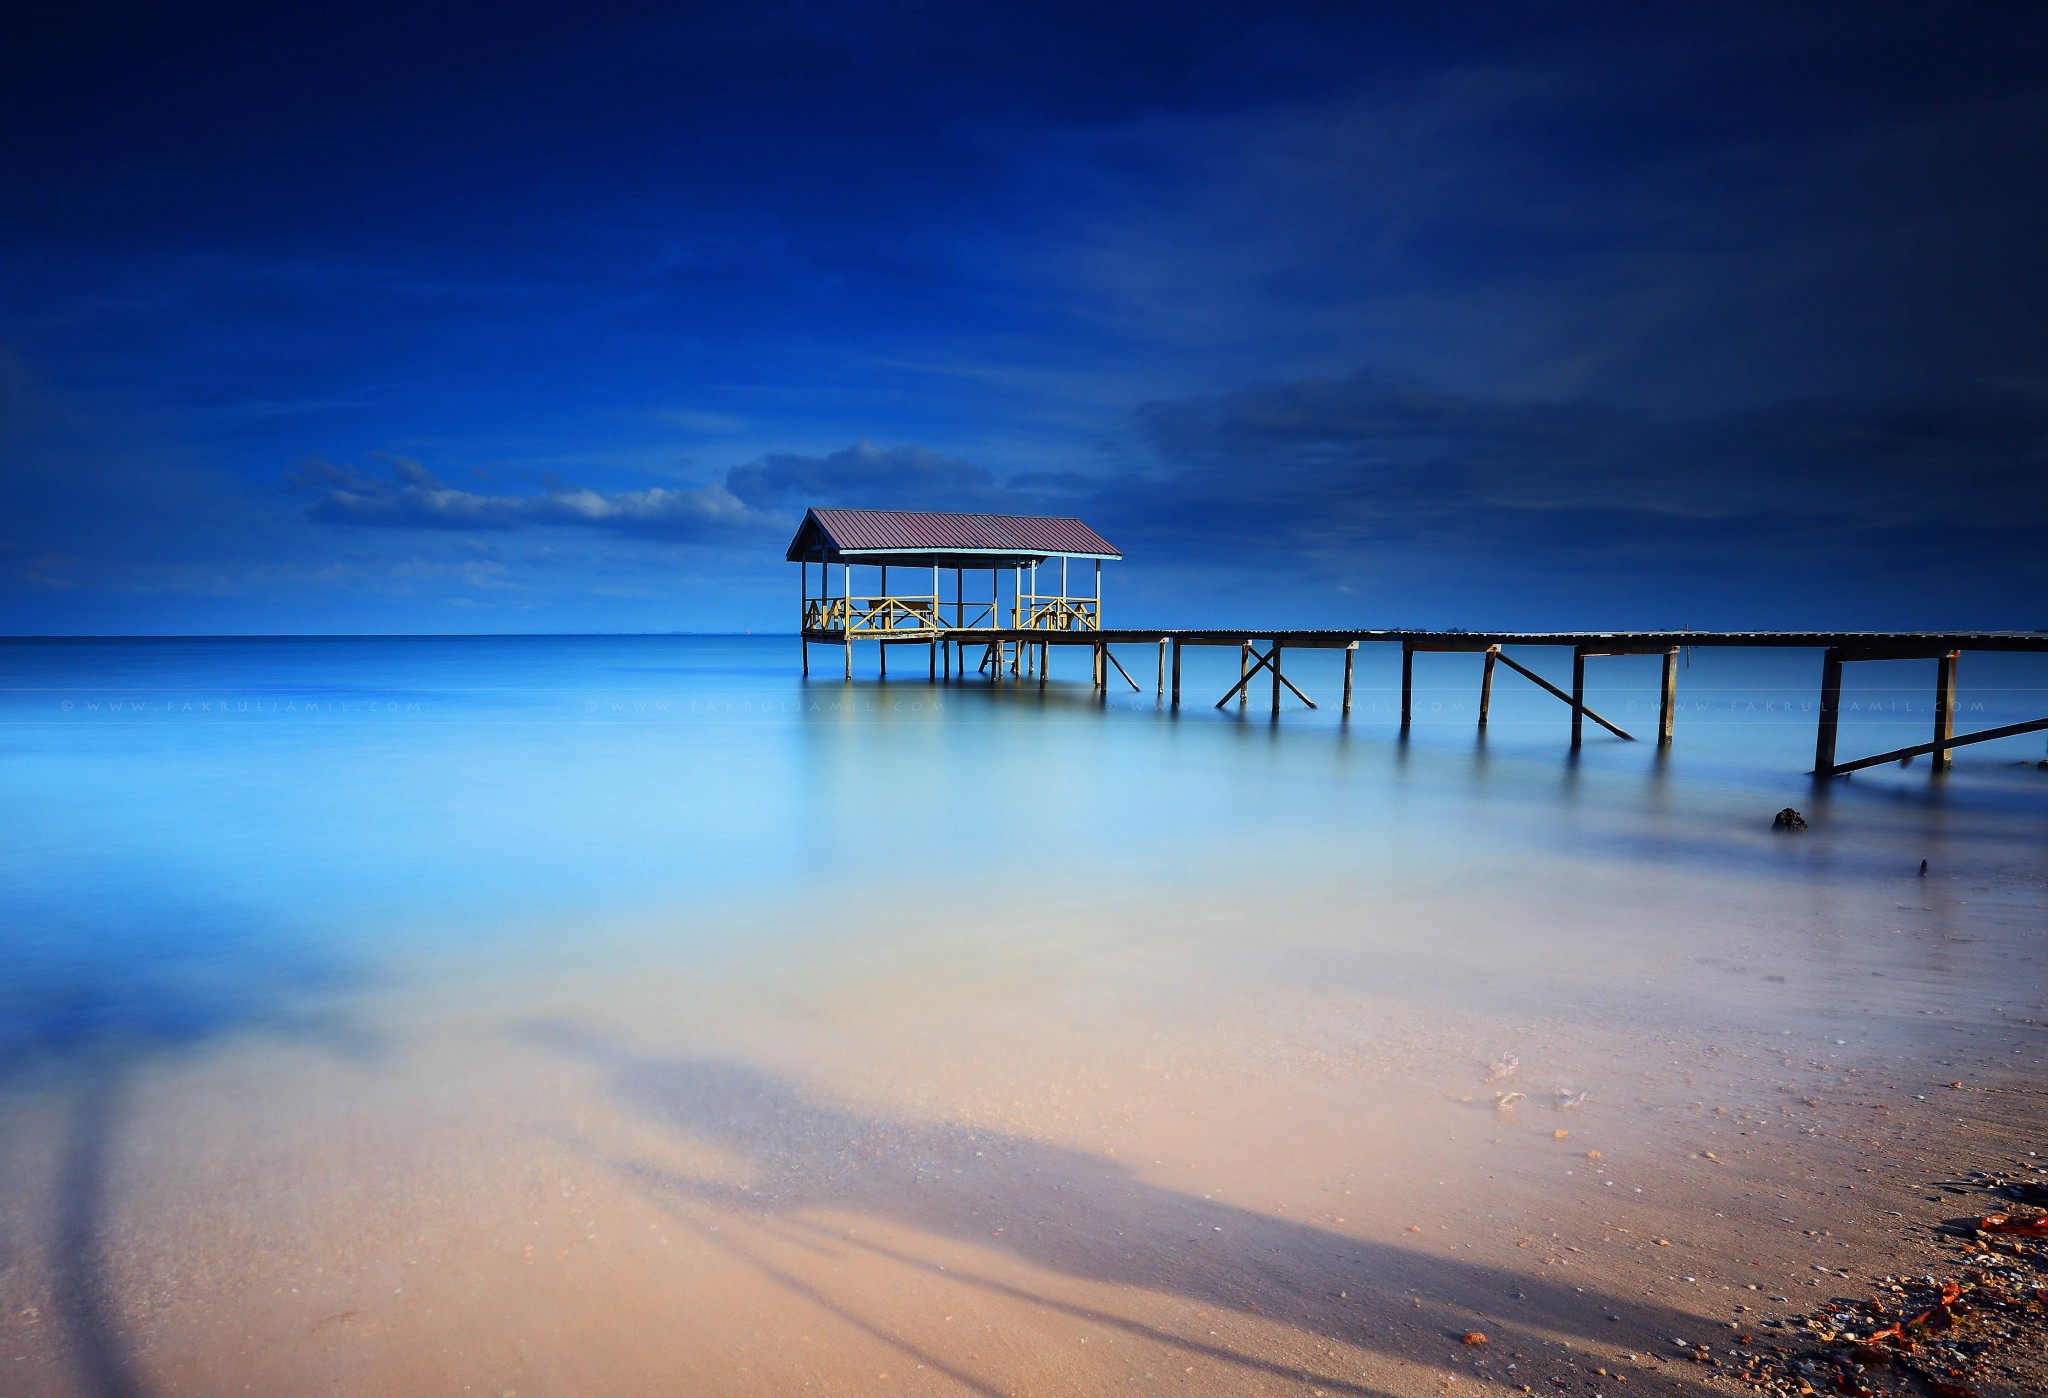
2. Kuala Penyu
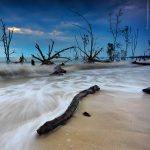
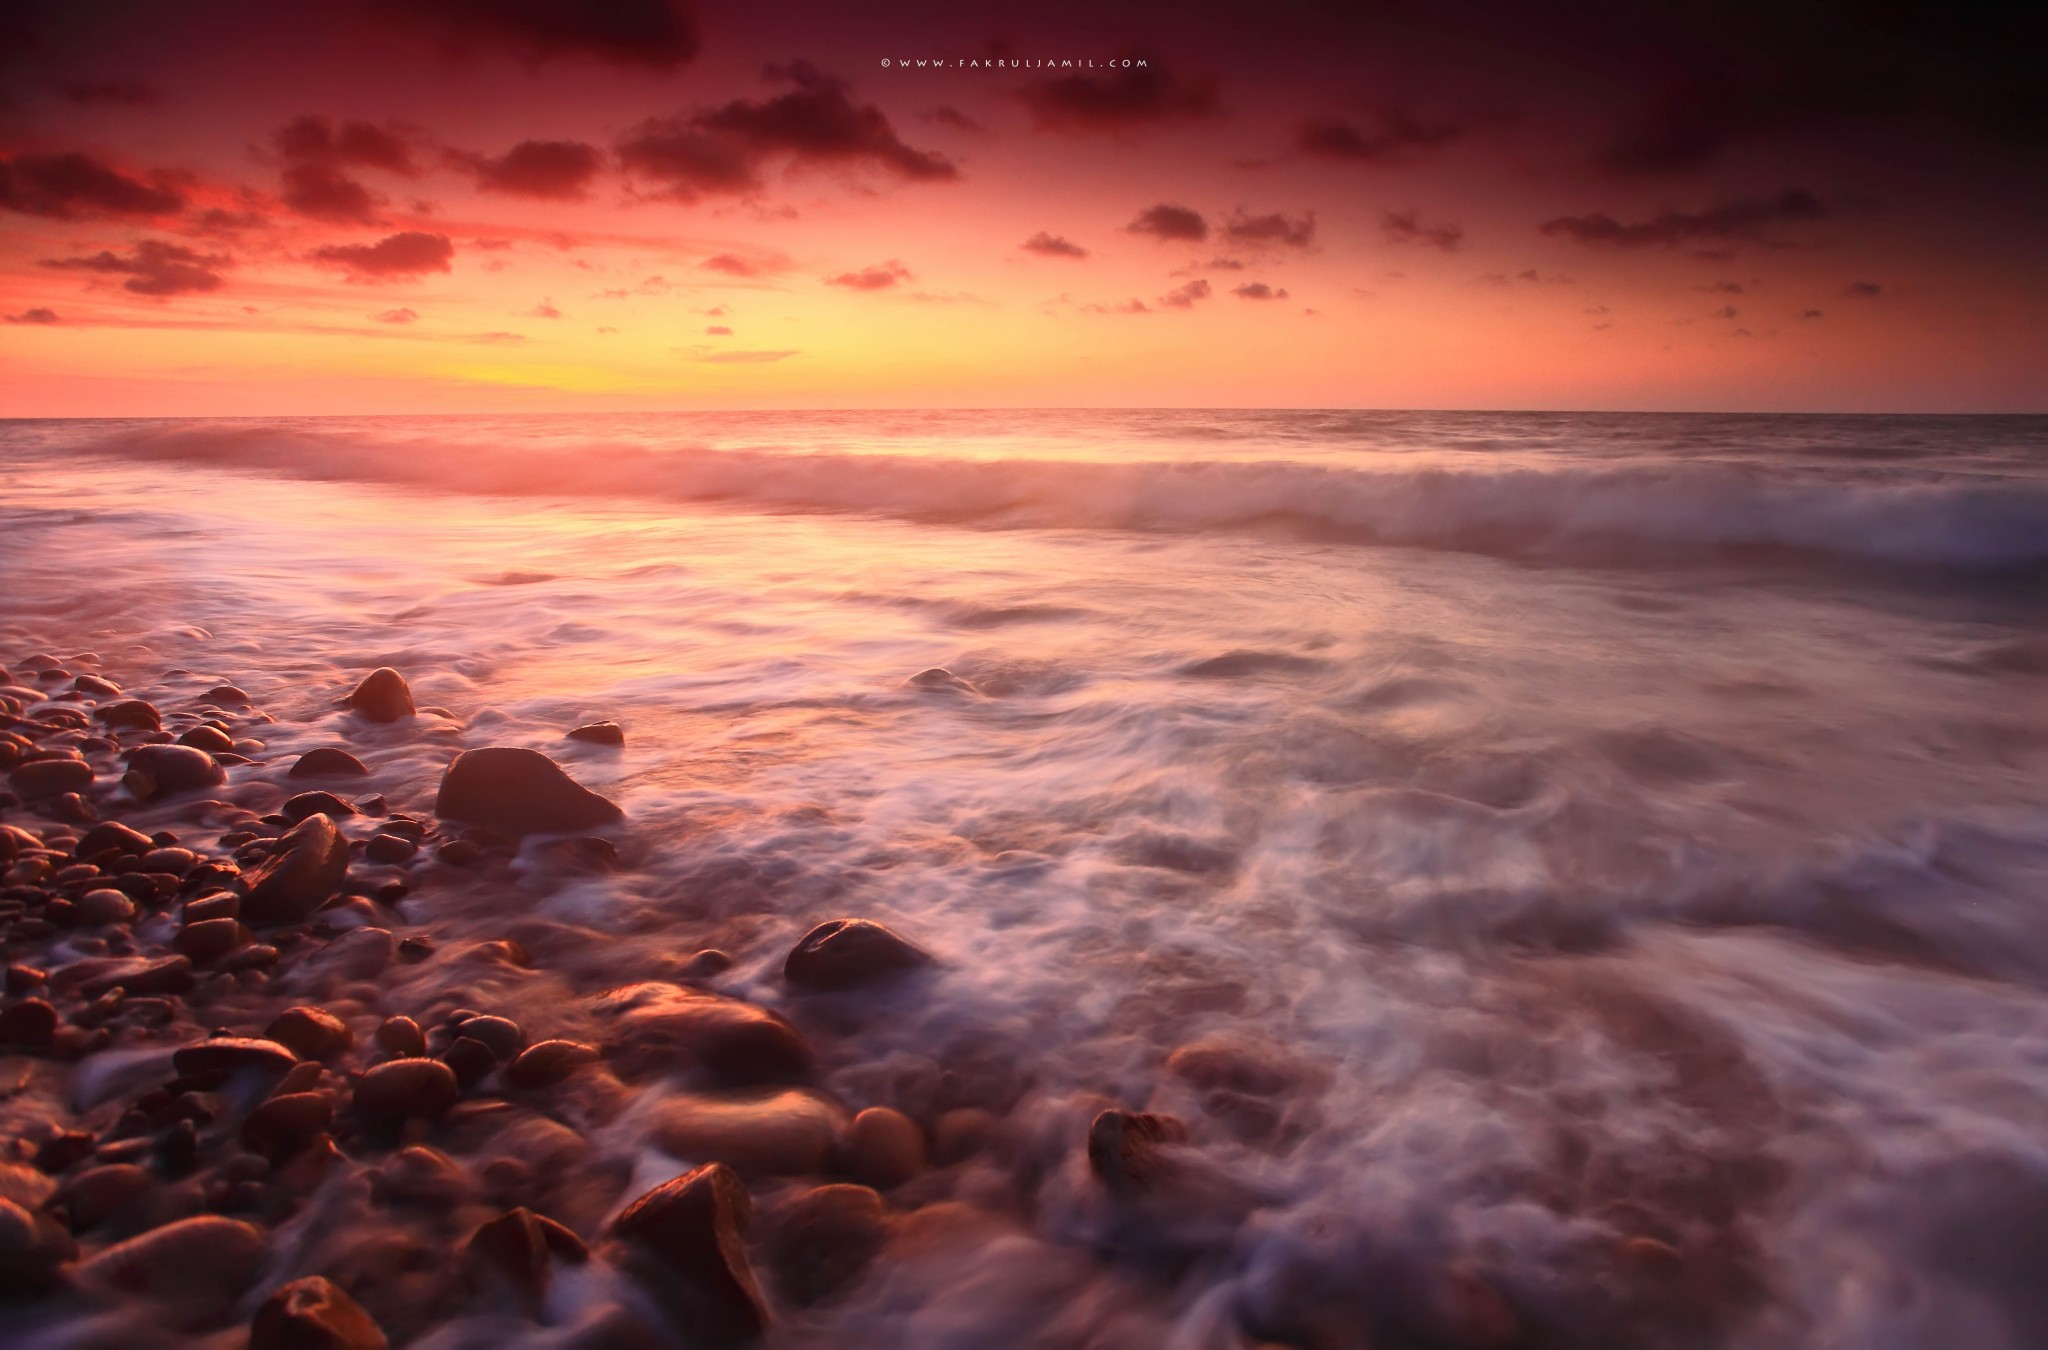
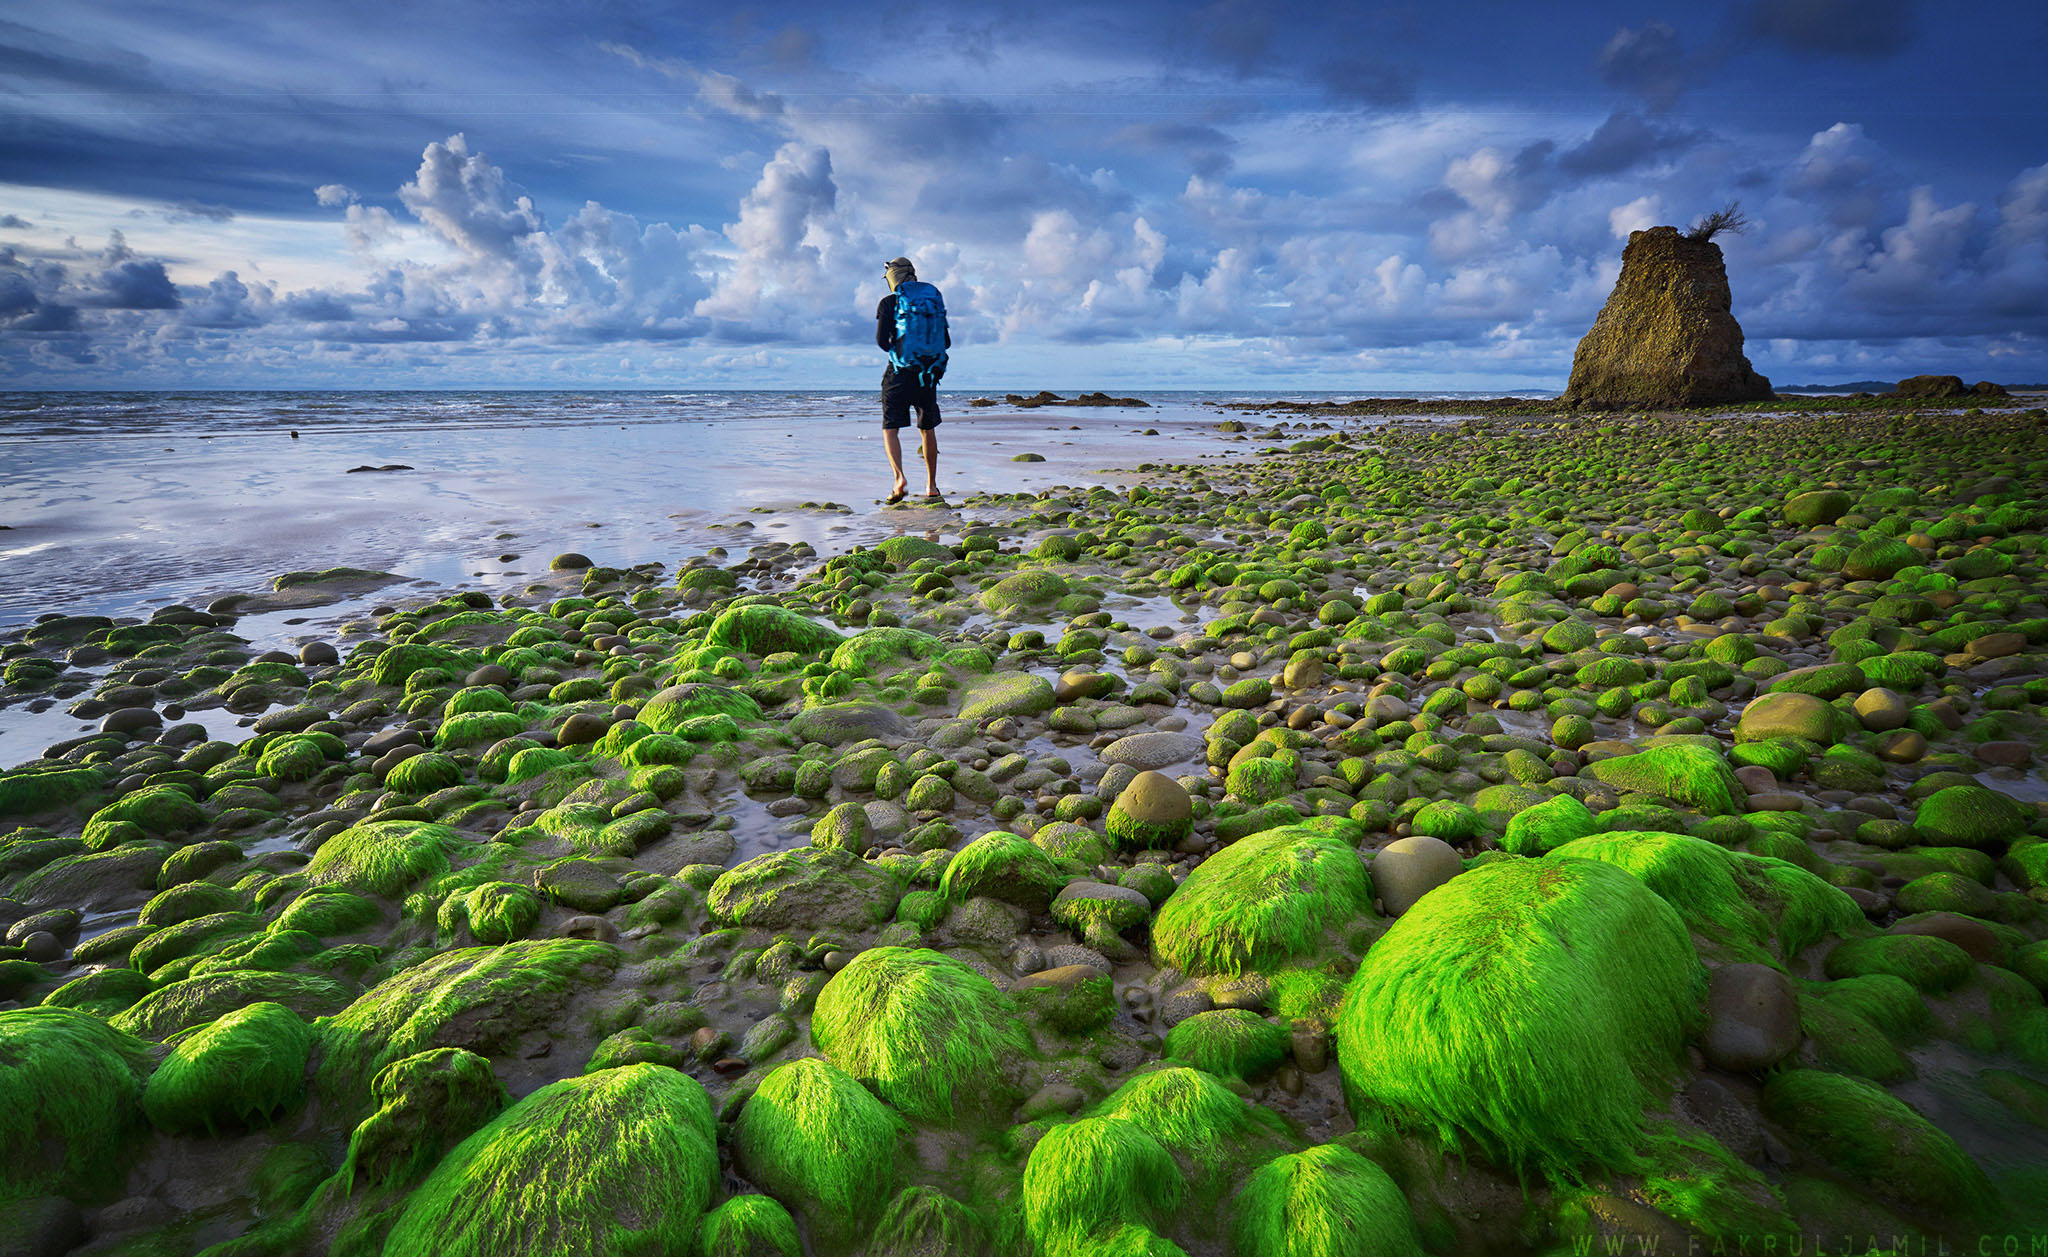
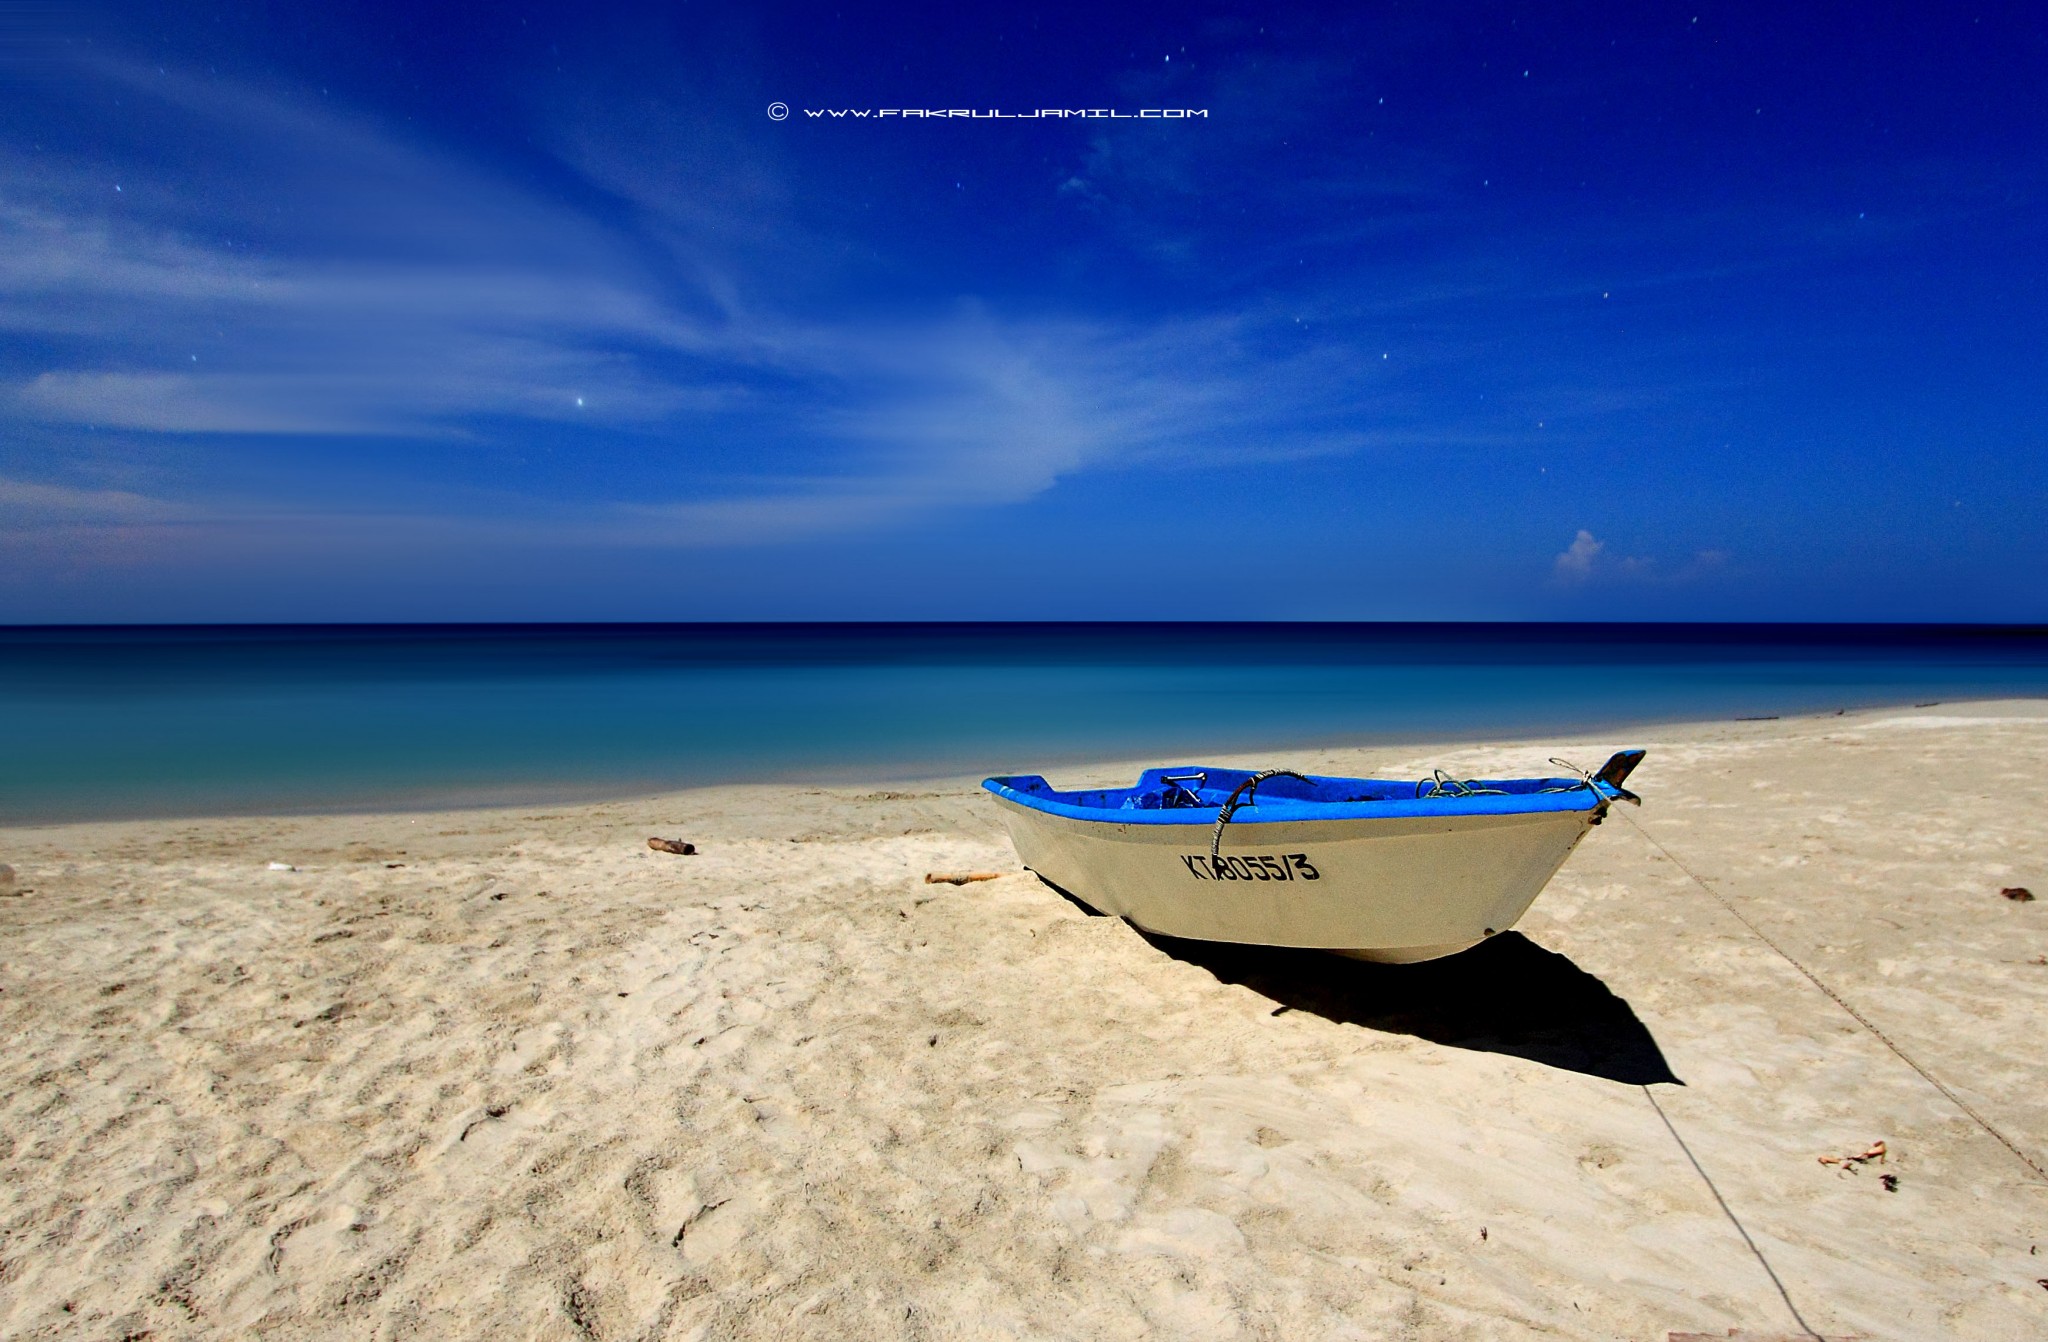
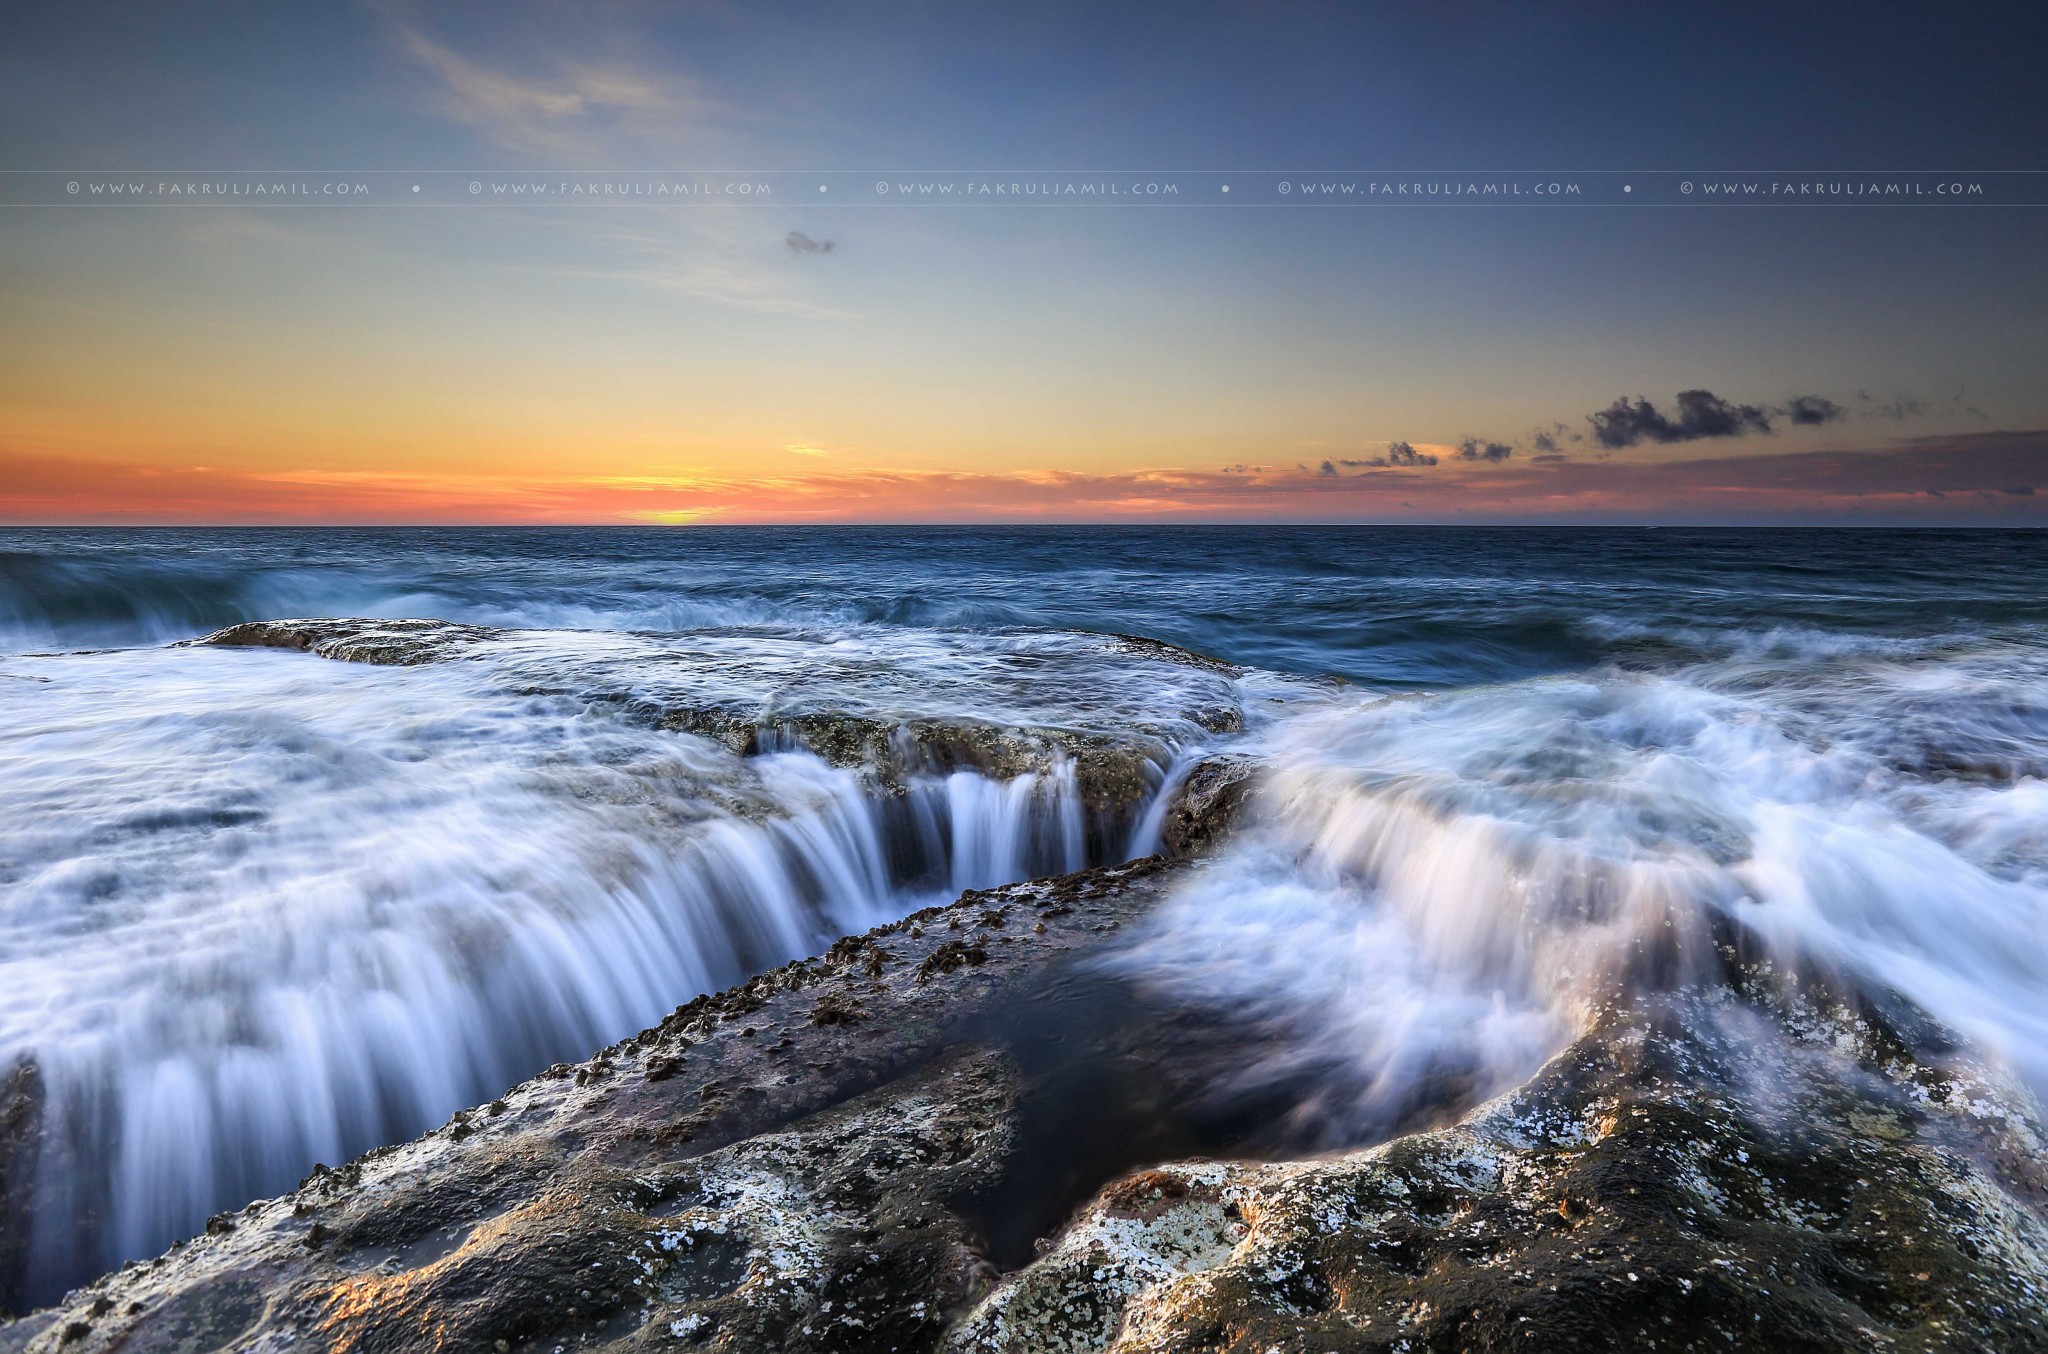
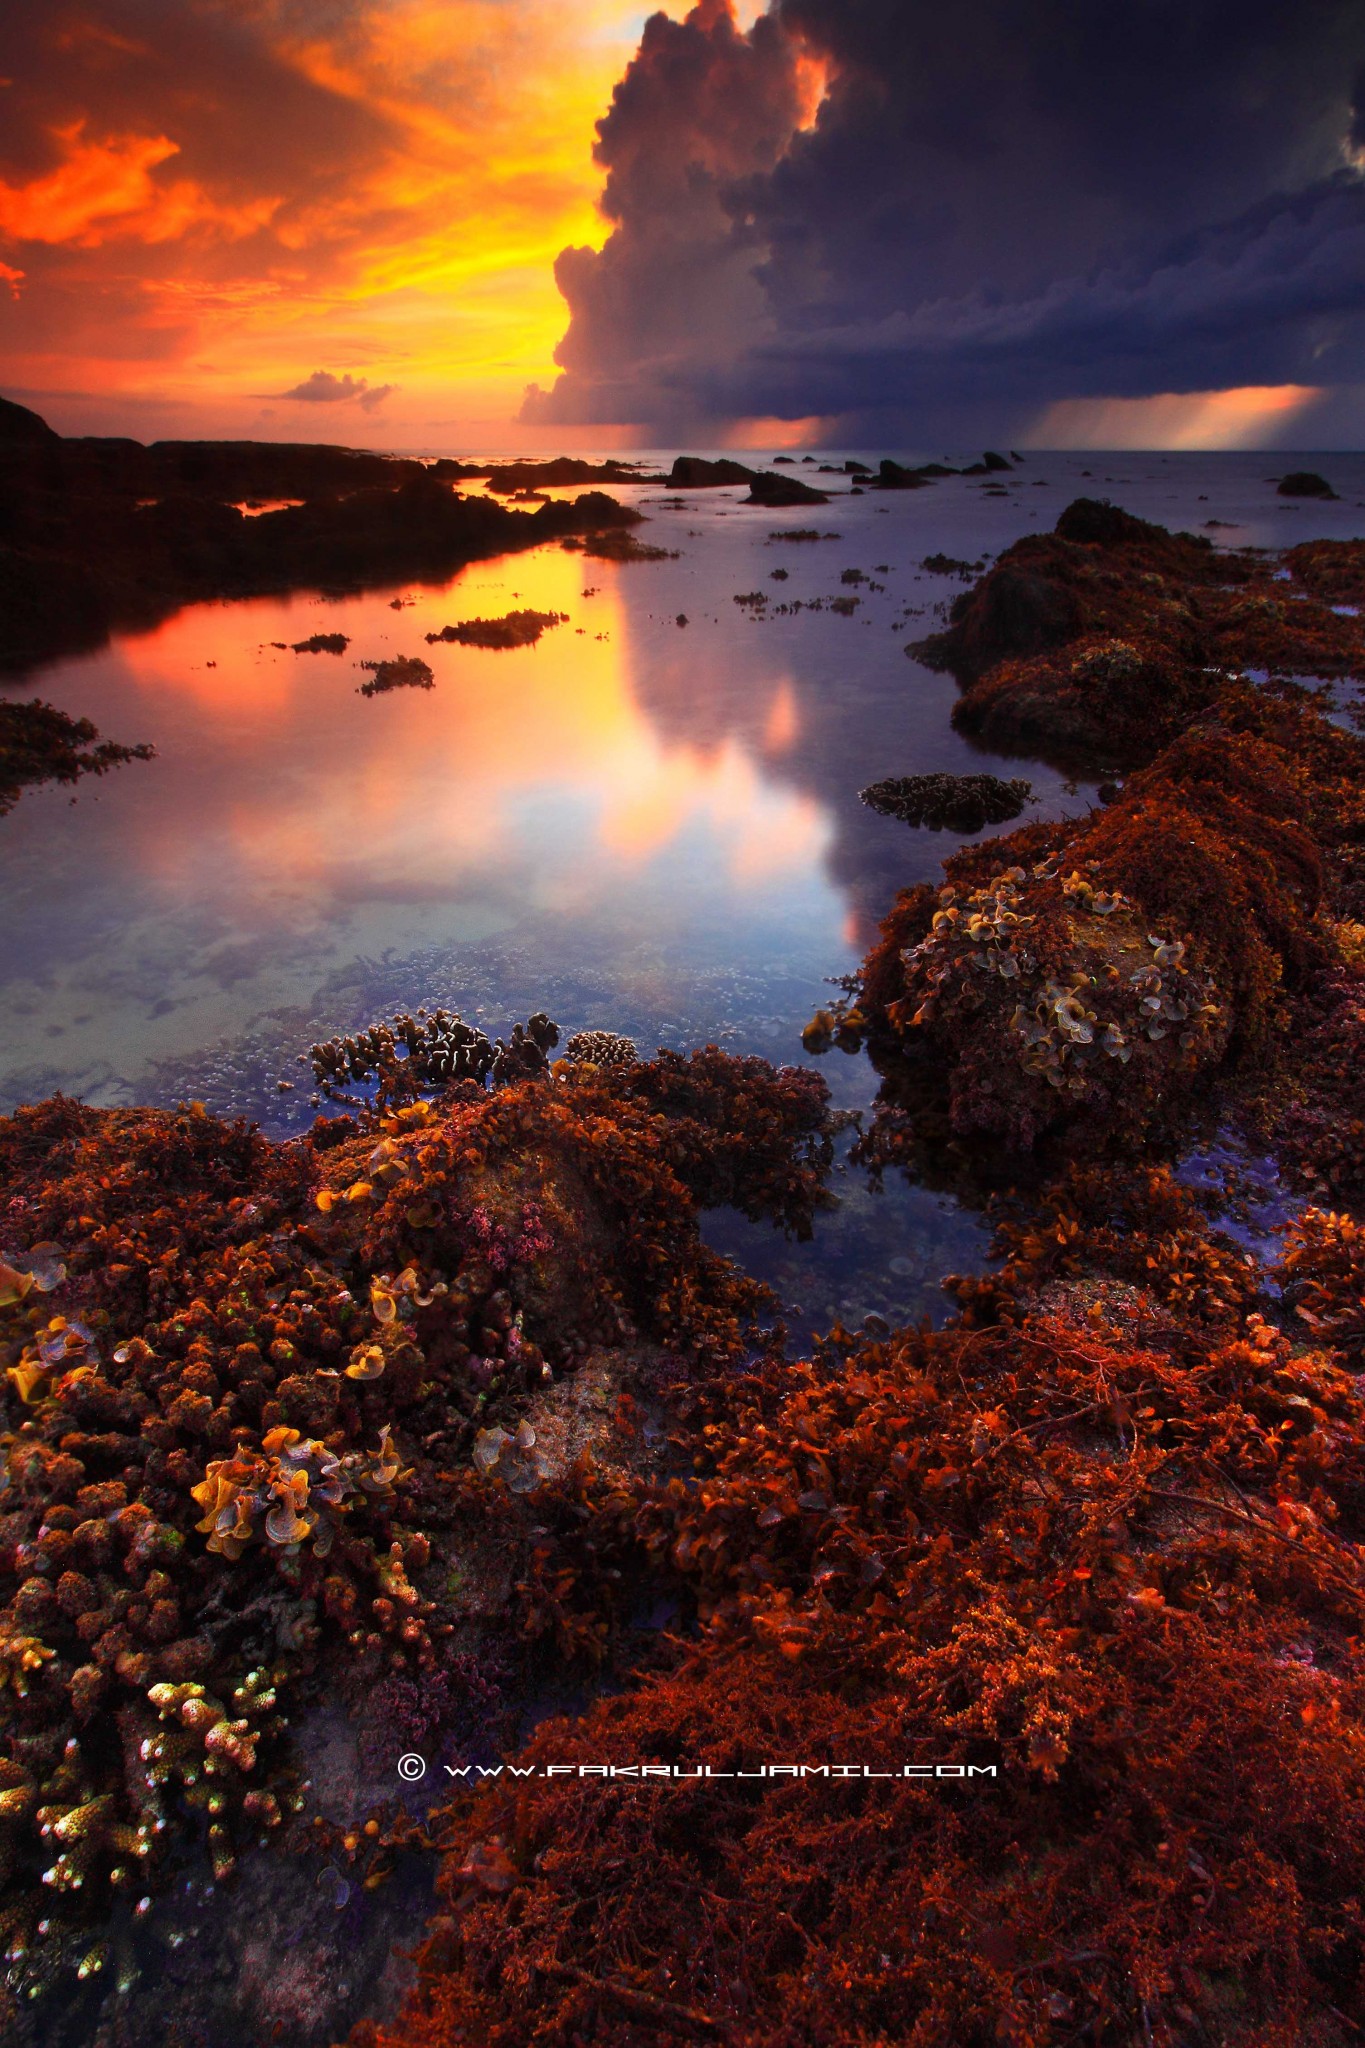
Kuala Penyu is a town located in Interior Division of Sabah and is famous for its beaches, especially the Tempurung Beach, Sawangan Beach, Kampung Vietnam and few more. At Tempurung beach, during low tide, you will see most part of the shore is covered with green-mossy pebble stones and at Sawangan beach, there is an old jetty that leads straight into the sea where it can be a good subject for landscape photography. Kampung Vietnam, there is a few abandoned ships stranded just off the shore. You can walk to get near to the ships and the water is about knee-deep, not too shallow. It is best to photograph them during sunrise.


3. Tip of Borneo,Tanjung Simpang Mengayau
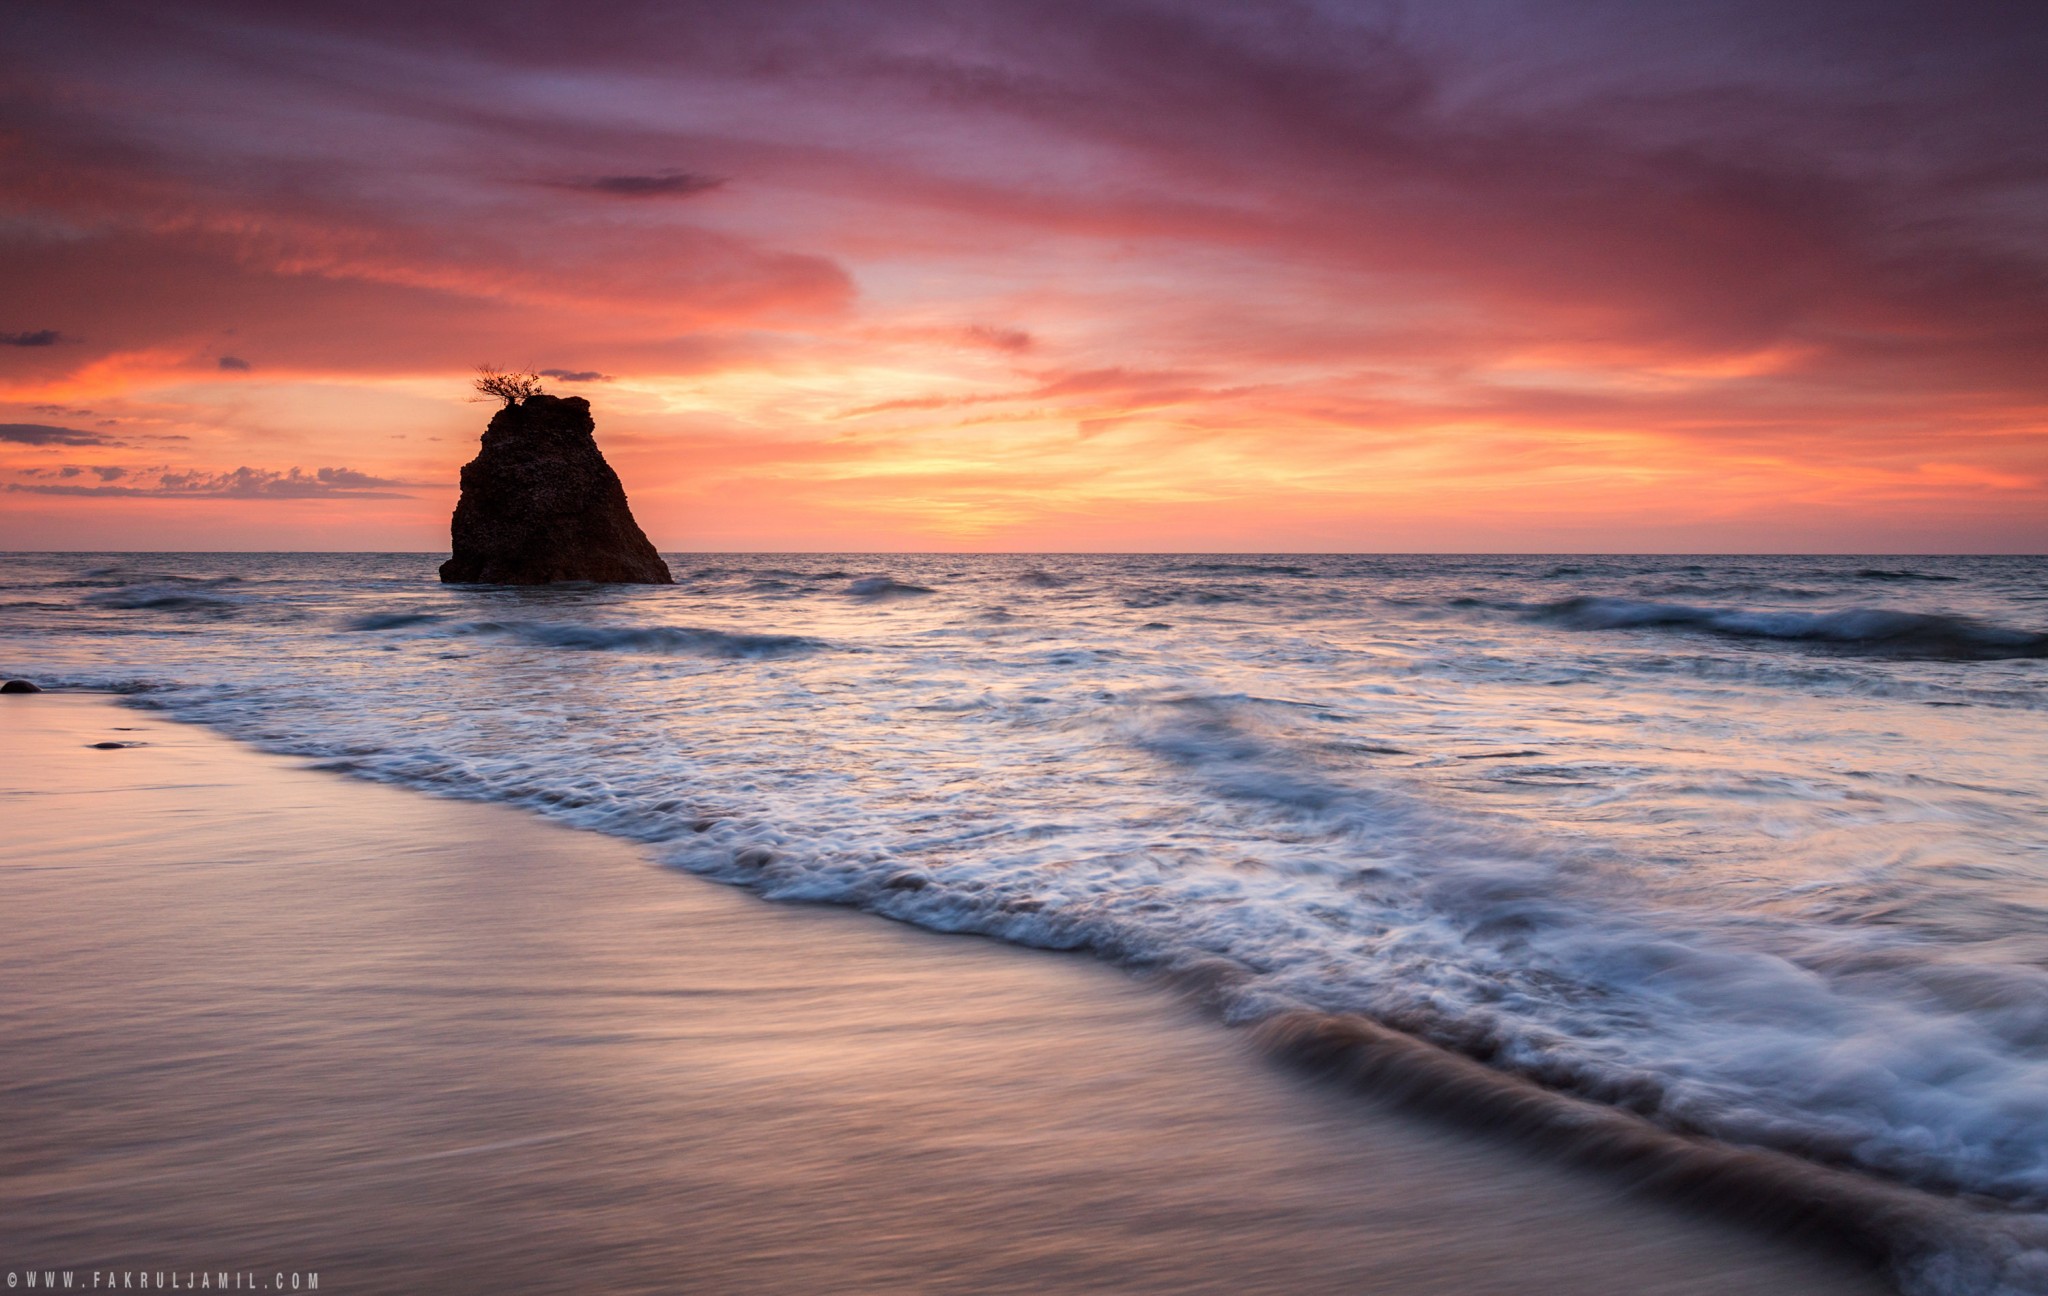
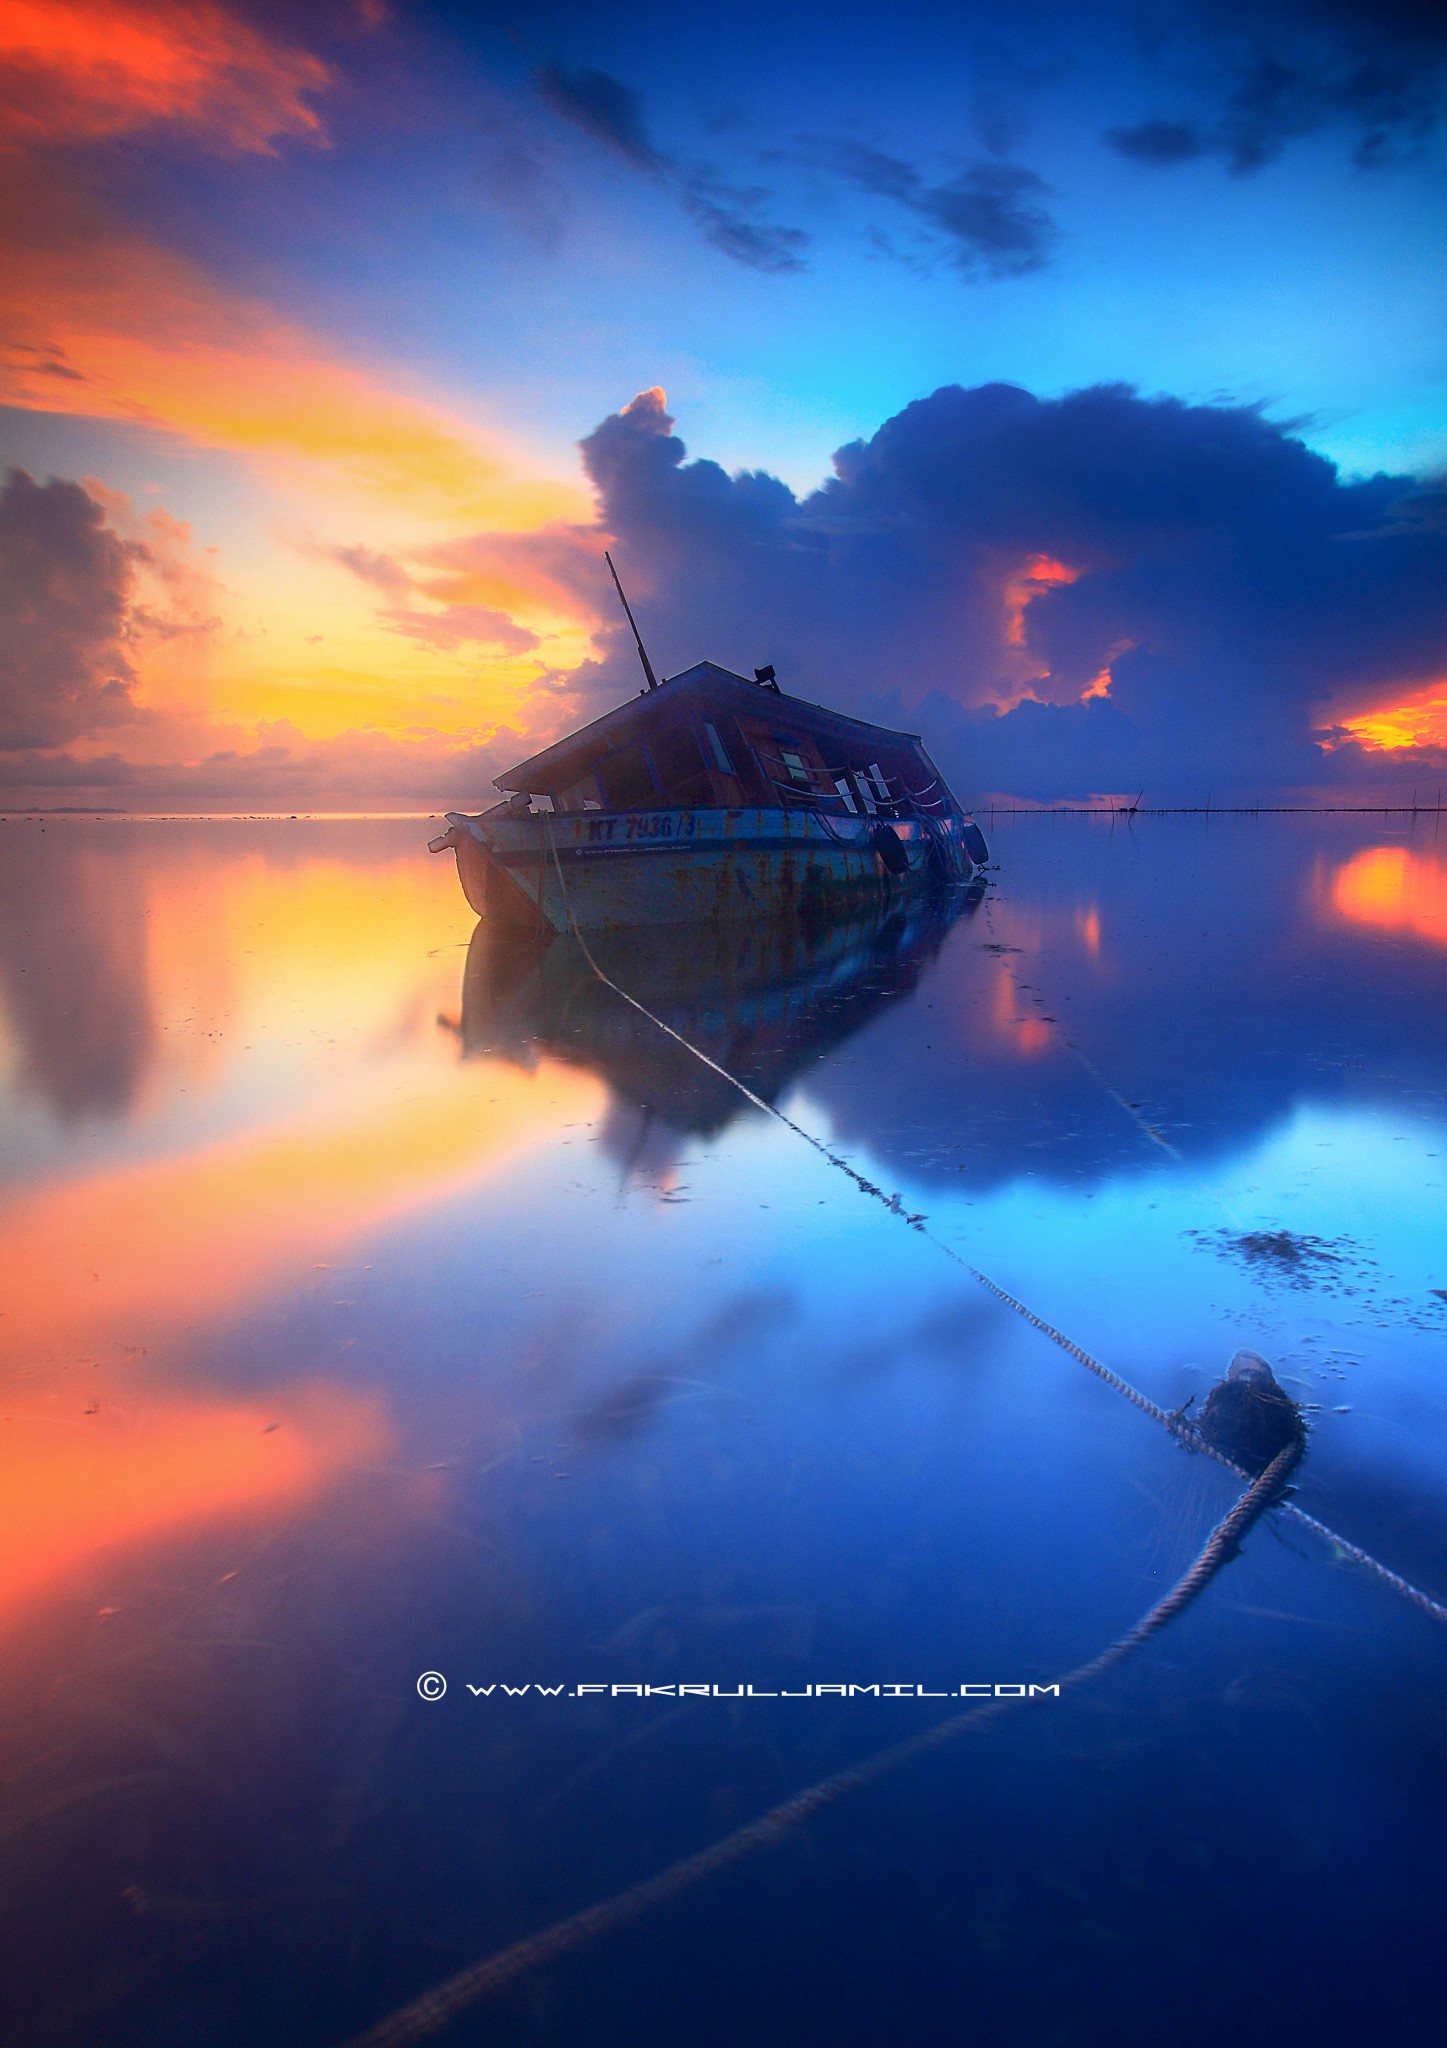
This dramatic headland is situated in the northern-most tip of BORNEO. “Simpang Mengayau” means ‘lingering junction‘ as it is here that the South China Sea lingers and meets the Sulu Seas flowing from the east. Isn’t that amazing?! It is located in the Kudat Peninsula, about three to four hours (215km) drive from Kota Kinabalu City. My first visit to this location was 5 years ago which was in 2012. Back then, there was an abandoned boat, stranded just off the shore (see photo below) which makes an interesting subject to photograph. I took that shot at sunrise where I had to wade into the low tide sea to get near to that boat and ended up blessed with beautiful sunrise. It was a great memories, but sadly, I was informed that the particular boat has been destroyed by the waves.
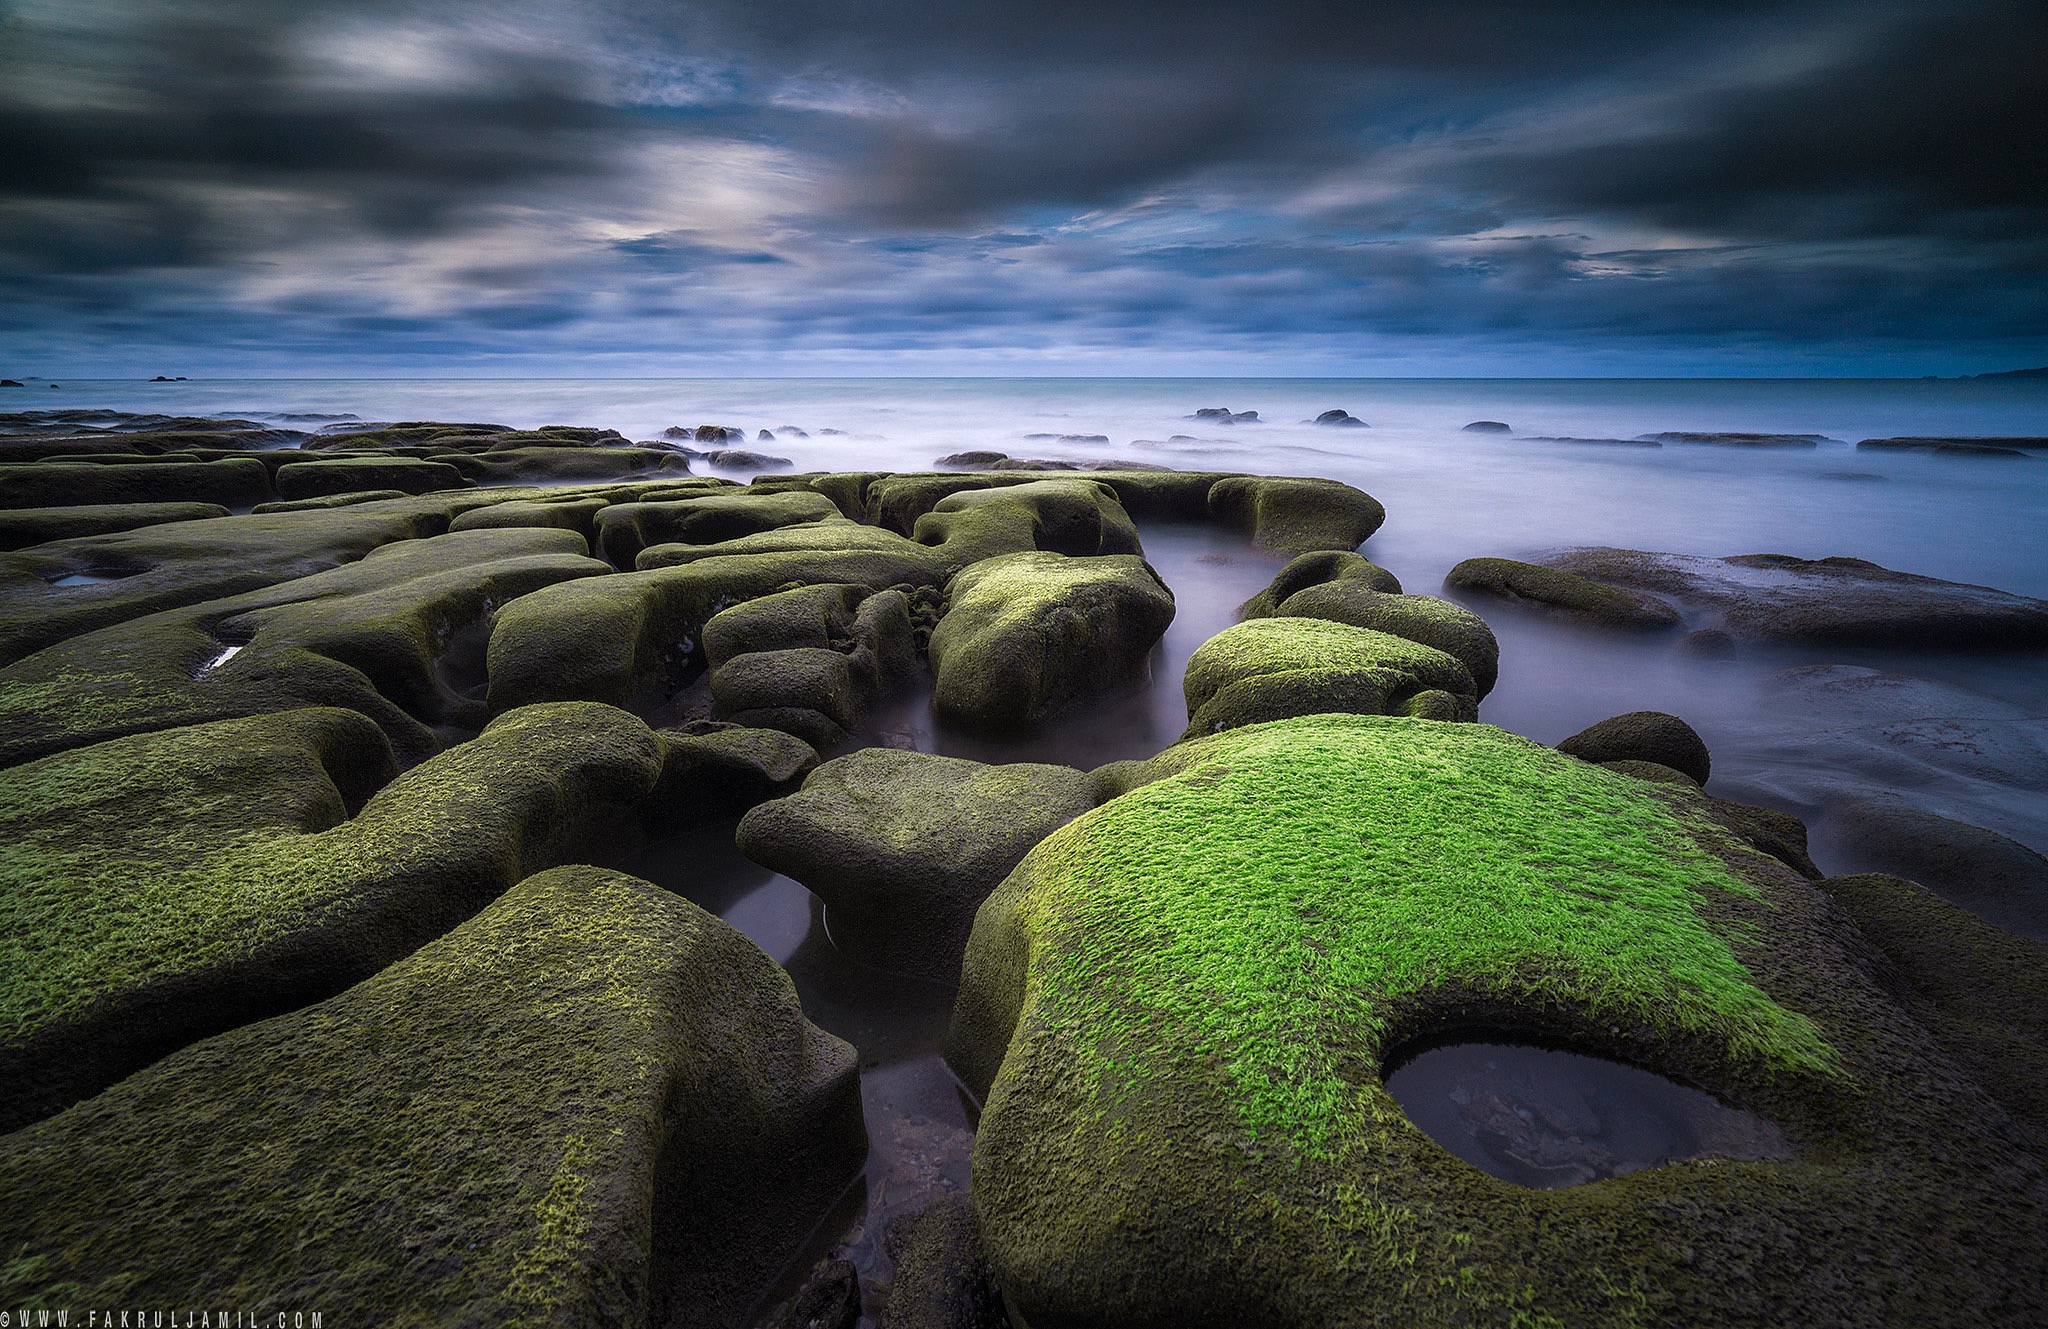
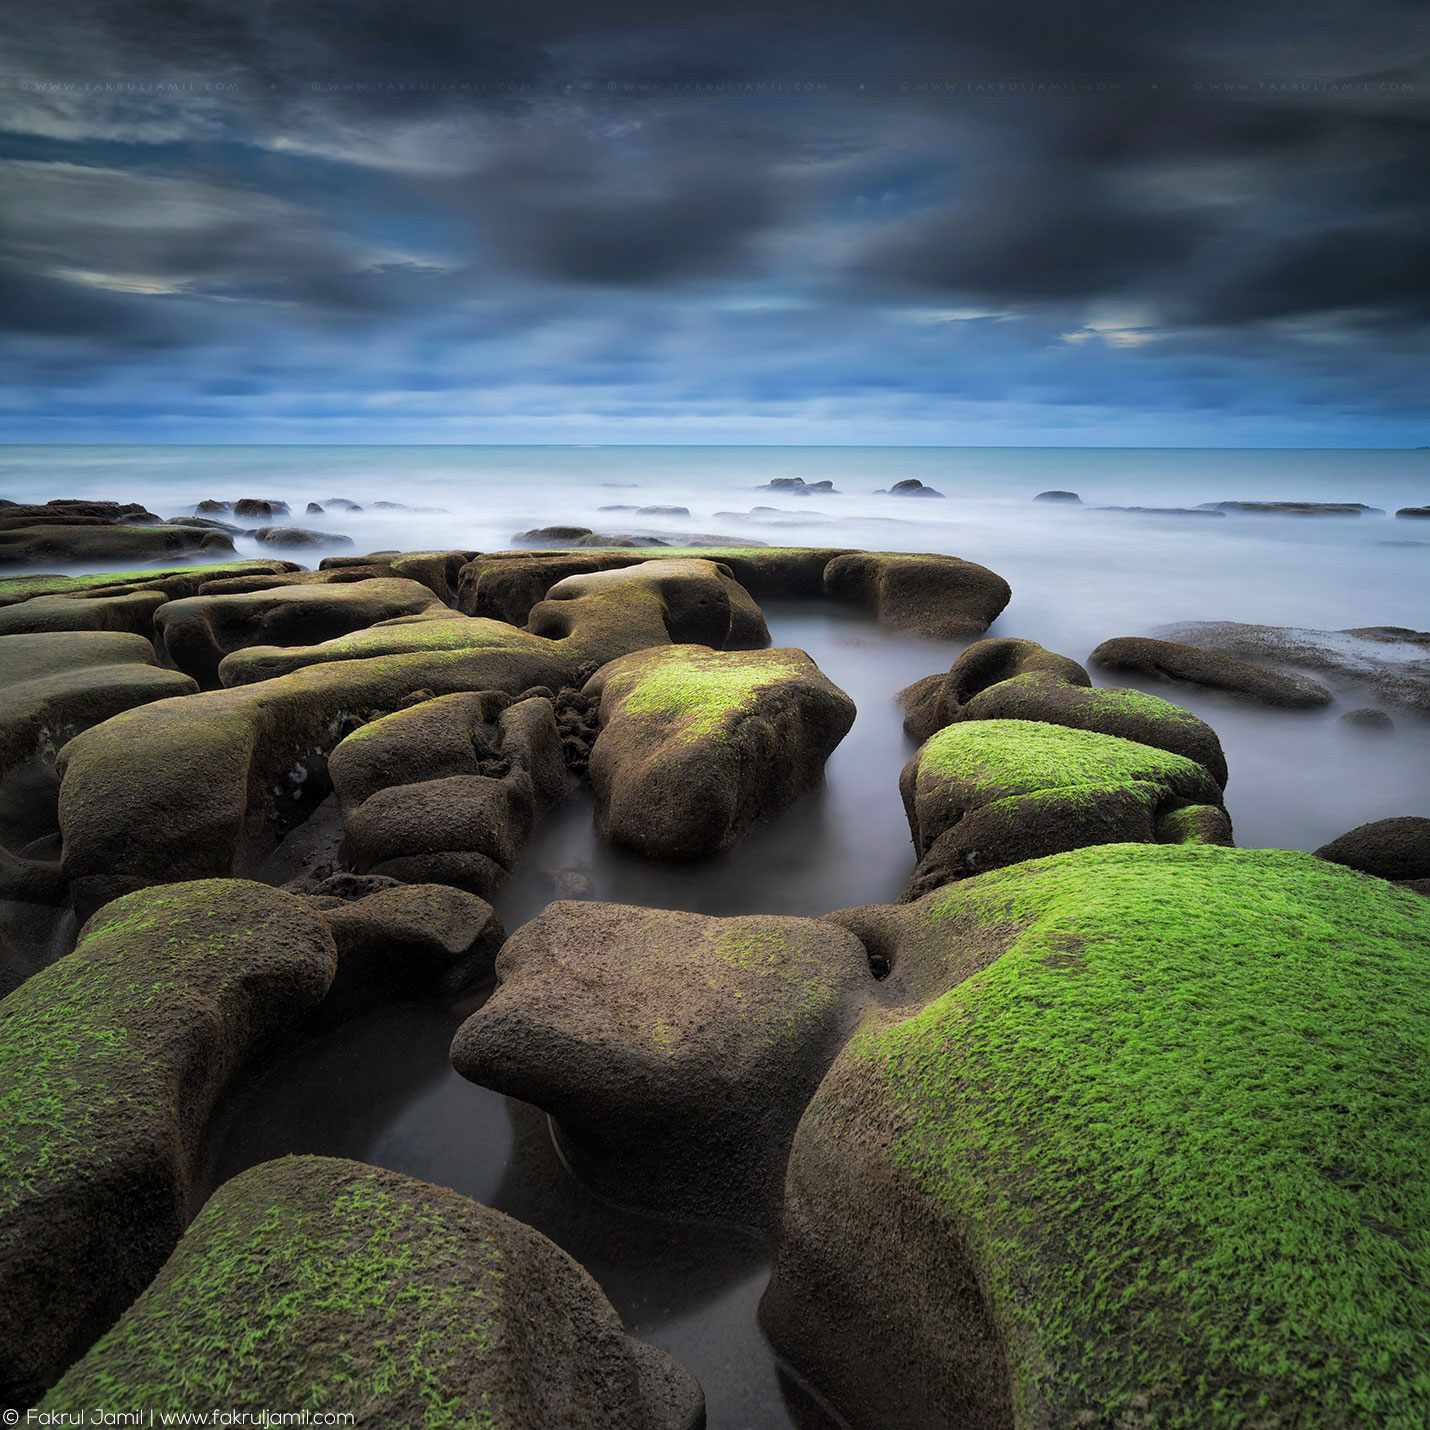
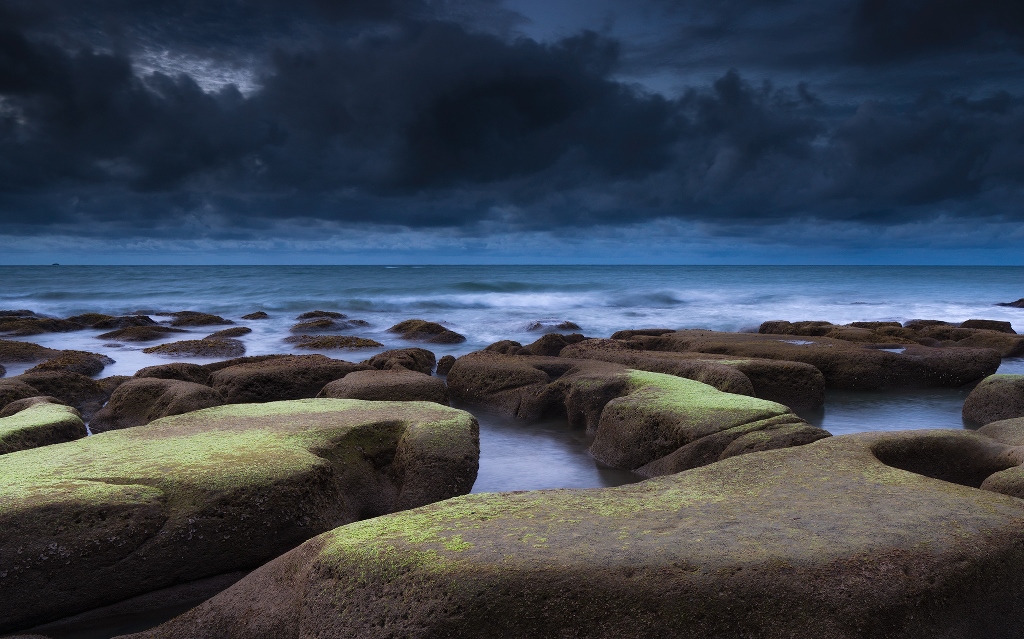
4. Tindakon Dazang Beach
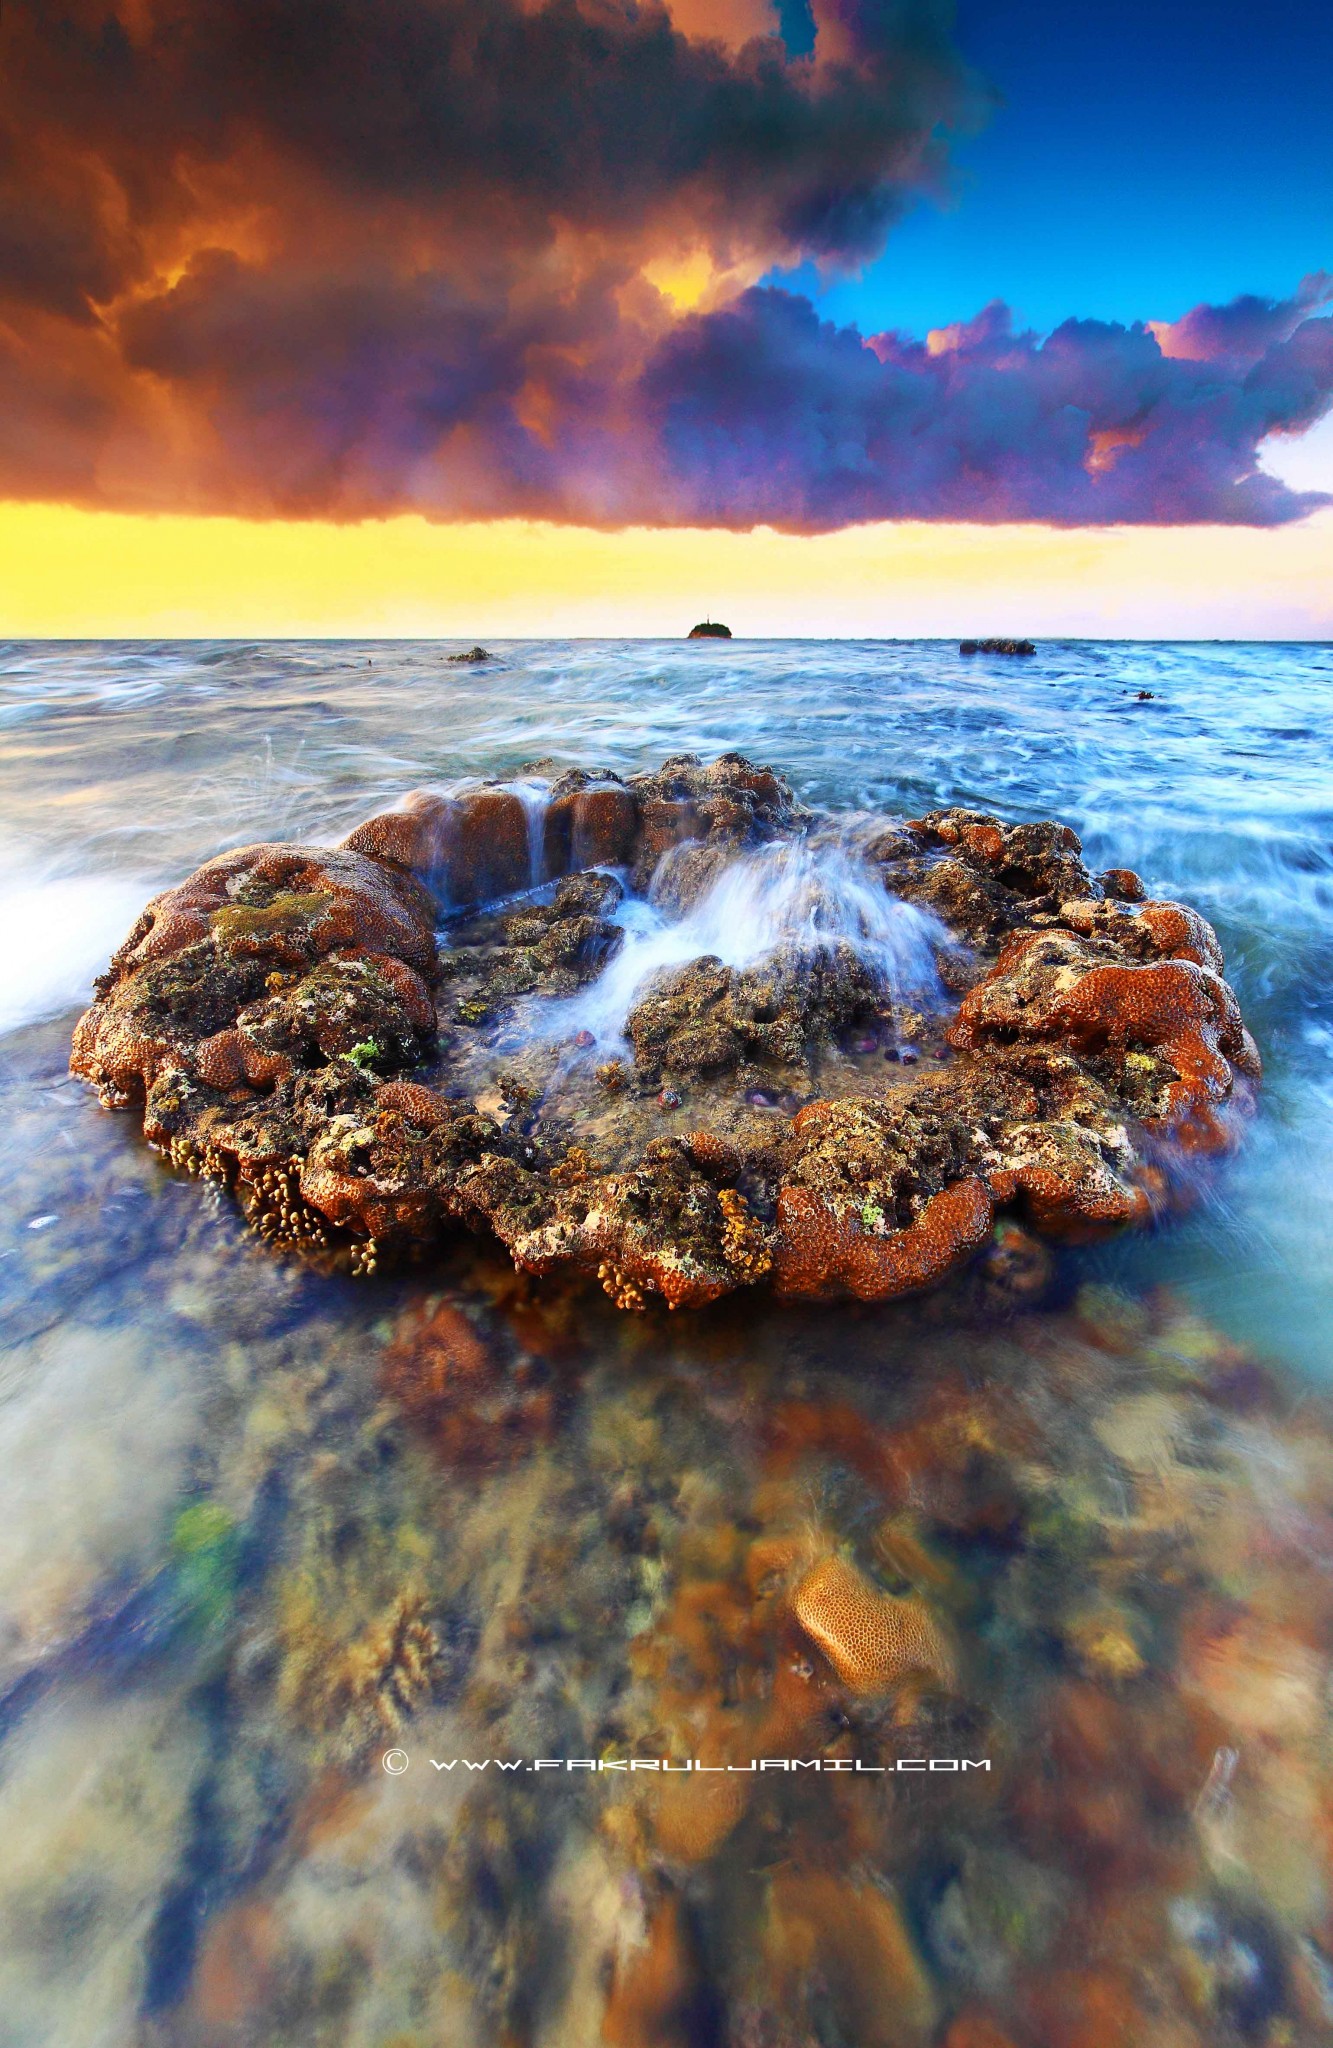
Located about 30km from Kudat town, Tindakon Dazang is a must visit location for seascape photography lovers! This place has a beautiful rocky coastline covered with vivid green seaweed-moss. To get to this beach, you need to cross a small gravel road inside of a palm oil plantation and it can be a bumpy ride depending on what type of vehicle you are driving. 4×4 is highly recommended, although you can still reach with normal car. Entry/parking fee is required and you can pay to the local villagers who took care of the place.

5. Mabul Island
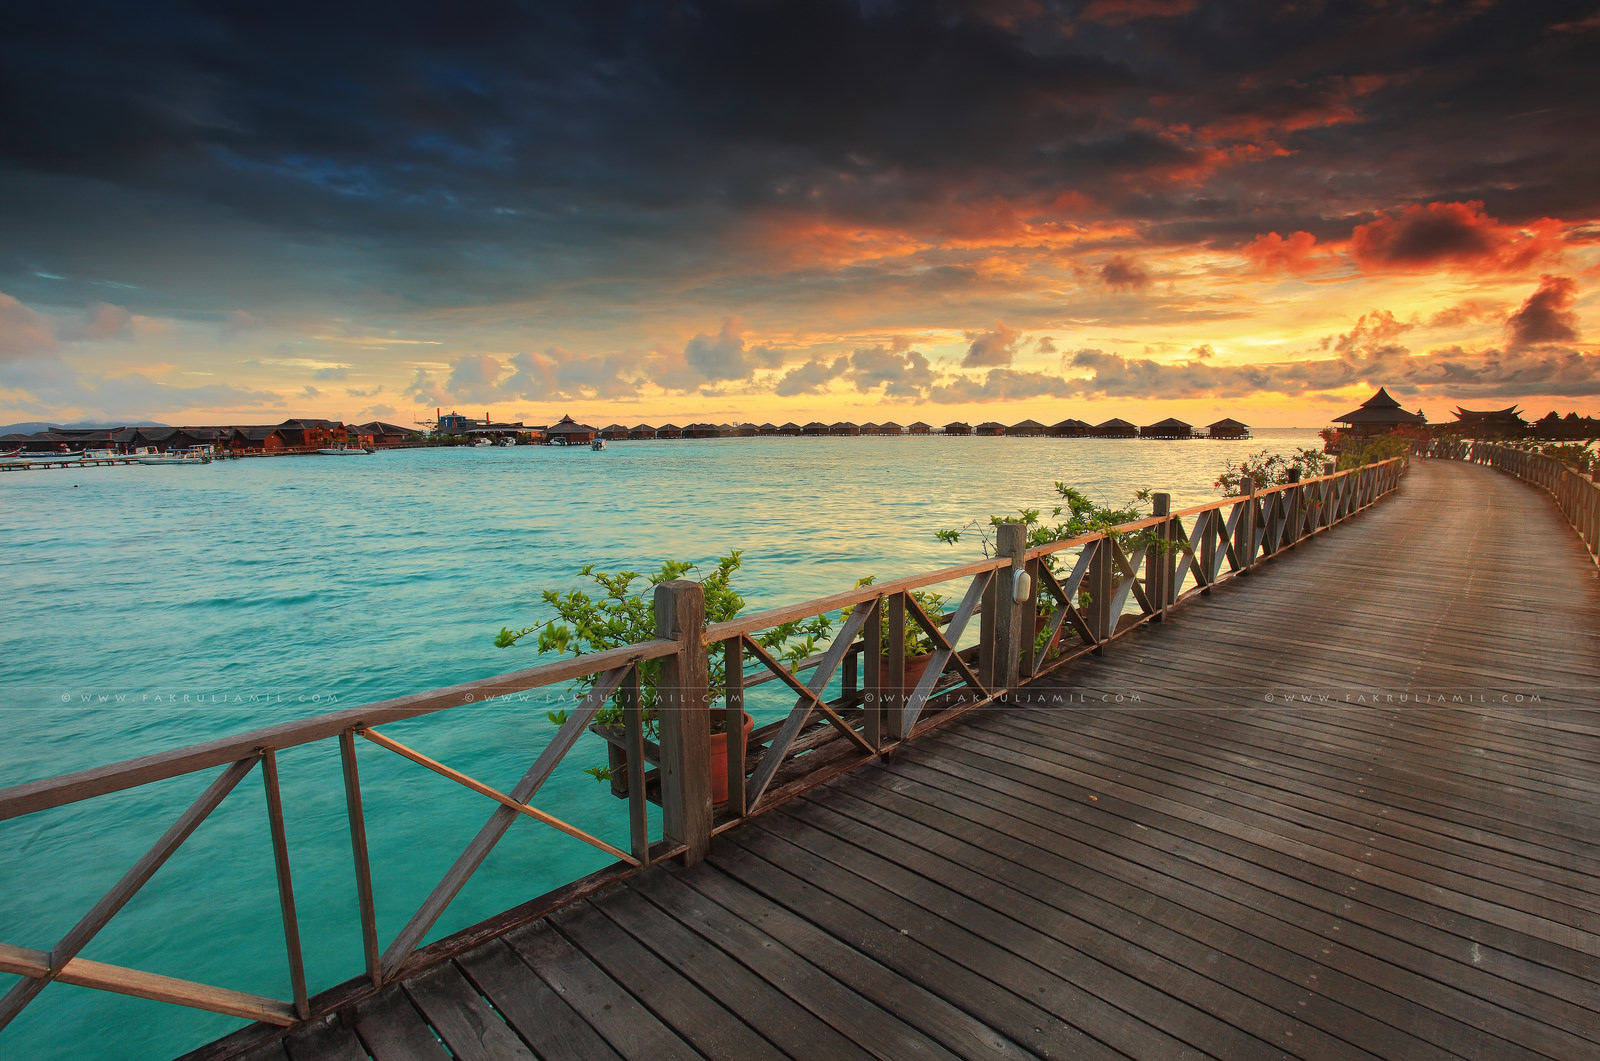
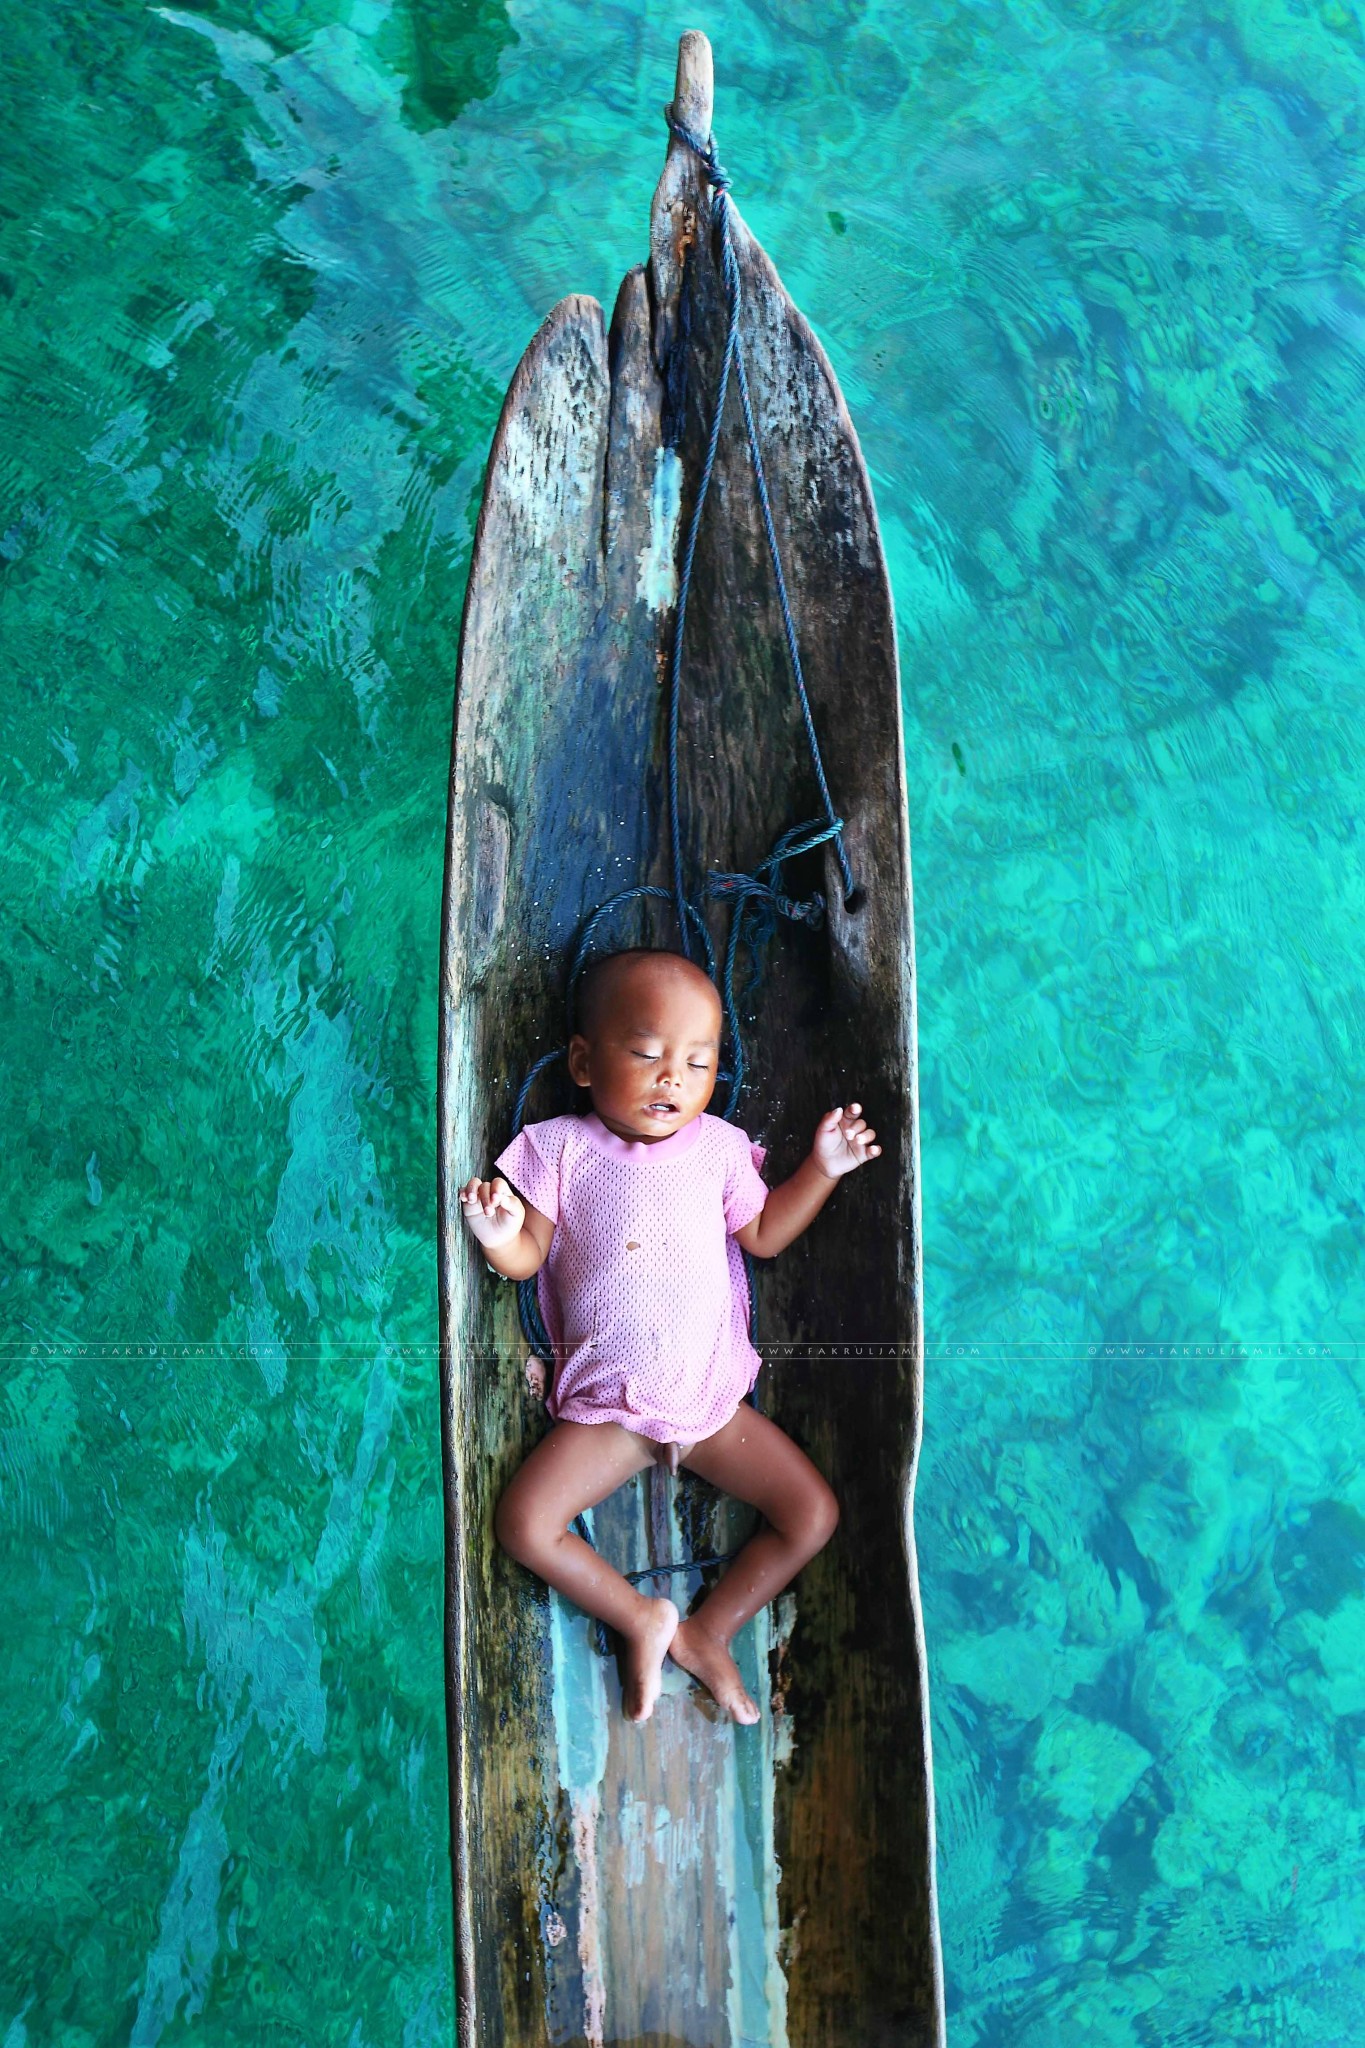
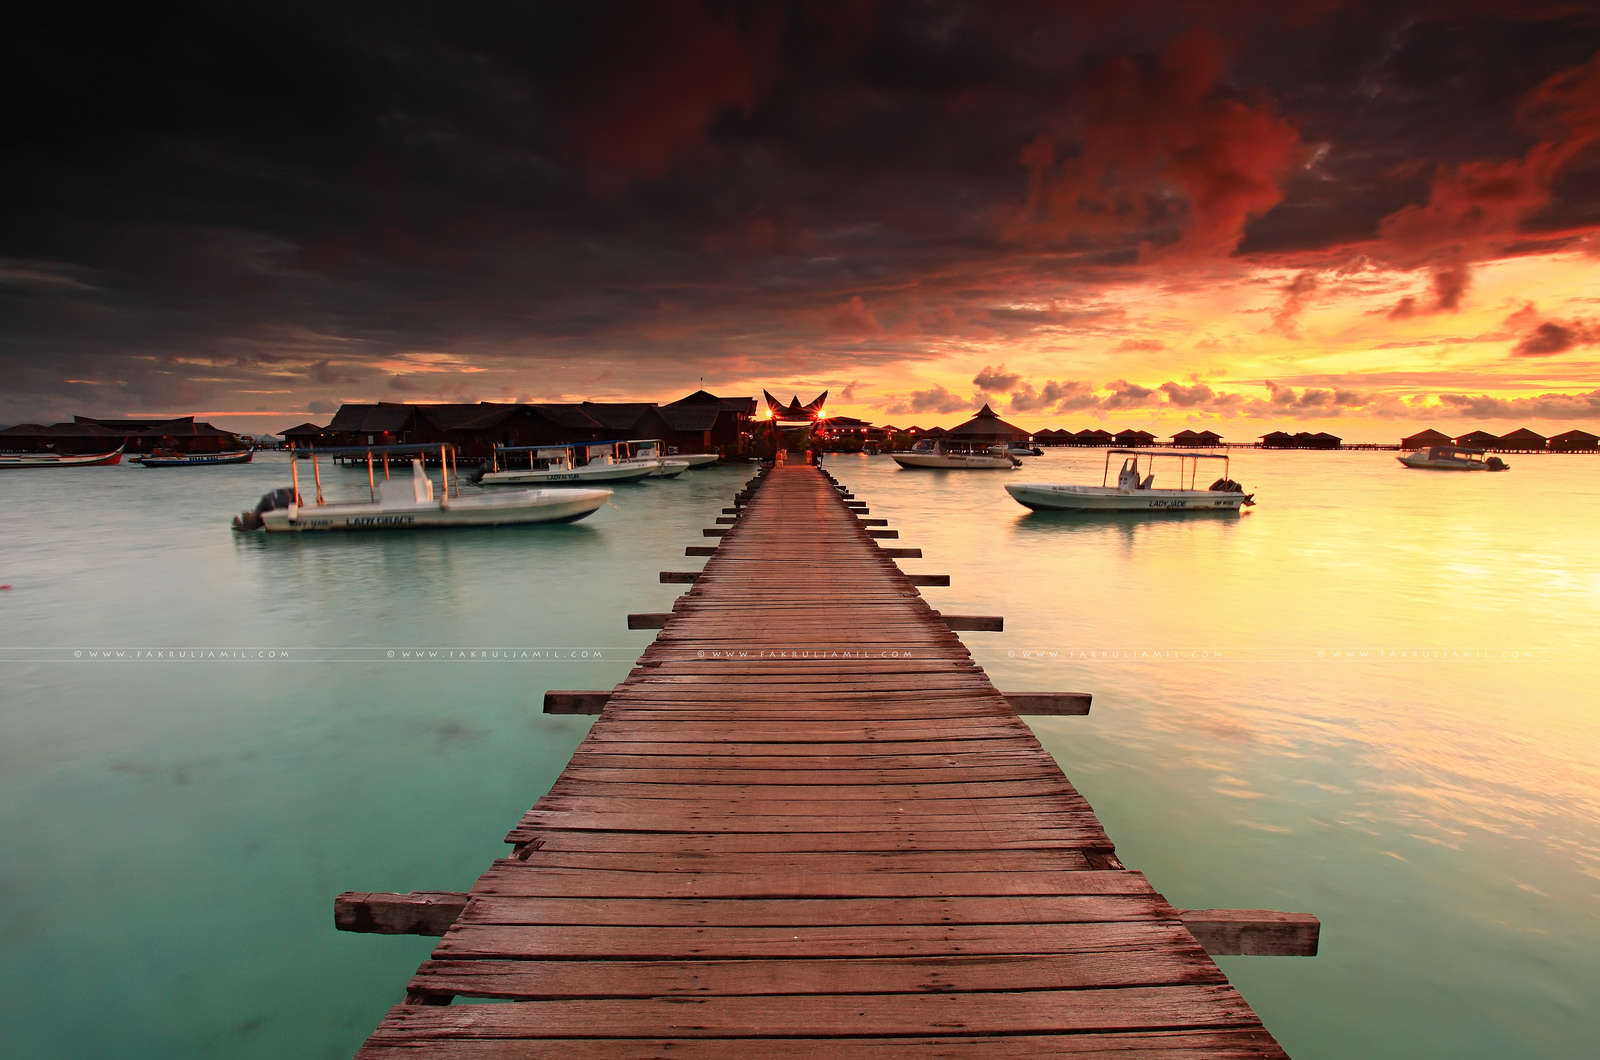
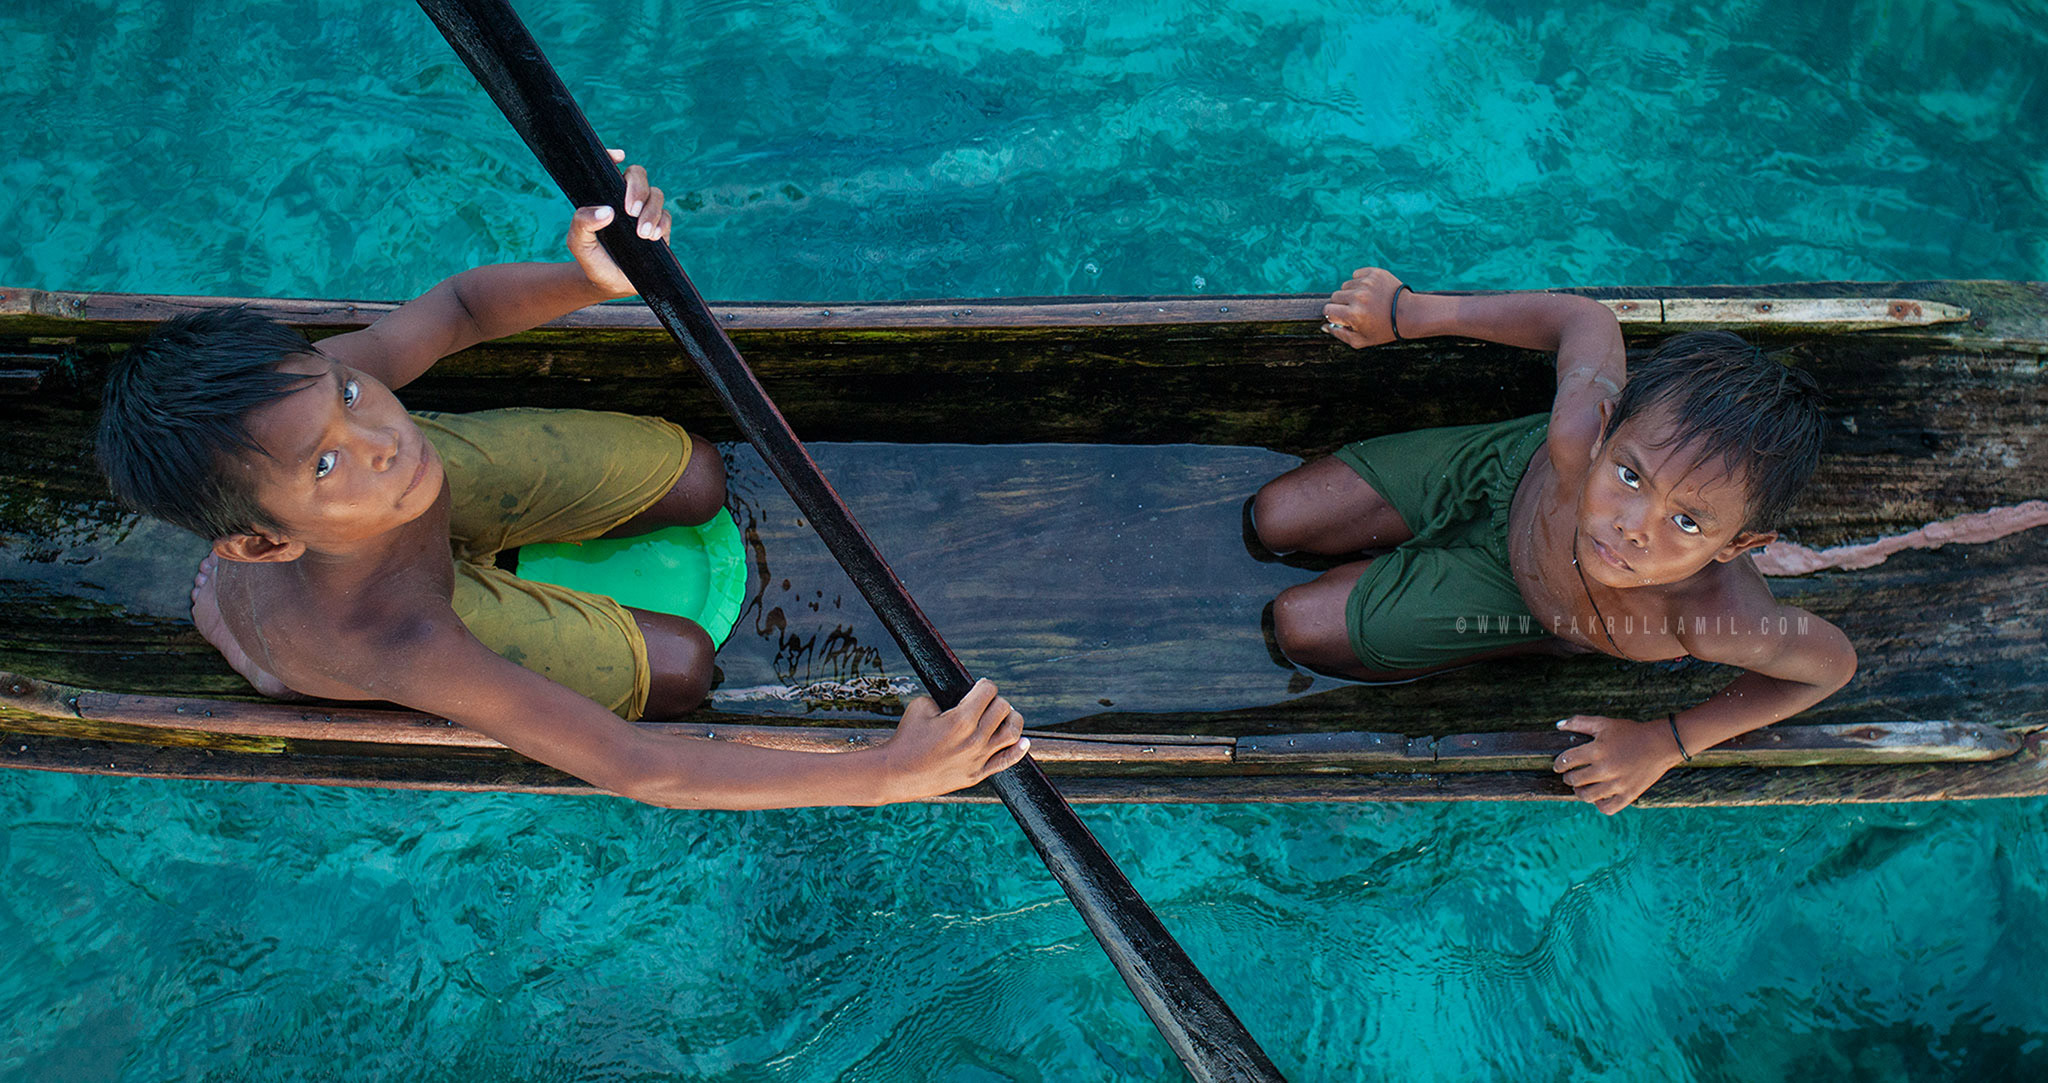
Mabul is a small island off the south-eastern coast of Sabah in Malaysia. The island has been a fishing village since the 1970s. The island itself is just a 20-hectare piece of land surfaces which you can cover the entire island by just walking around on foot. The local people here is mainly from “Bajau Laut” of Sea Gypsies. You can do a few type of photography in this island like, landscape, human interest or even underwater photography.


This is the top 5 places that I have visited and I can say they offers great opportunity for landscape photographers.
Until my next post then!
It’s that time of the year again..2016 is ending very soon. Photographically, as a freelance-hobbyist photographer, this year has been one of my favourite year as a photographer. The reason is 2016 is the year that I managed to tick-off the top two places on my bucket list – Iceland and Lofoten Islands, Norway.
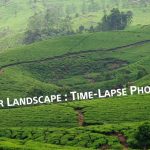
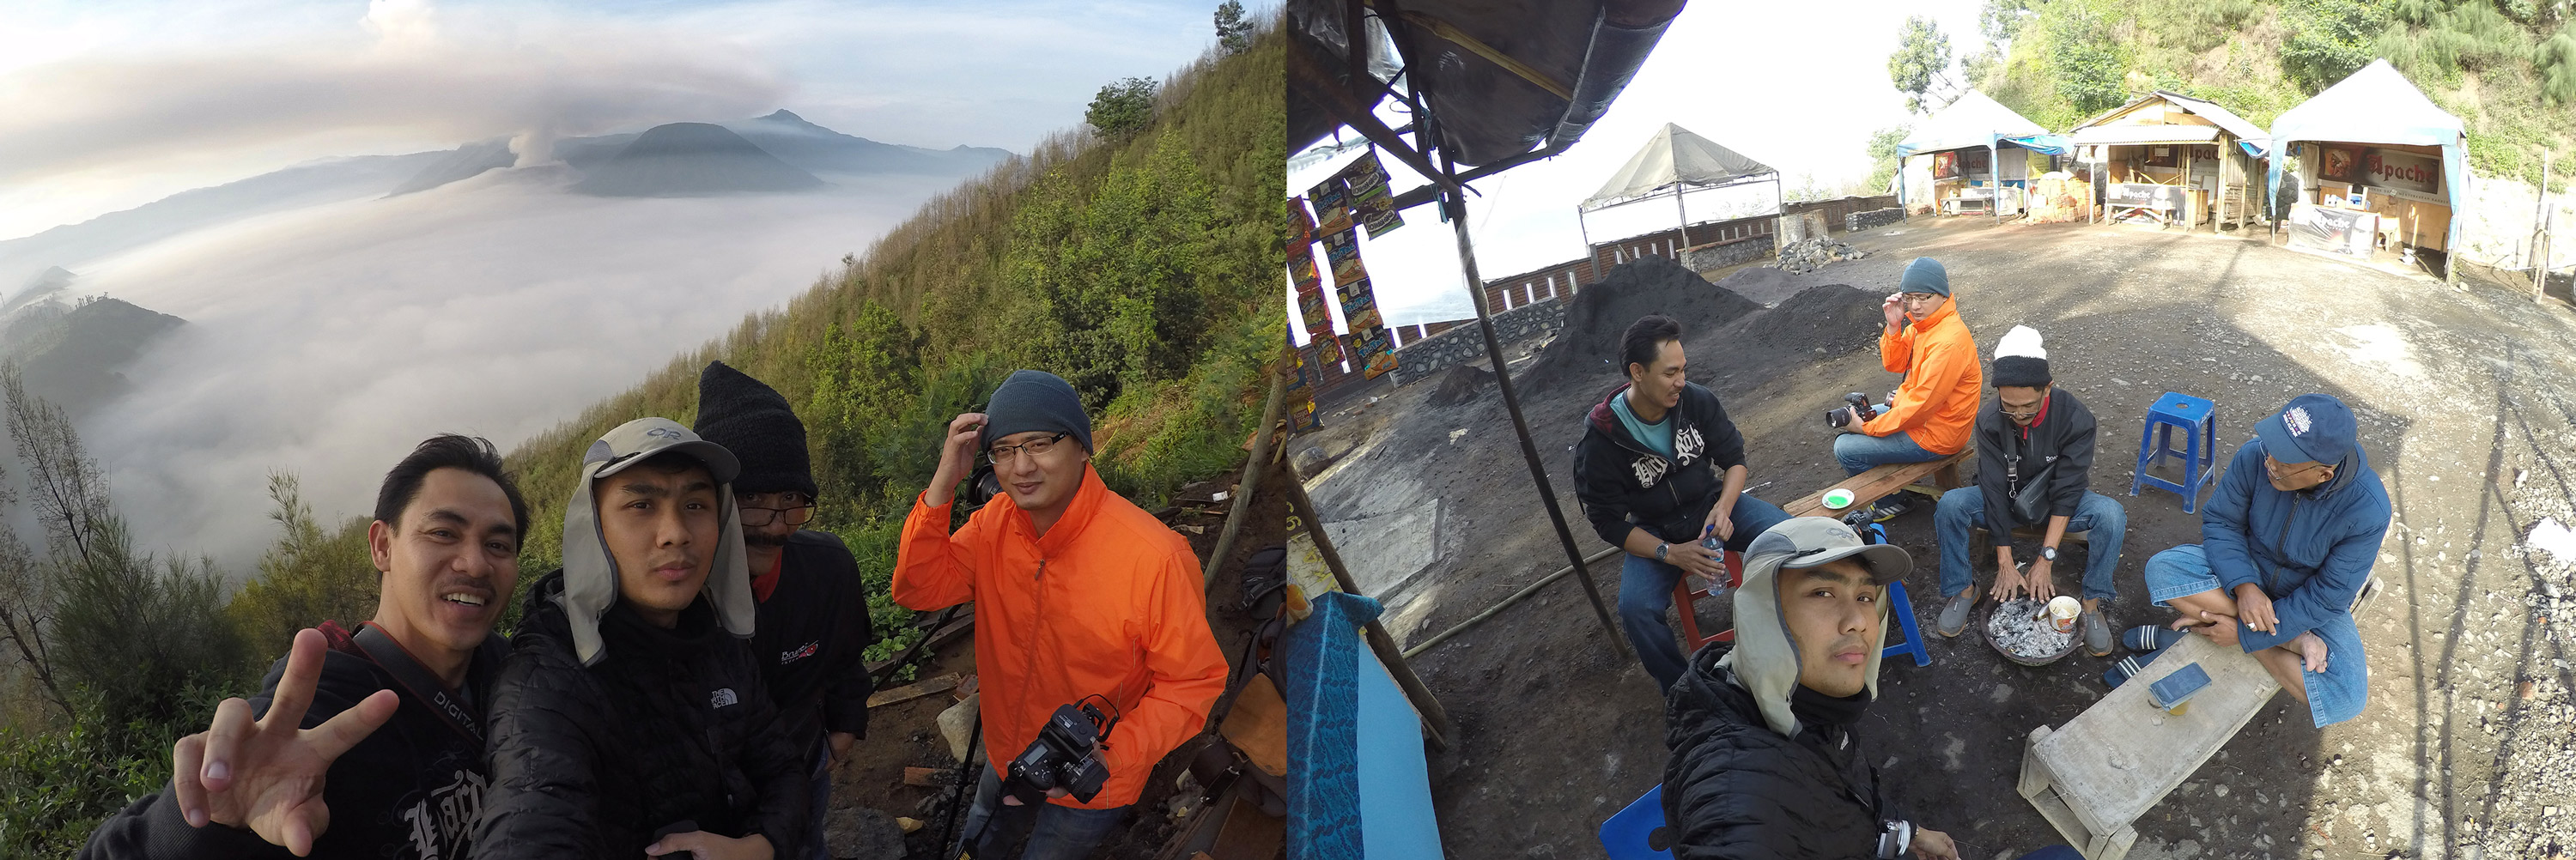
But before we get to that, lets start from the beginning of the year. In March, I traveled to Mount Bromo National Park in East Java of Indonesia with few of my comrades. None of us been there before so we was pretty excited to see the famous sea of clouds in the park.
24/4 – Thursday morning : Our flight delayed for over an hour so we arrived in Surabaya airport around 1am. We met Pak Irsam, our local guide for this trip. It was then a long 4-5 hours drive from Surabaya city to Bromo Tengger Semeru National park. Our eyes couldn’t take it anymore so everyone fell asleep except for Pak Irsam himself because he got to drive.

Yours truly with the blanket of clouds
We wrapped our shooting at this first location with a nice cup of teh halia (ginger tea)
Cemoro Lawang is a very small hamlet north-east of Mount Bromo (East Java), Indonesia with the altitude of 2,217 meters above sea level.This hamlet is a part of Ngadisari Village, Sukapura in the Probolinggo Regency.
Frame-grab from my timelapse sequence. Absolutely magnificent view when the stormy clouds came into the scene.

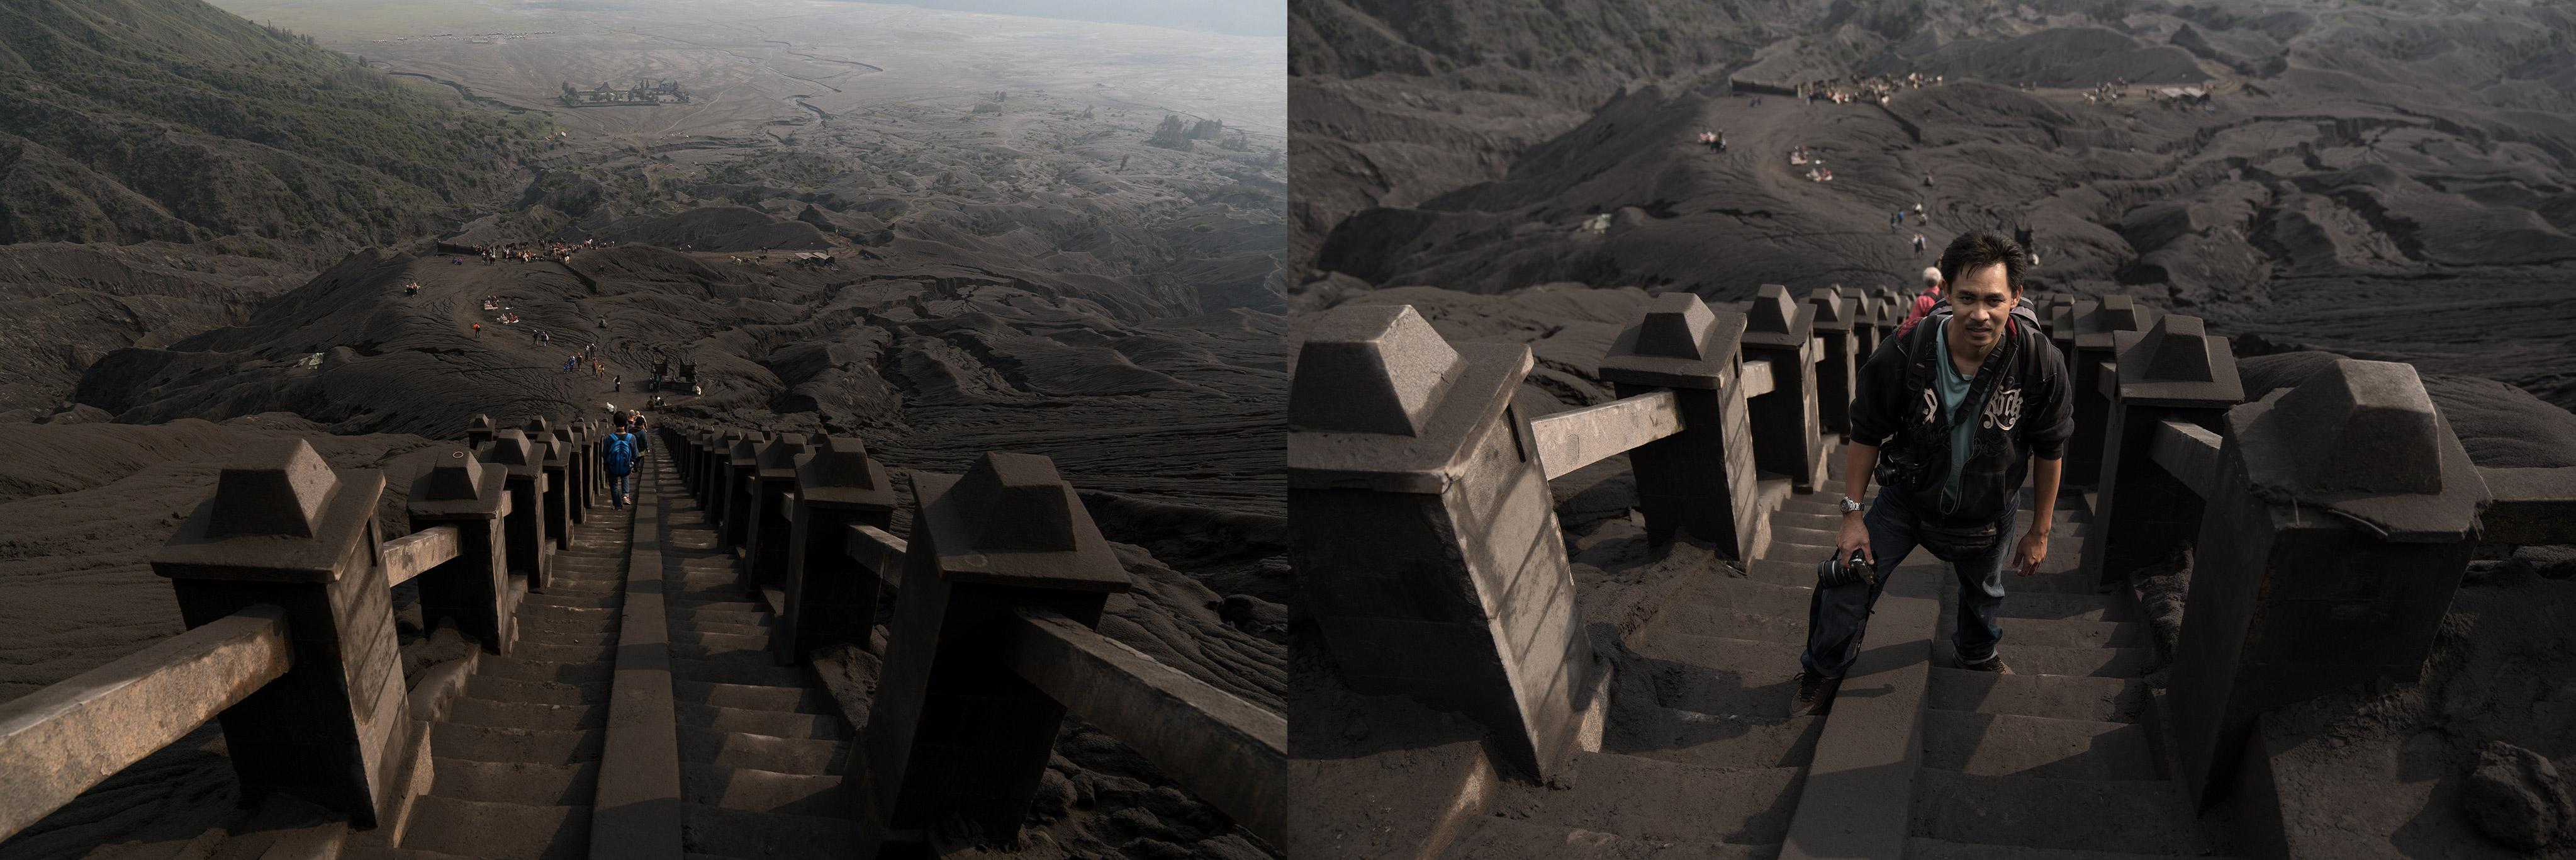
Our next location is the crater of Mt. Bromo. To be honest, I didn’t expect a horse ride which was arranged by Pak Irsam. It’s around 1 km distance from the car park up to the crater so a horse ride definitely ease the journey. Photo below is a courtesy from Pak Zahar’s camera. 🙂
Anyway, I thought the horse ride would take us all the way up to the crater, but I was wrong. The ride stops at the stairways then we had to climb it ourself and it was a pretty steep climb. Had to stop few times to catch some breath!
Here’s the stairways and abam Jemang at one of the many pit-stop we had to make before reaching the peak.
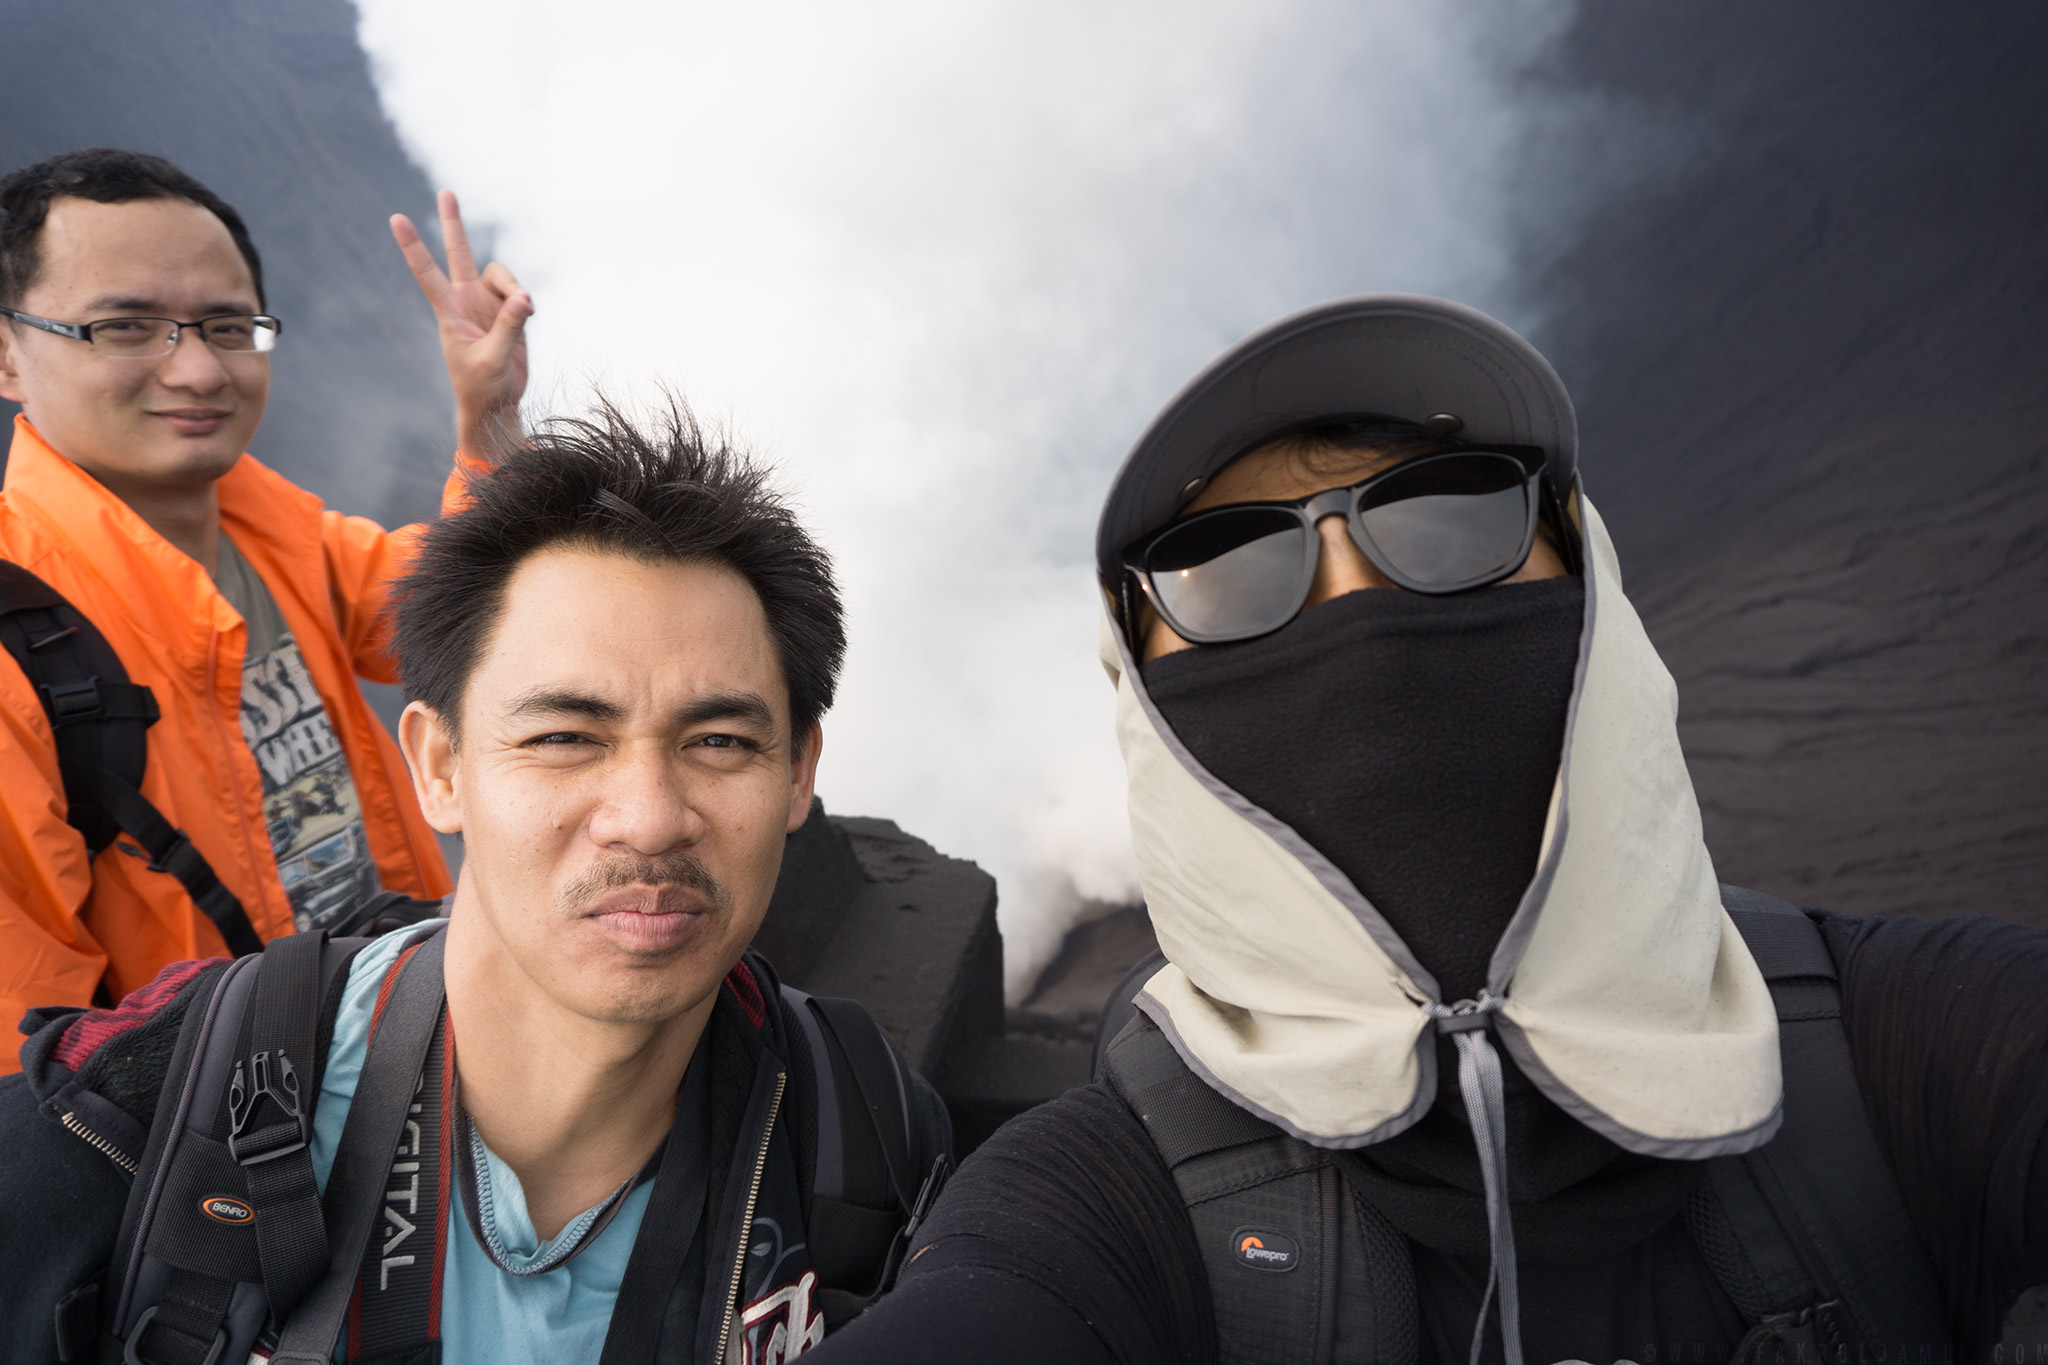
The crater of Mt. Bromo and its constantly belches white sulfurous smoke.
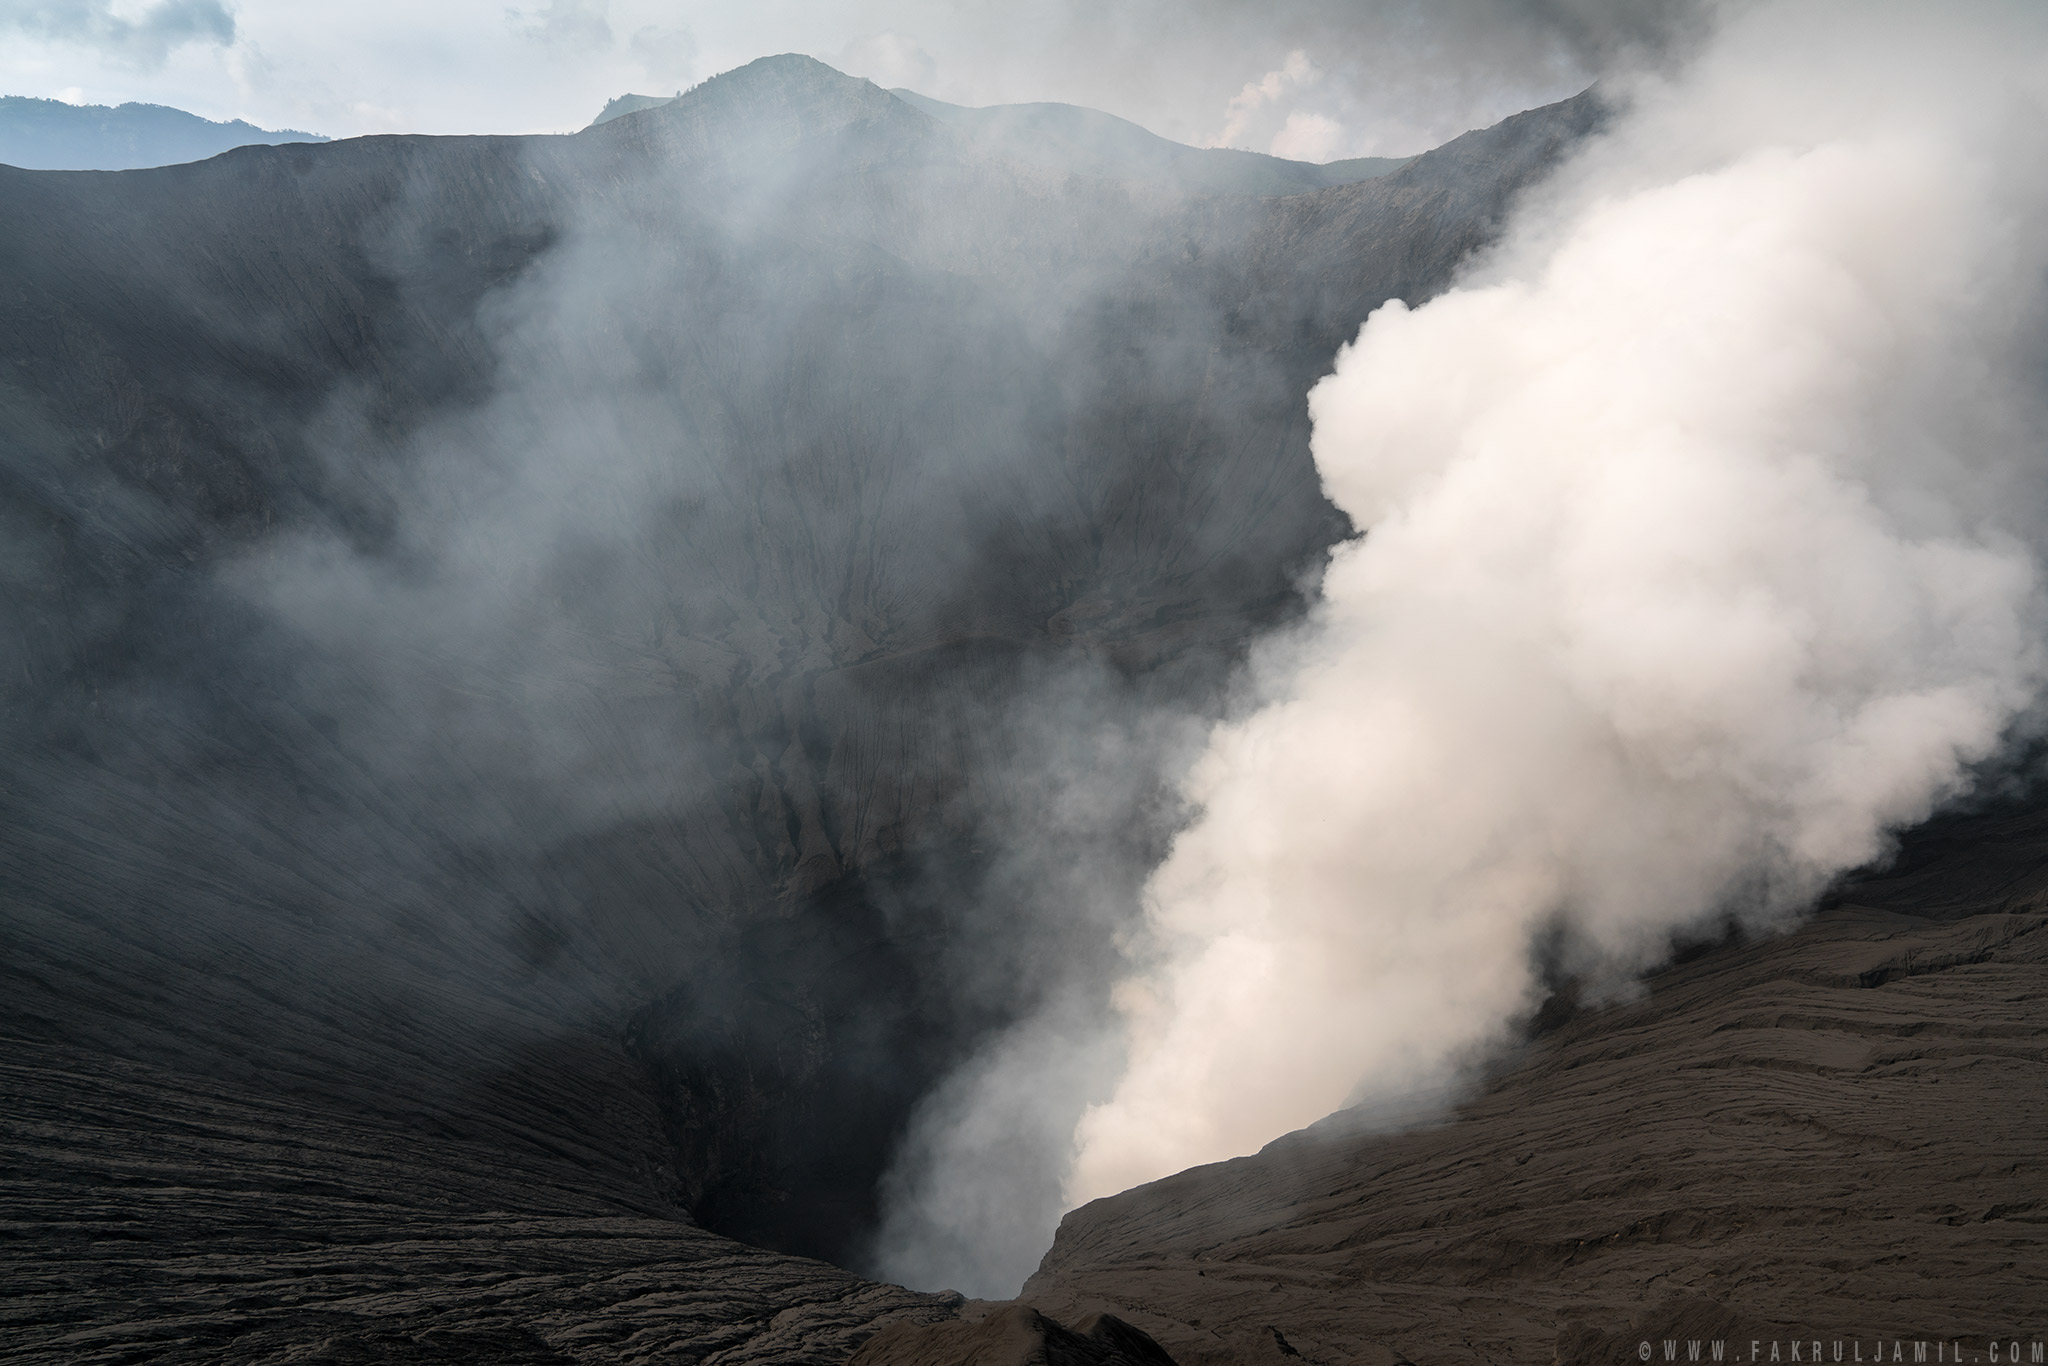
A quick selfie with Jemang and Azmi. Too bad Pak Zahar didn’t make it to the top because he could not stand the heavy sulfur smoke.
24/3 – Thursday morning : Our second day starts as early as 2.00am. Our next location is Penanjakan 1, which happens to be the most famous viewpoint in the national park. It’s located approximately about 1 hour drive but its not your ordinary drive. It was a really bumpy drive even on a 4×4 vehicle. Not recommended for those who suffers back-pain etc. We reached Penanjakan 1 around 3.00am and the parking area is already looks like a night market. The place is filled with lots of tourist!
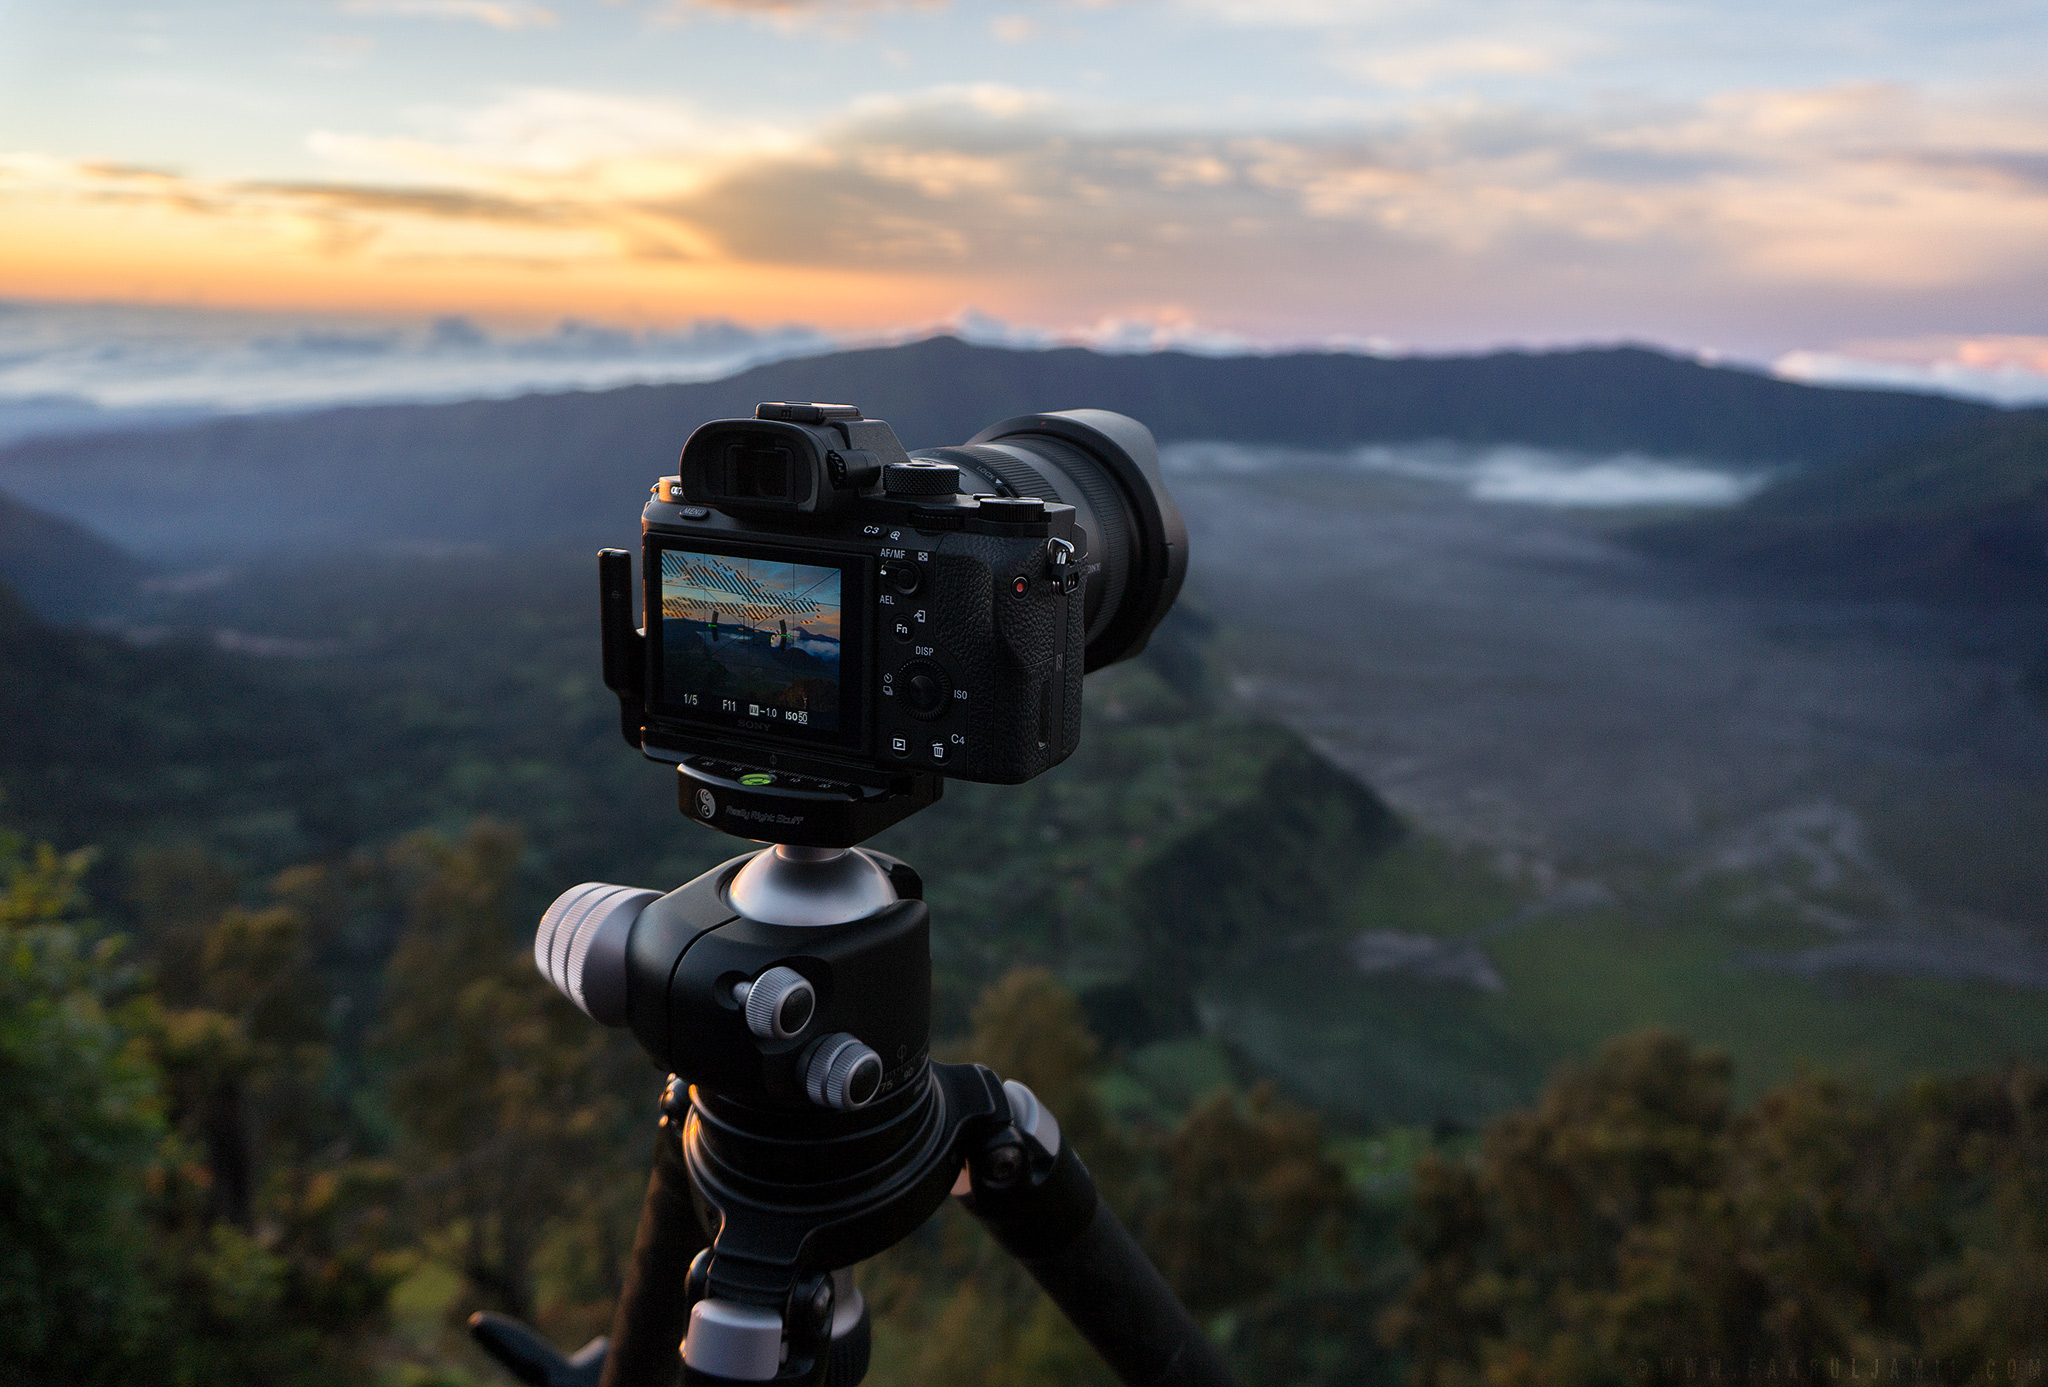
So after got dropped by our driver, we then hike up to the viewpoint which located around 500 meters from the parking area. Pak Irsam showed us where to set our tripod and luckily the front seat is not yet taken. We then setup all our gears and waited patiently for the sunrise. It gets pretty cold sometimes but thanks to down jacket and a neck-warmer, I’m all covered.
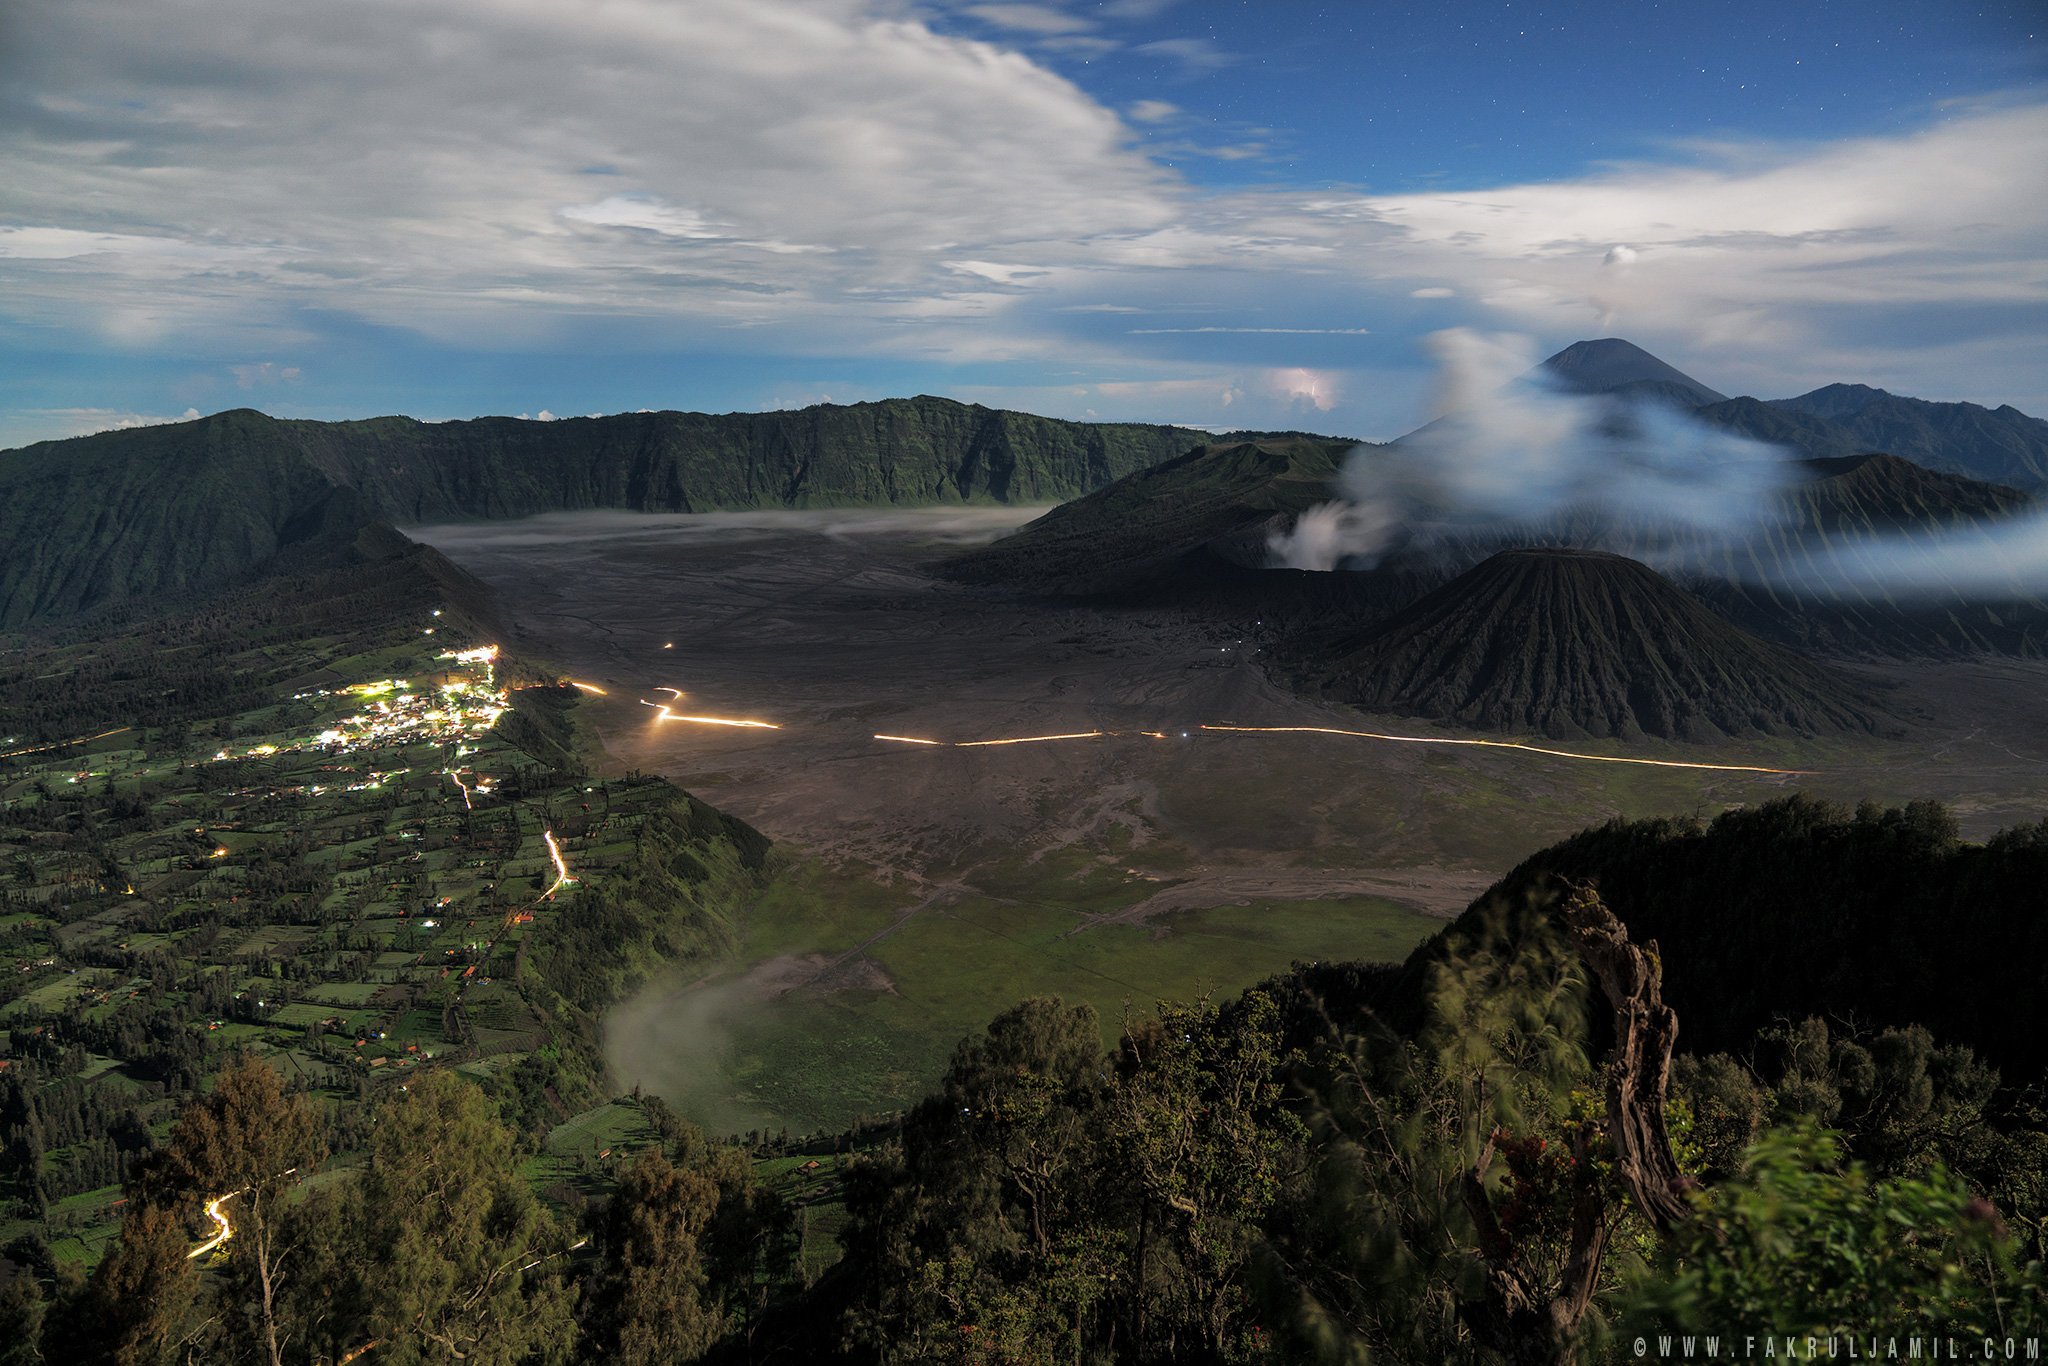
Here’s a photo taken around 3.30am. As you can see, the light trails down in the caldera is from all the 4×4 vehicle, transporting tourist from Ngadisari village to Penanjakan 1. Better be early to grab the front seat!
After few hours waiting and shivering in the cold weather, the sun is about to rise. Here’s a panorama of the blue hour taken with Sony A7RM2 + FE 24-70 f/2.8 GM lens. Click on the photo to view in large.
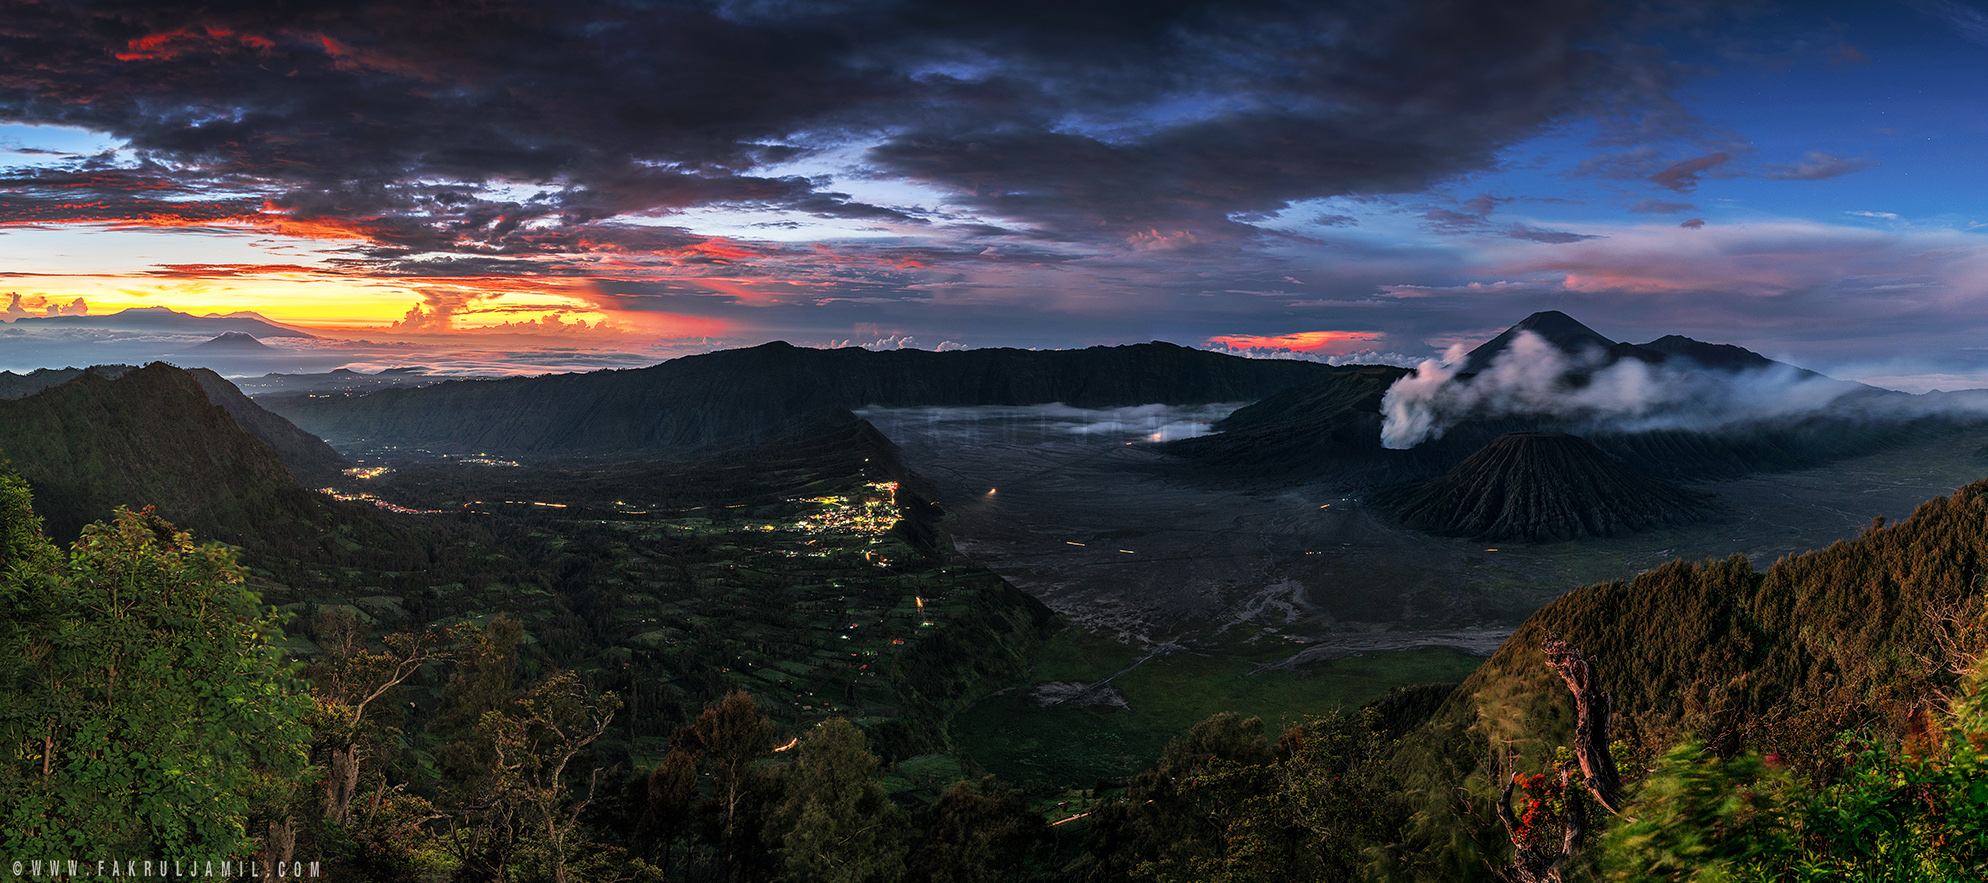
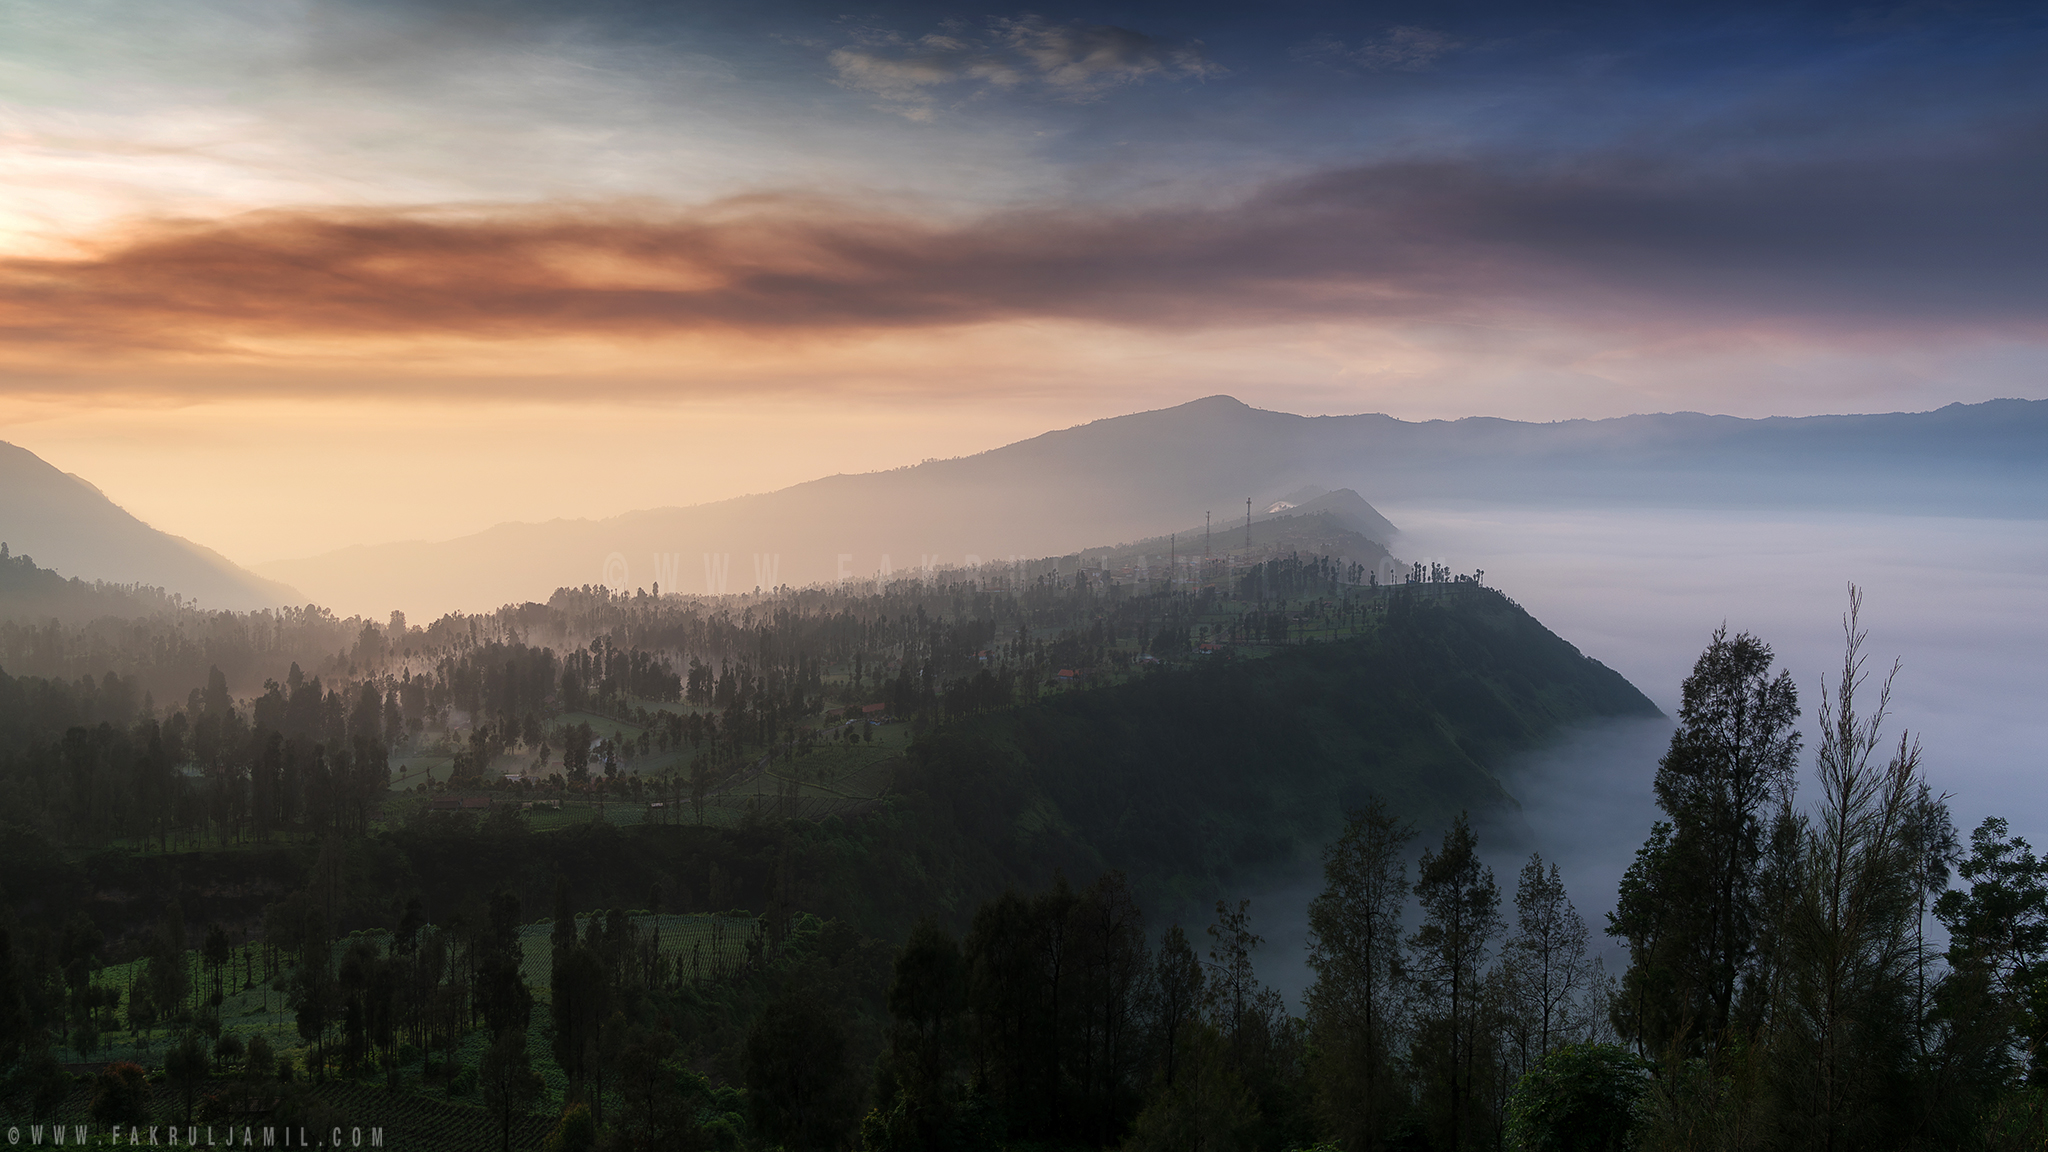
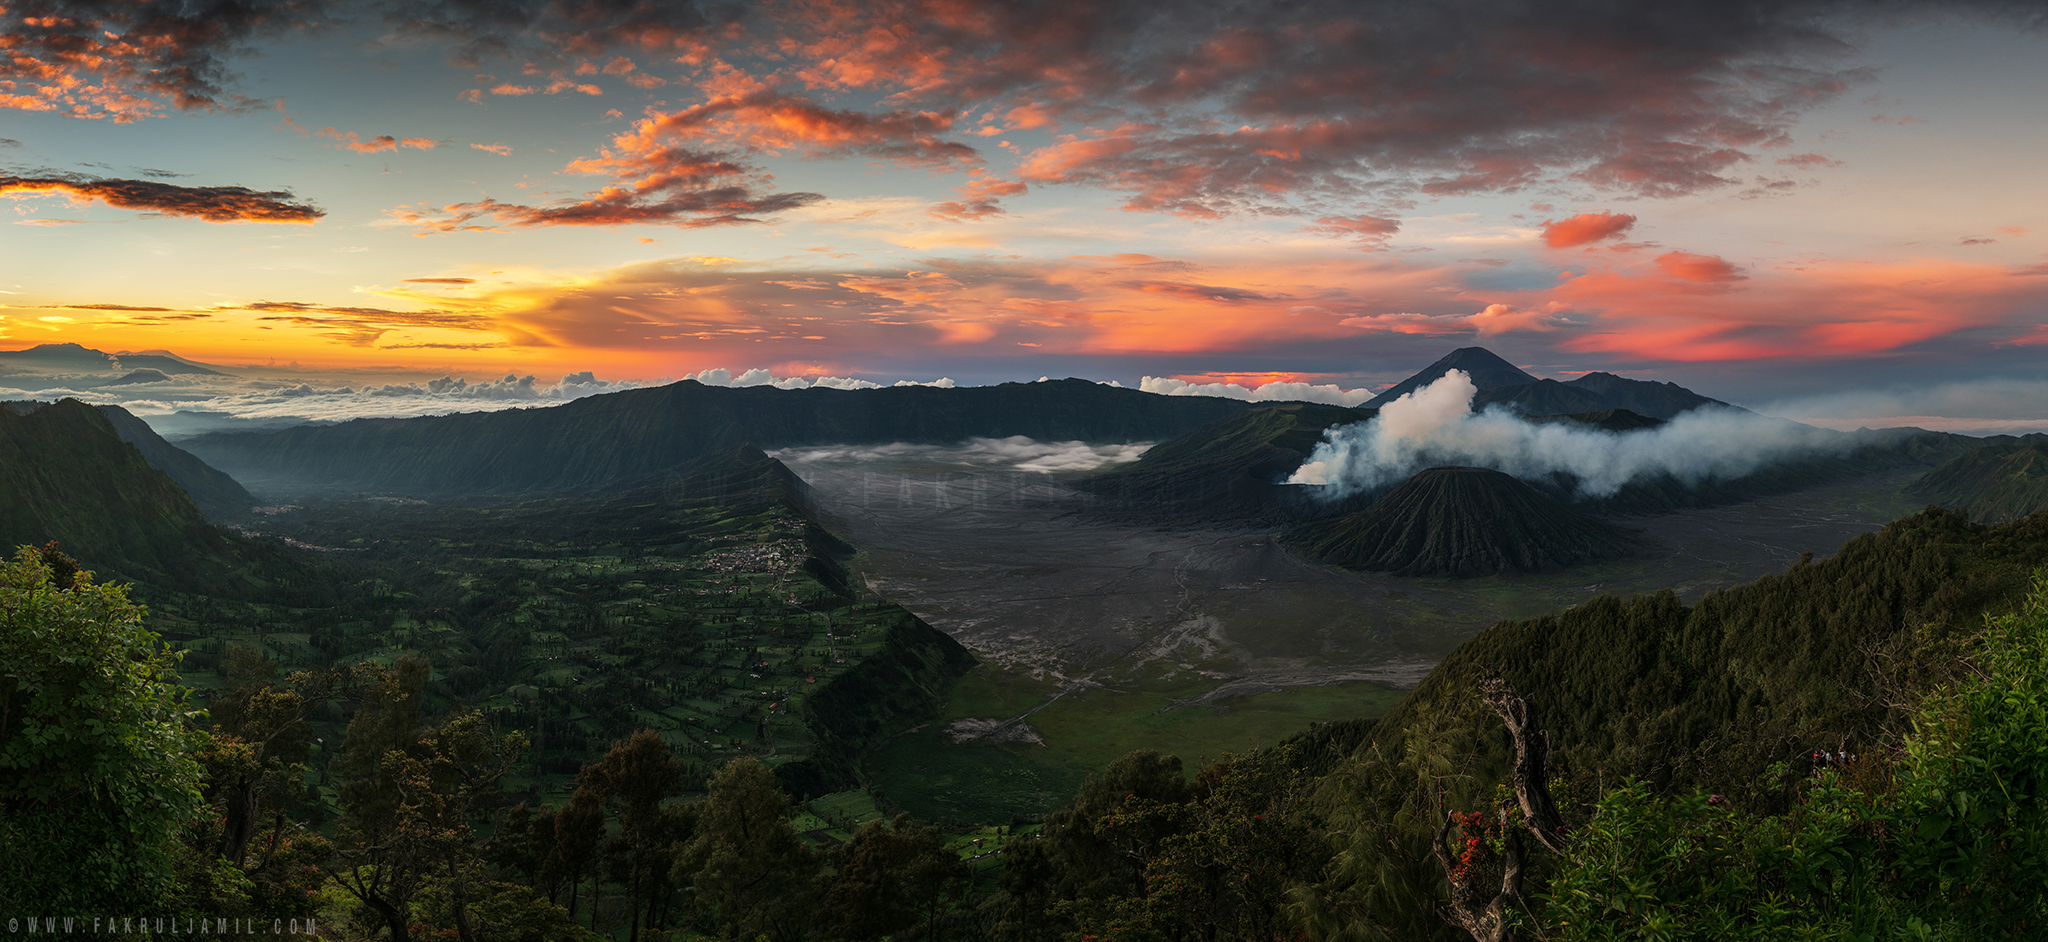
When I saw the blue hour, I thought to myself, this could be a pretty amazing sunrise and as the sun progressed higher, the mesmerizing colours starts to appear. We, landscape photographers express this moment as “the magic hour”. Check out behind the scenes photo below taken with Sony A5100.
As you can see, the sun rose slightly to left of Mt. Bromo. But the strong colours did reflects all the way to the volcano hence the final result below. I present to you….”When Earth Meets Sky” a panoramic image generated from 8 vertical shots taken with Sony A7RM2 + FE 24-70 f/2.8 GM lens. I just had to take panos because I wanted to capture everything for this shot. Final resolution for this pano is 12,600px wide!
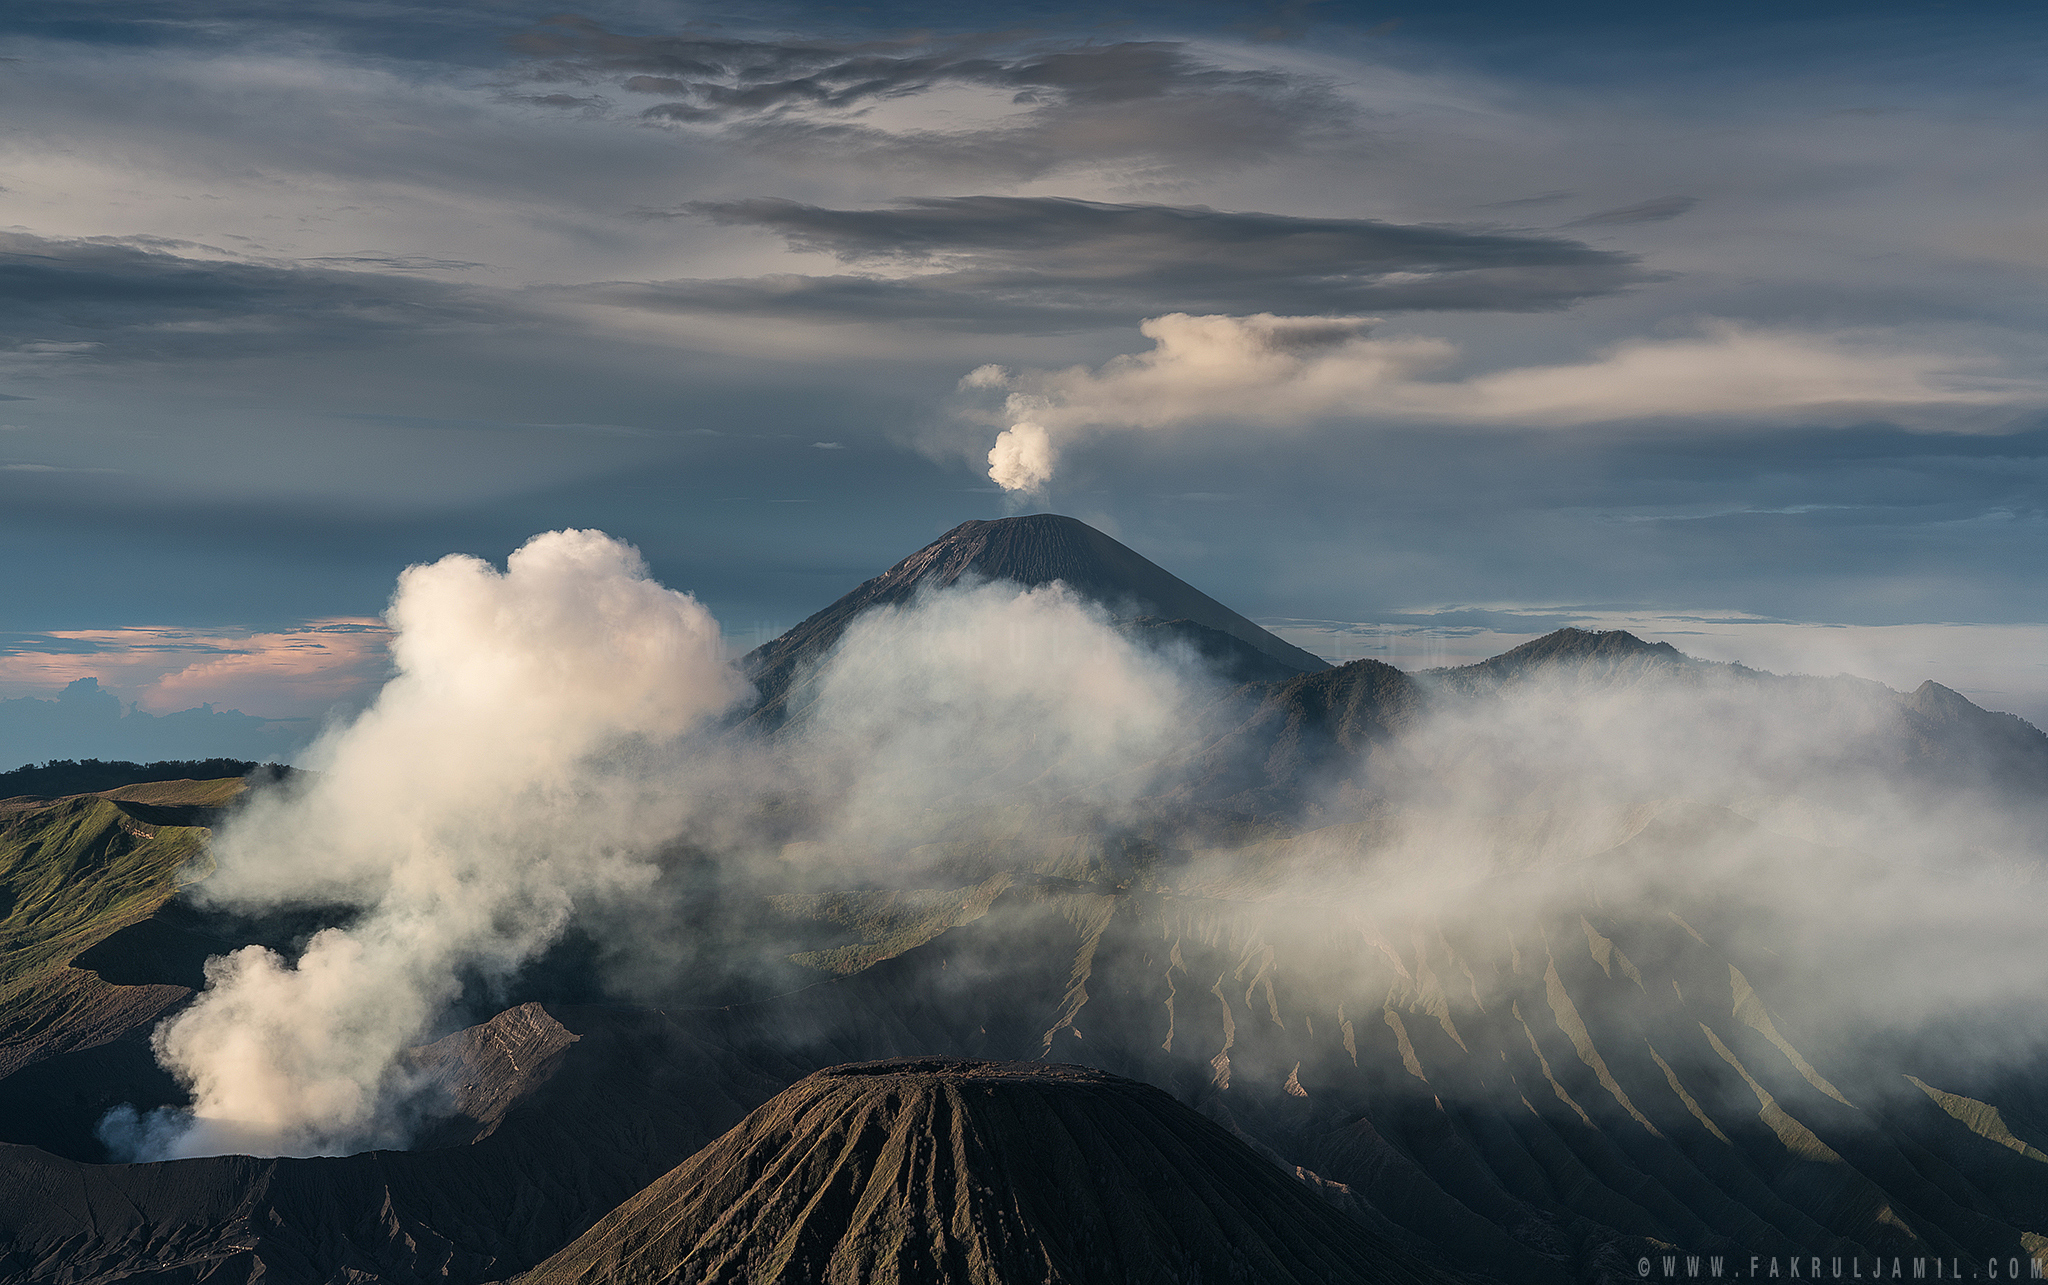
My other camera, Sony A7SM2 was running on timelapse mode and managed to capture the beautiful sunrise display changing rapidly. We waited for quite sometimes and I when I was about to pack all my gears, I saw this view of “The Great Mountain” of Mahameru standing tall behind Mt. Bromo.
Our next destination is to the Savannah Field. The place is actually a field of grass surrounded by the hills and is also one of the attraction when visiting the national park. But we encounter some problem when we are on our way to the location. It rained the night before so the track road gets a bit wet and muddy. Our 4×4 driver gets a bit clever and thought he could get through the muddy road. But in the end, he got us all stucked!
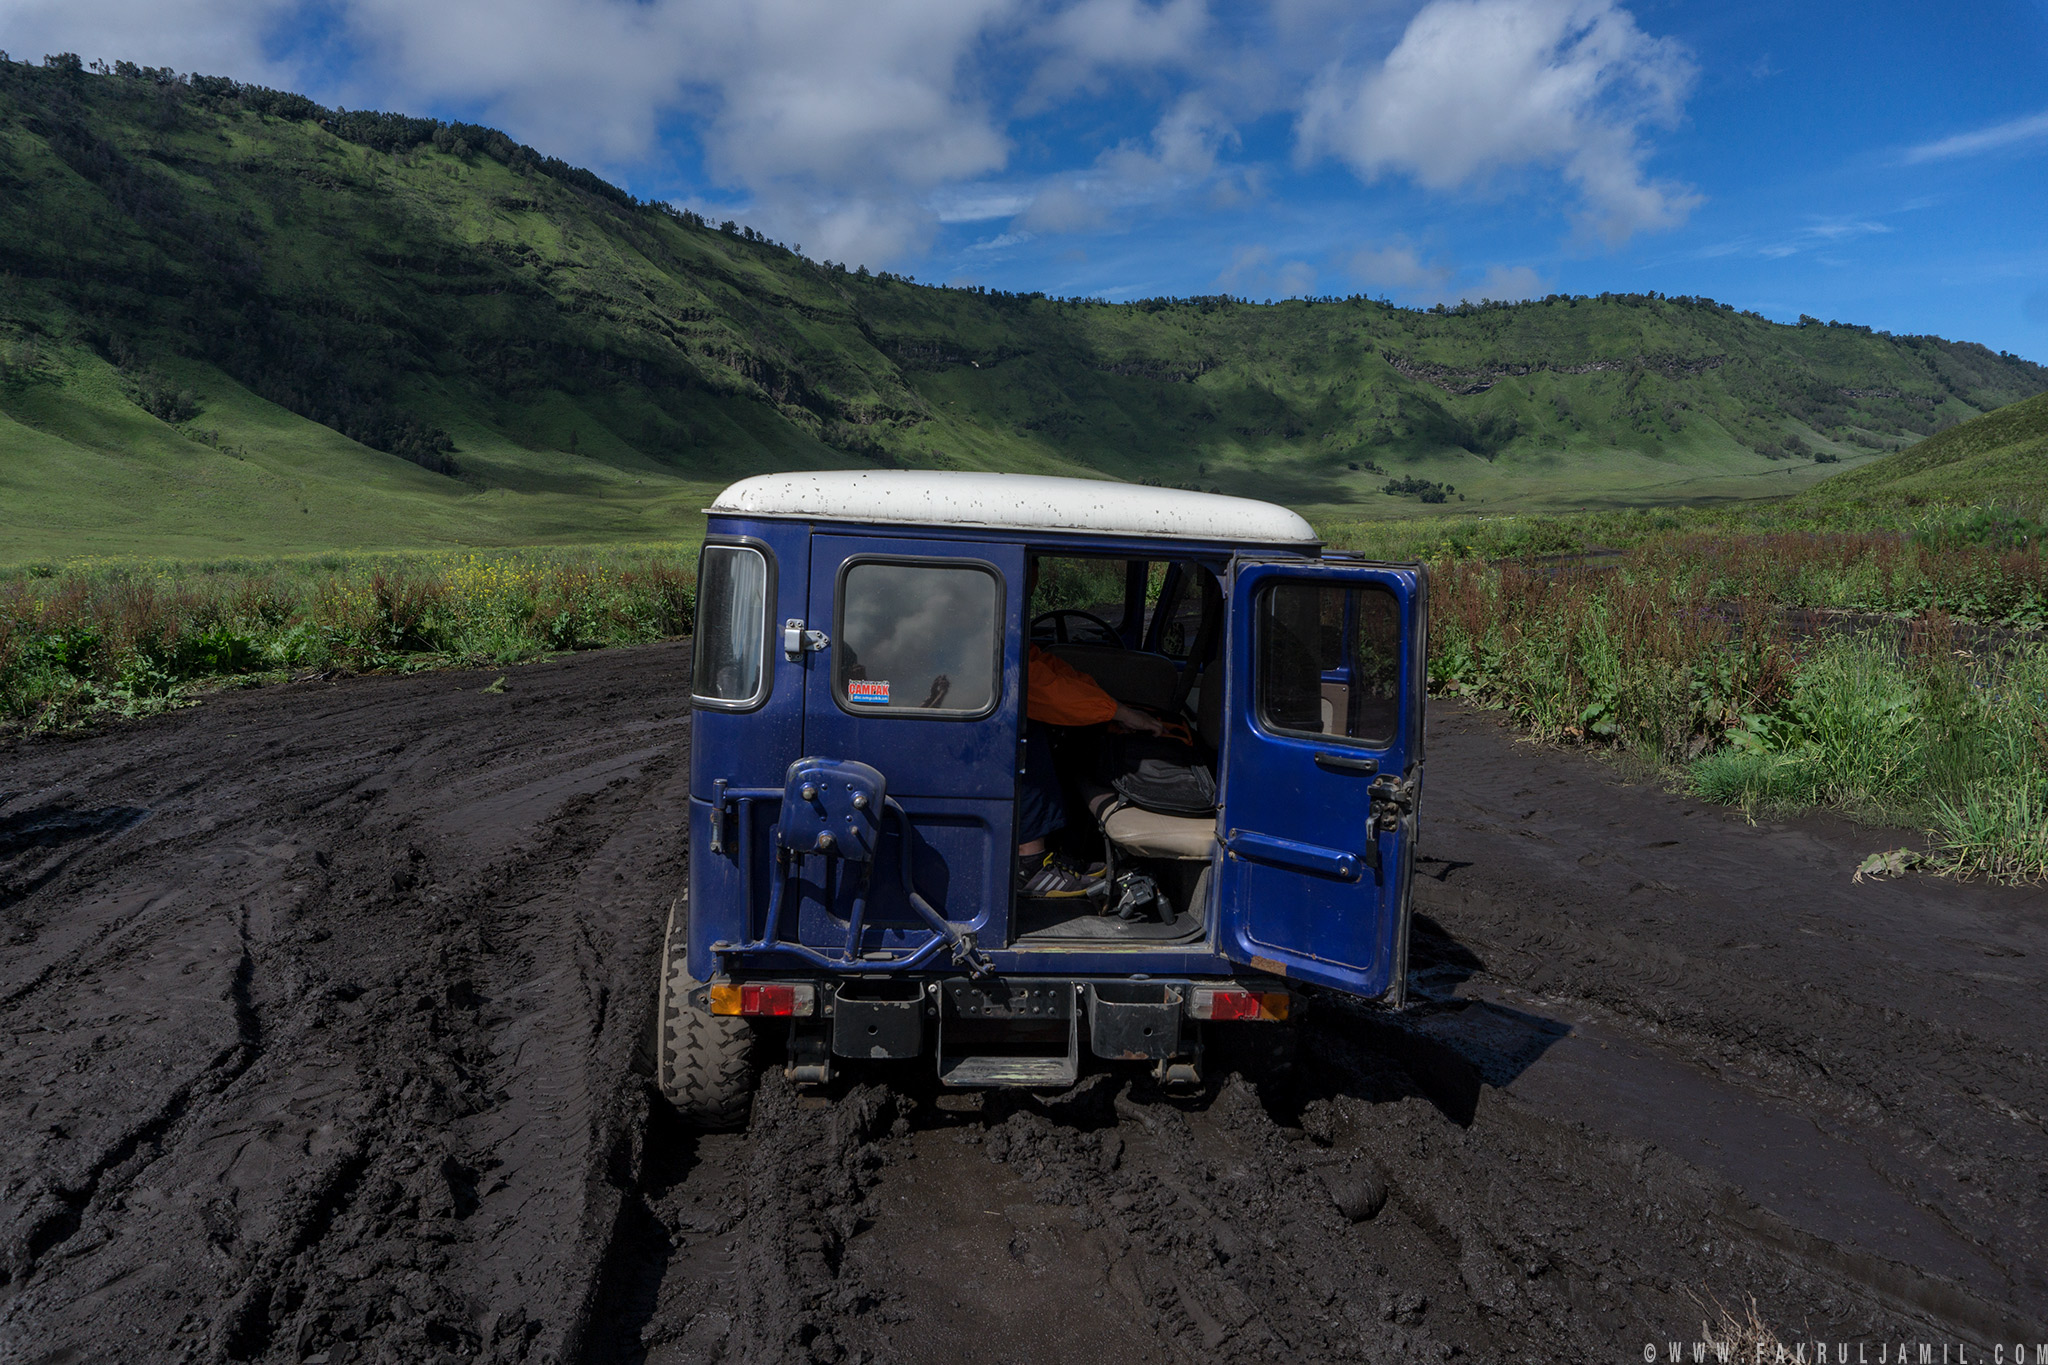
We had to abandoned our 4×4 and wait for another truck to pass by to get help. Turns out there were few other trucks that got stucked too.
After that, we continue our journey to Savannah Field. Its just a short drive to reach there. But we did not go all the way in as Pak Irsam took us to one of the best viewpoint (I guess) available in the park. It looks a little bit like the famous Dolomites in Italy. Except there is no huge mountains in the background. But I guess I can call this as Asia’s Dolomites…
And of course, a compulsory group shot. Credit goes to our guide, Pak Irsam. 🙂

After spending a few hours in the field, we head back to our hotel, Cemara Indah for breakfast and rest. The best thing about our hotel is, the view itself is facing Mt. Bromo. We had our sunset shooting just from the hotel lookout point. Here’s my camera running on timelapse mode.

Jemang and Pak Zahar admiring our hotel view. Azmi is out of the frame as he was standing slightly to the left of this photo. I guess he gets the best composition, or same.
This session wrapped our short visit to Mt. Bromo. The next day before checking out, we went out in the morning for quick shoot in Ngadisari Village. But, nothing much to share so I just skipped that. 🙂

Thank Sony Malaysia for the opportunity to shoot with the new FE 24-70 f/2.8 G-Master lens on this trip. The new lens has successfully kept my ultra wide angle in the bag most of the time. 🙂
I hope everyone enjoy this post and hopefully it will inspire you to get out and shoot. Feel free to share and spread the love for landscape photography!
Until my next post, assalamualaikum wr wbt. 🙂
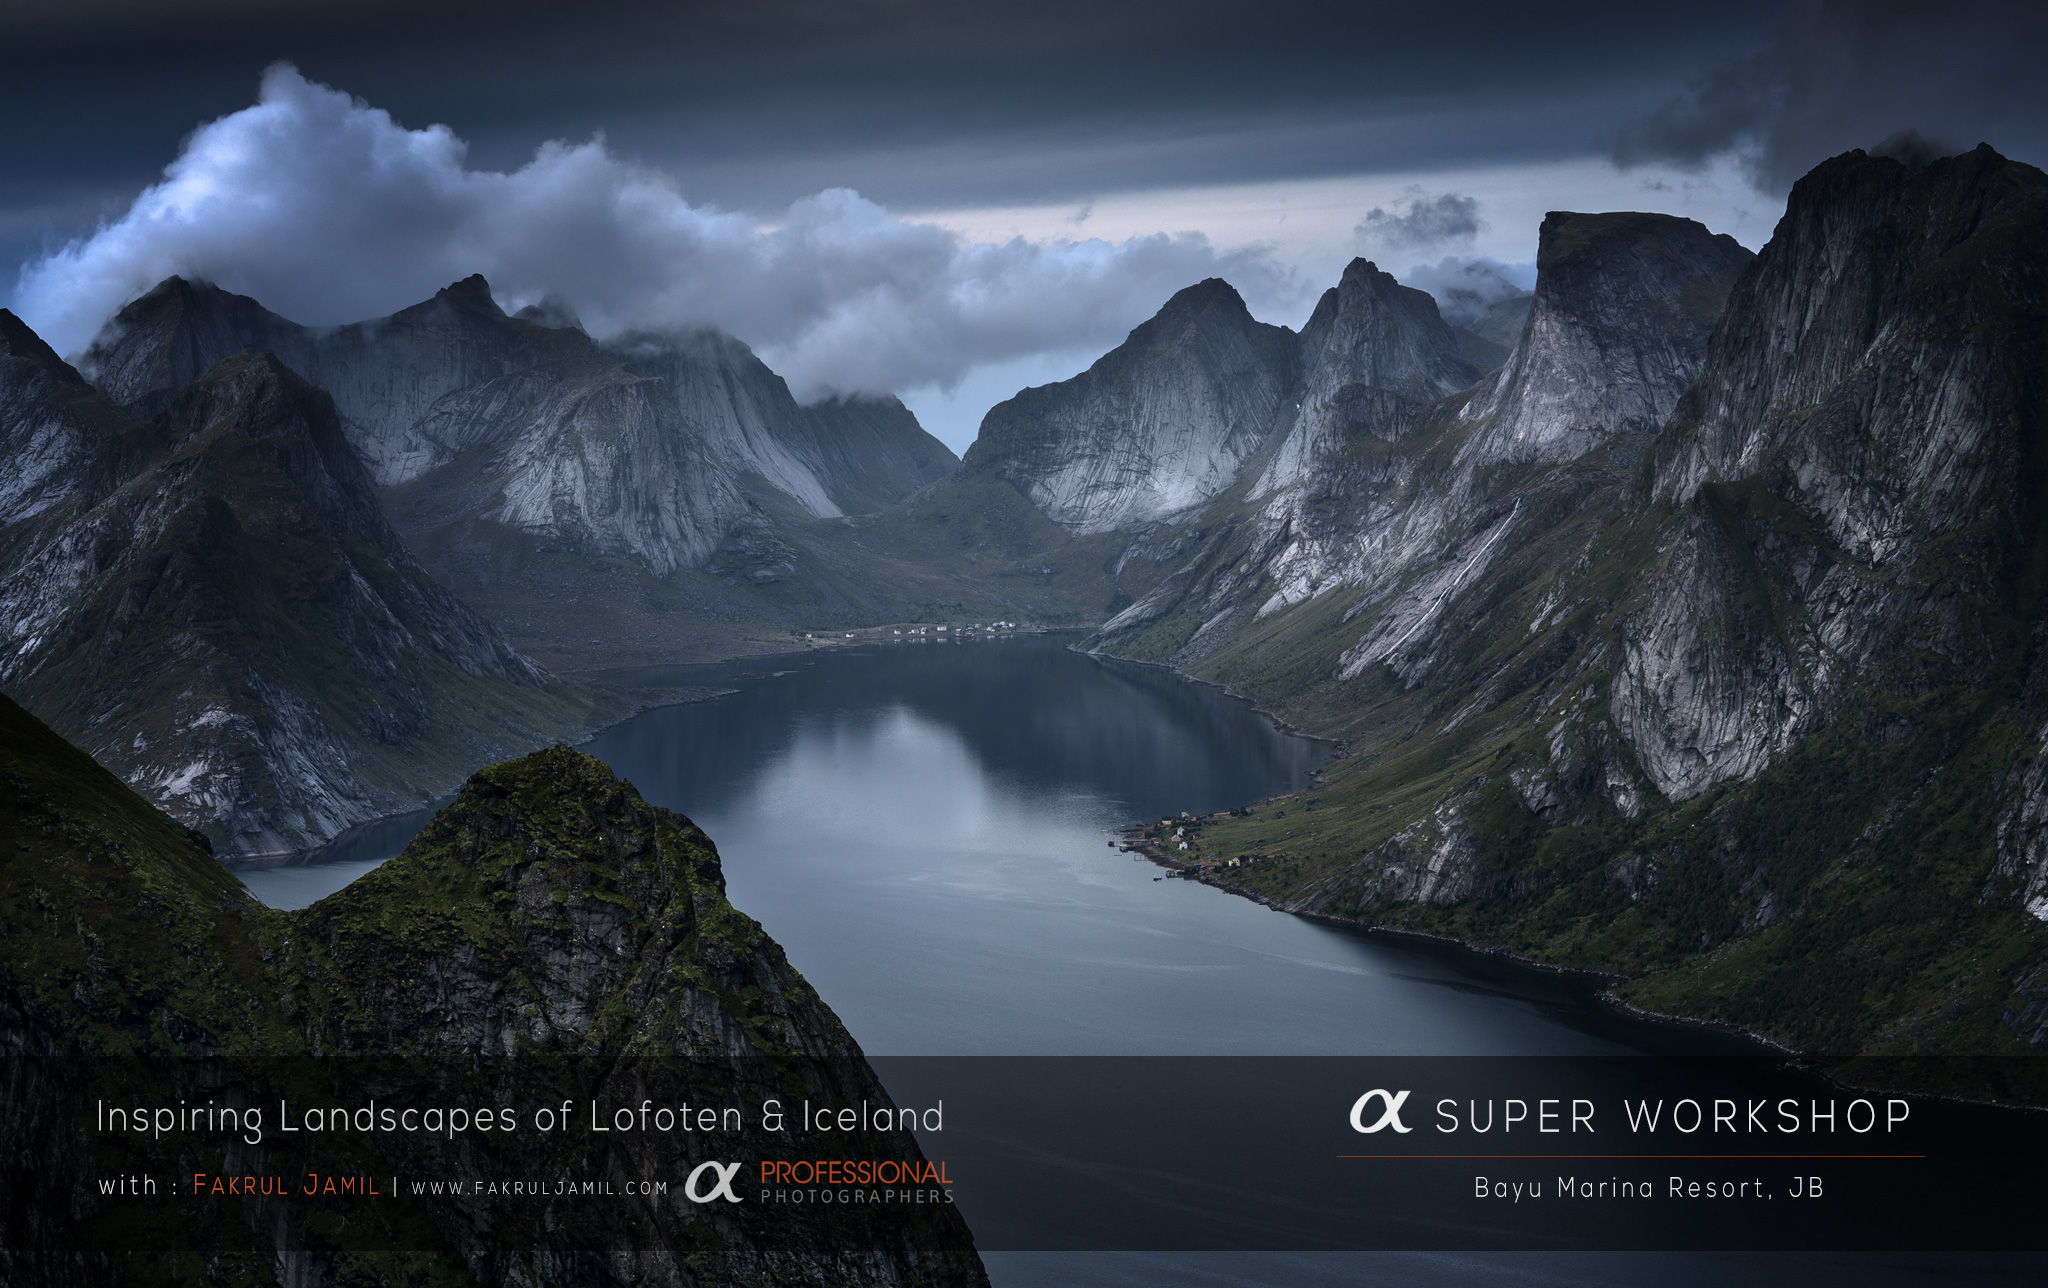
Hi guys! So Sony Malaysia’s biggest annual photography workshop, Alpha Super Workshop is coming up next week on the 5th and 6th of November 2016. I’ll be speaking about ‘Inspiring Landscapes of Lofoten & Iceland’ on the last day of the workshop.
If you interested to join, more details on the event page: http://bit.ly/AlphaSuperWorkshop2016. Look forward to seeing you guys there!
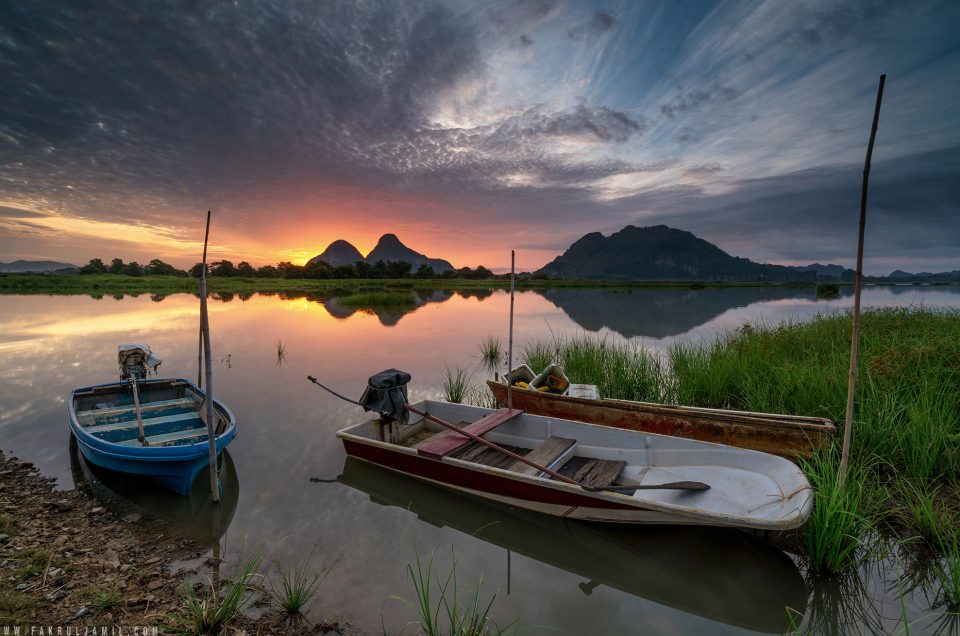
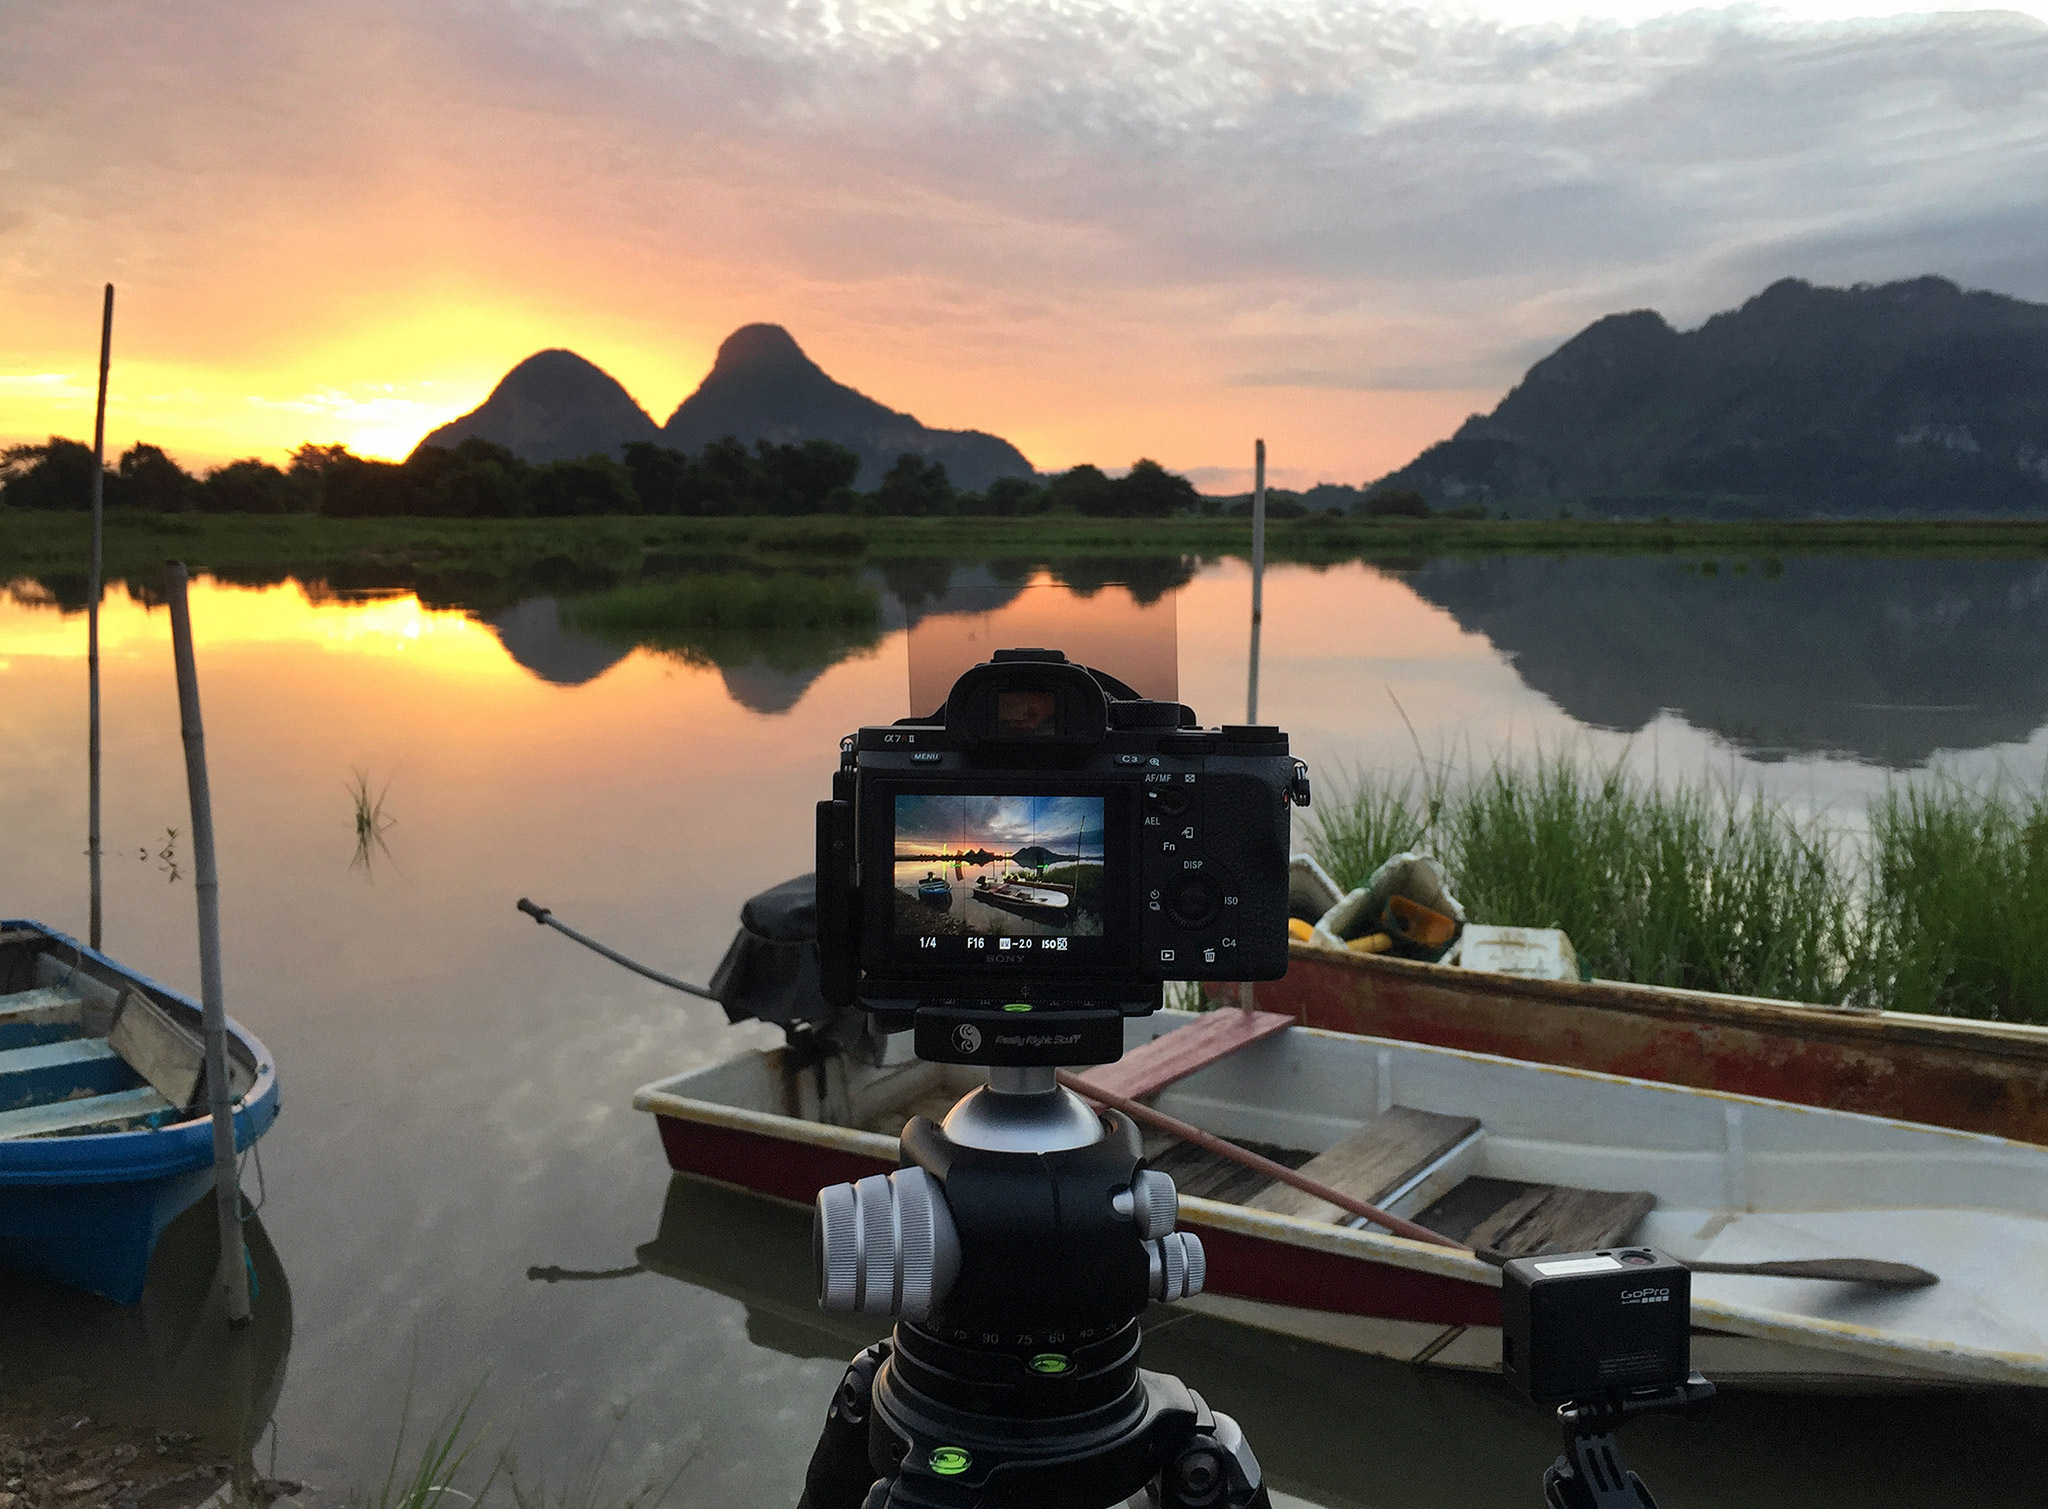
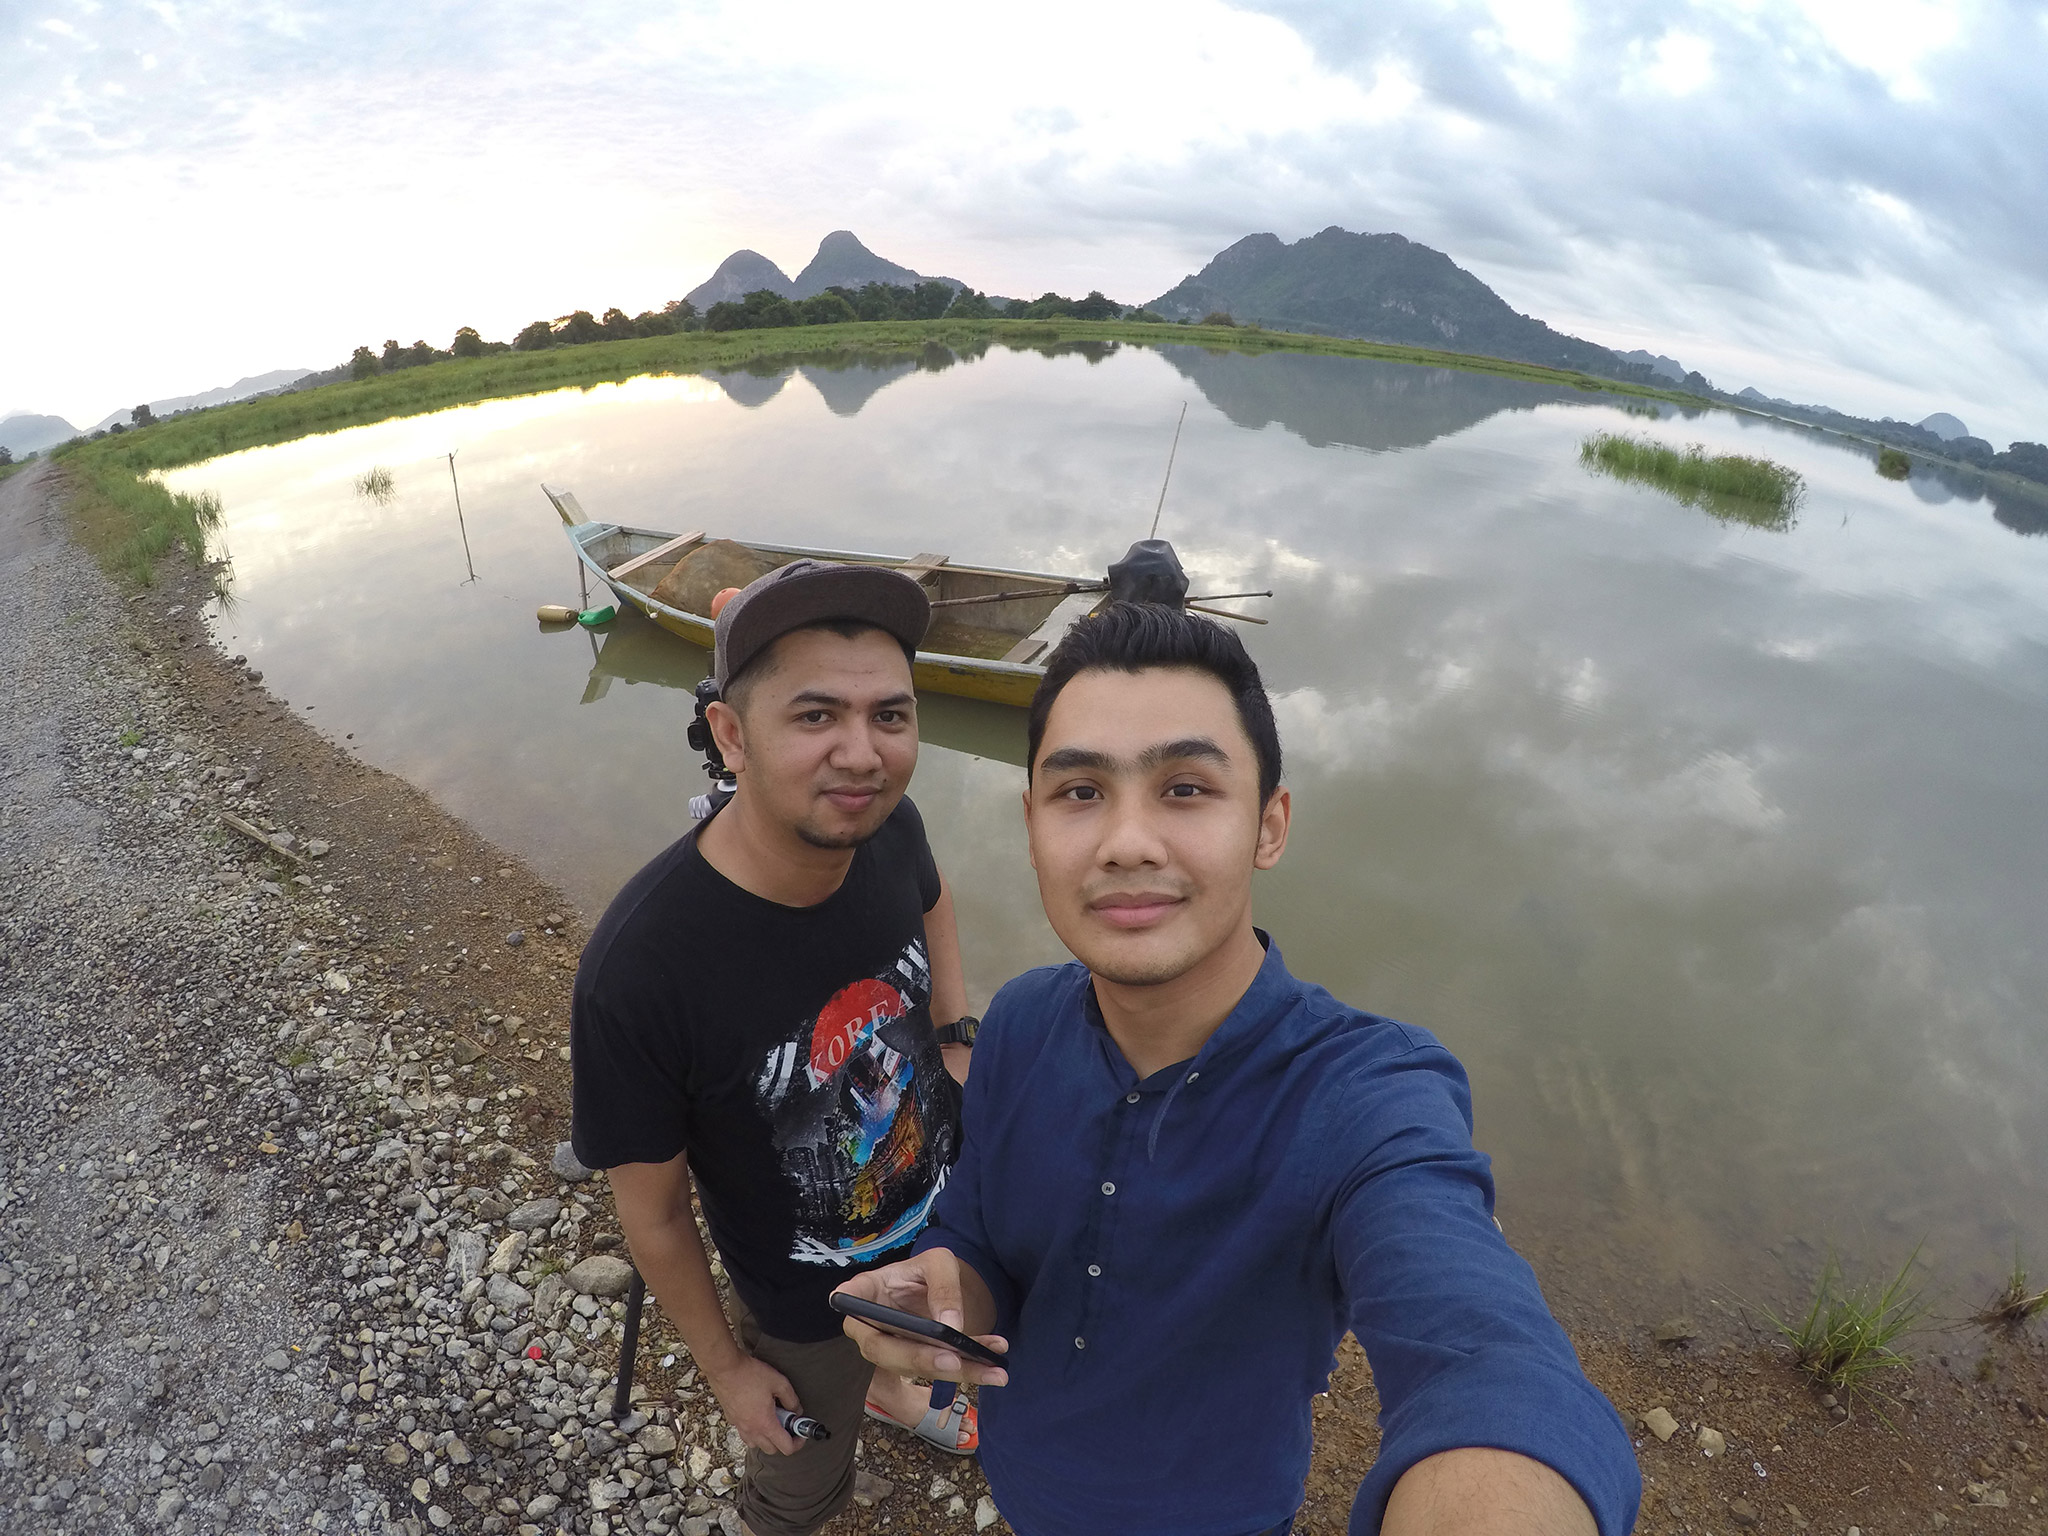
Hi everyone, how’s your weekend so far? ☺️ So this post would be dedicated to my second outing when I was in my hometown during Raya break. The outing took place a few days after Raya celebrations, where originally I was invited by a friend to join him to shoot the sunrise at Timah Tasoh Lake.
I’ve been to this place before (this is my second time) but it was a total failure because the whole area was covered with thick fog which was quite unusual according to the local fisherman whom I met at the lake. That’s why I’m so eager to return to this place again hoping to see the “Malaysia’s Guilin“. Luck is with me on my second time to this location…
Panorama with my iPhone
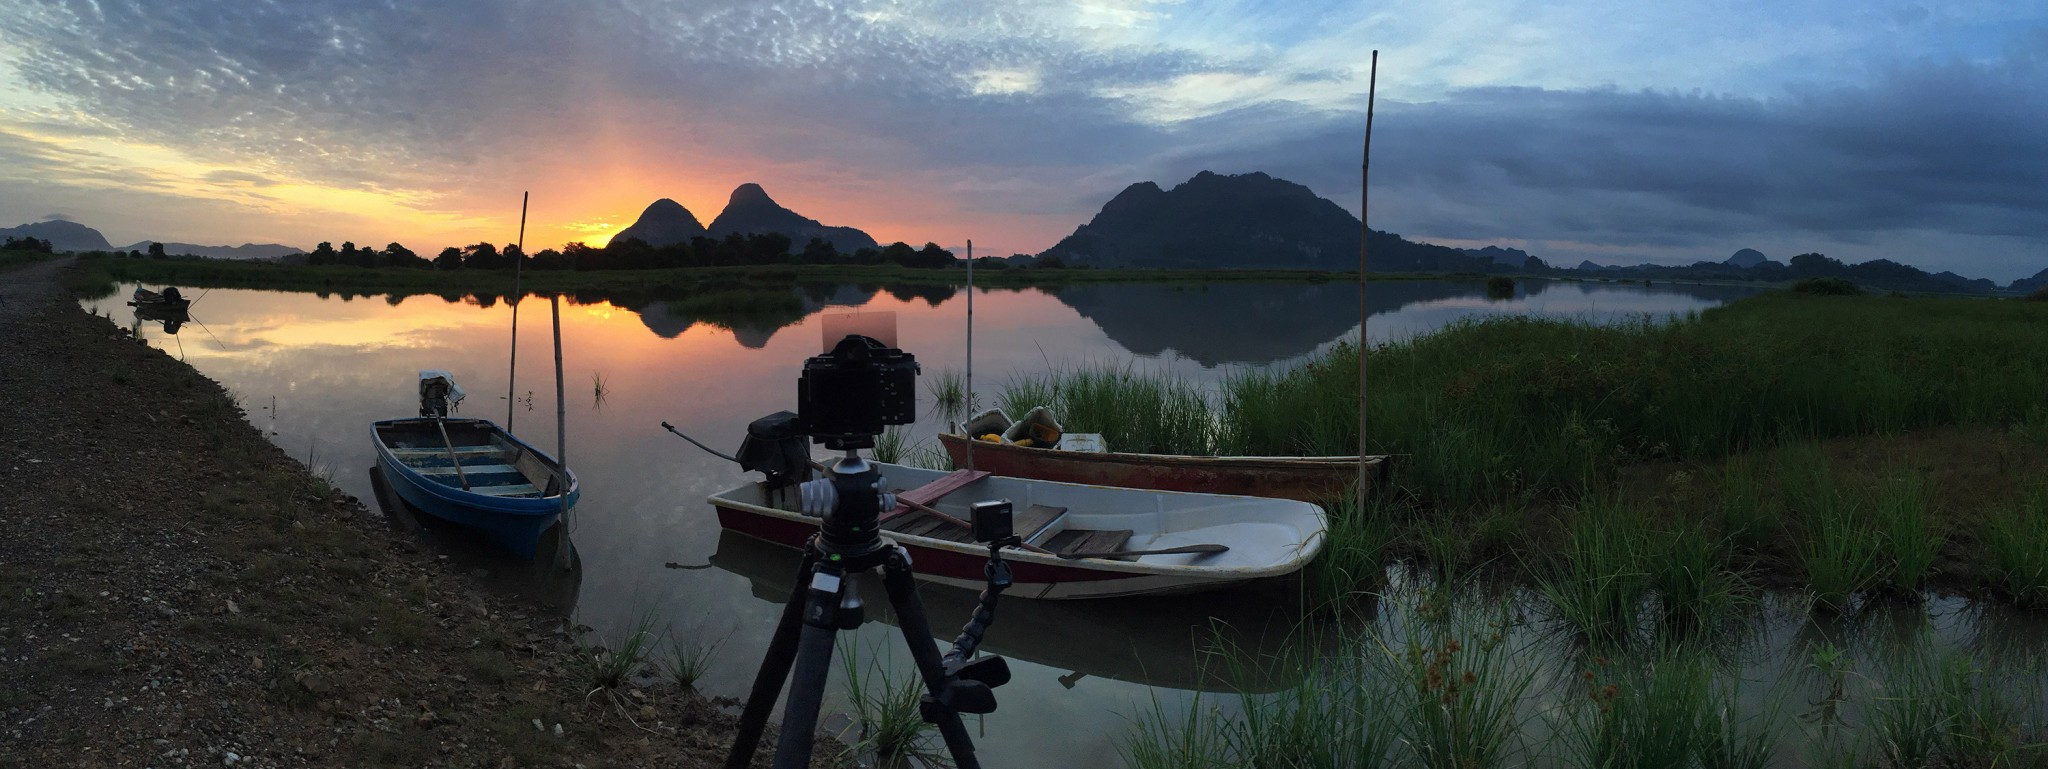
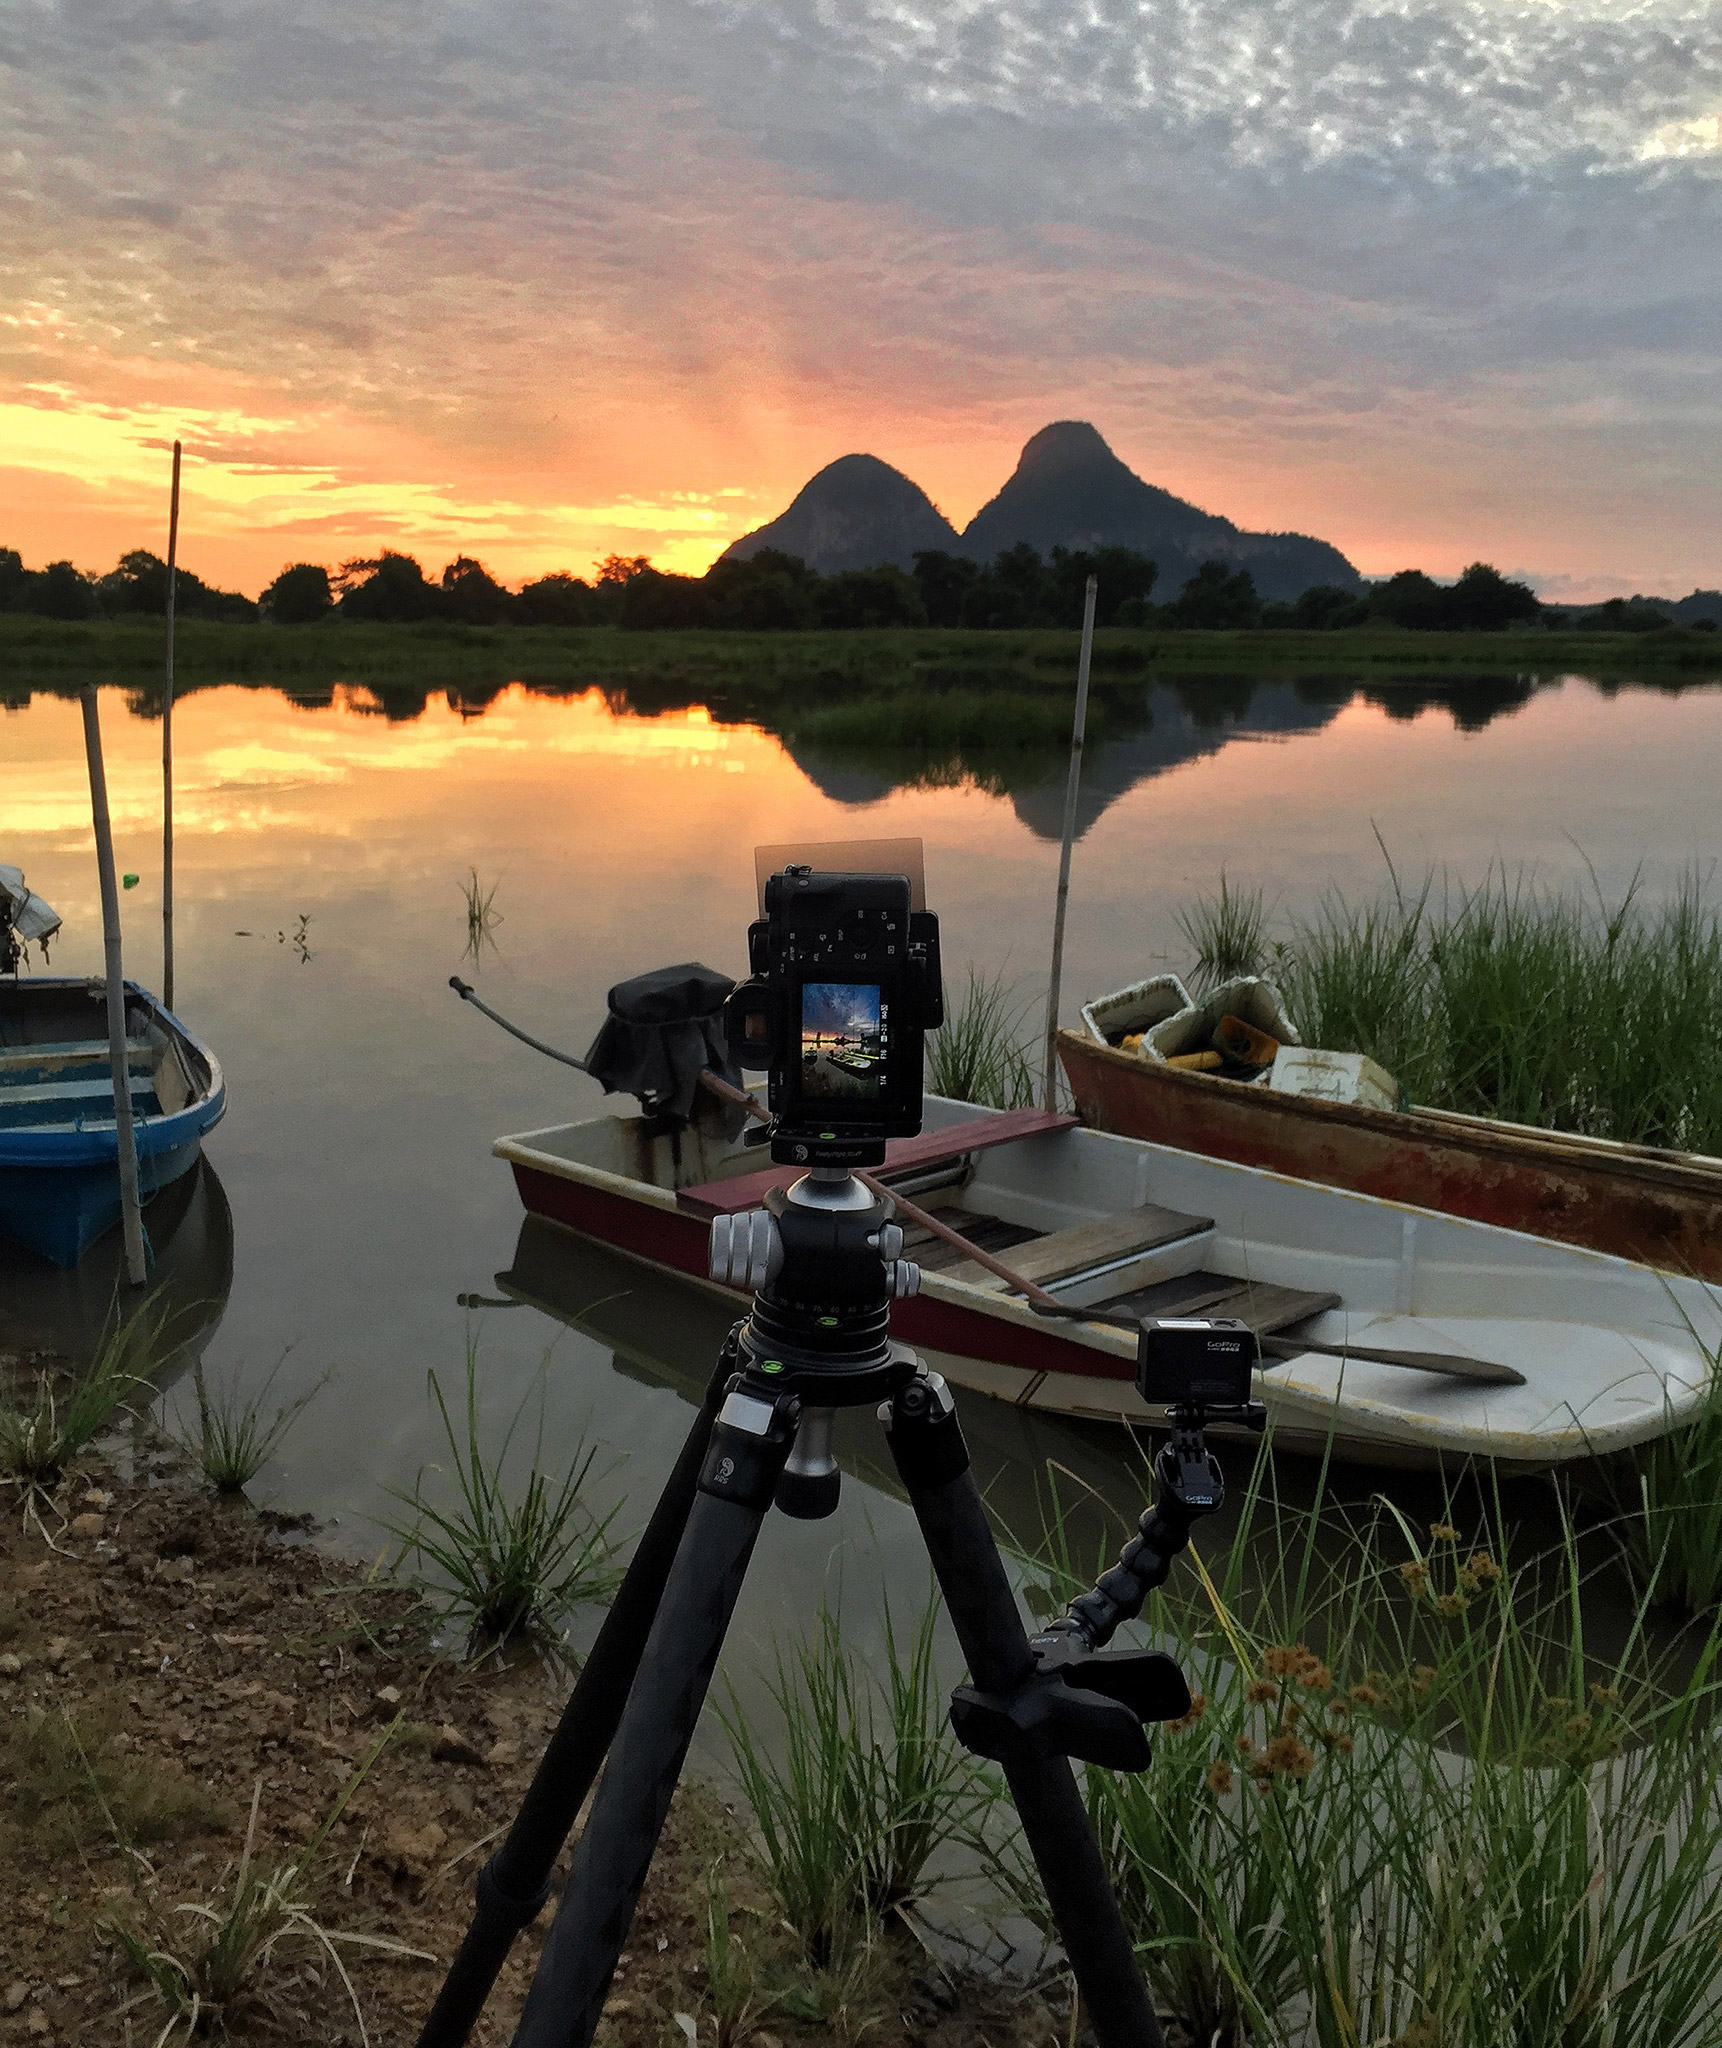
Arriving to the spot, I notice that the lake is getting very shallow and parched compare to my last visit. Had to go slightly to the middle of the lake to reach the lake shore where it’s usually filled with water. Anyhow, it was a very promising morning. Check out some of behind the scene shots below taken with my iPhone.
The sun never rose, but the beautiful light behind those mountain lasted about 5 minutes and it’s more than enough for me. In landscape photography, you just have to be grateful and learn to appreciate whatever that you were granted with. Sometimes you don’t want to be too hopeful and put too much stress on your shoulder otherwise it will later disappoint yourself…
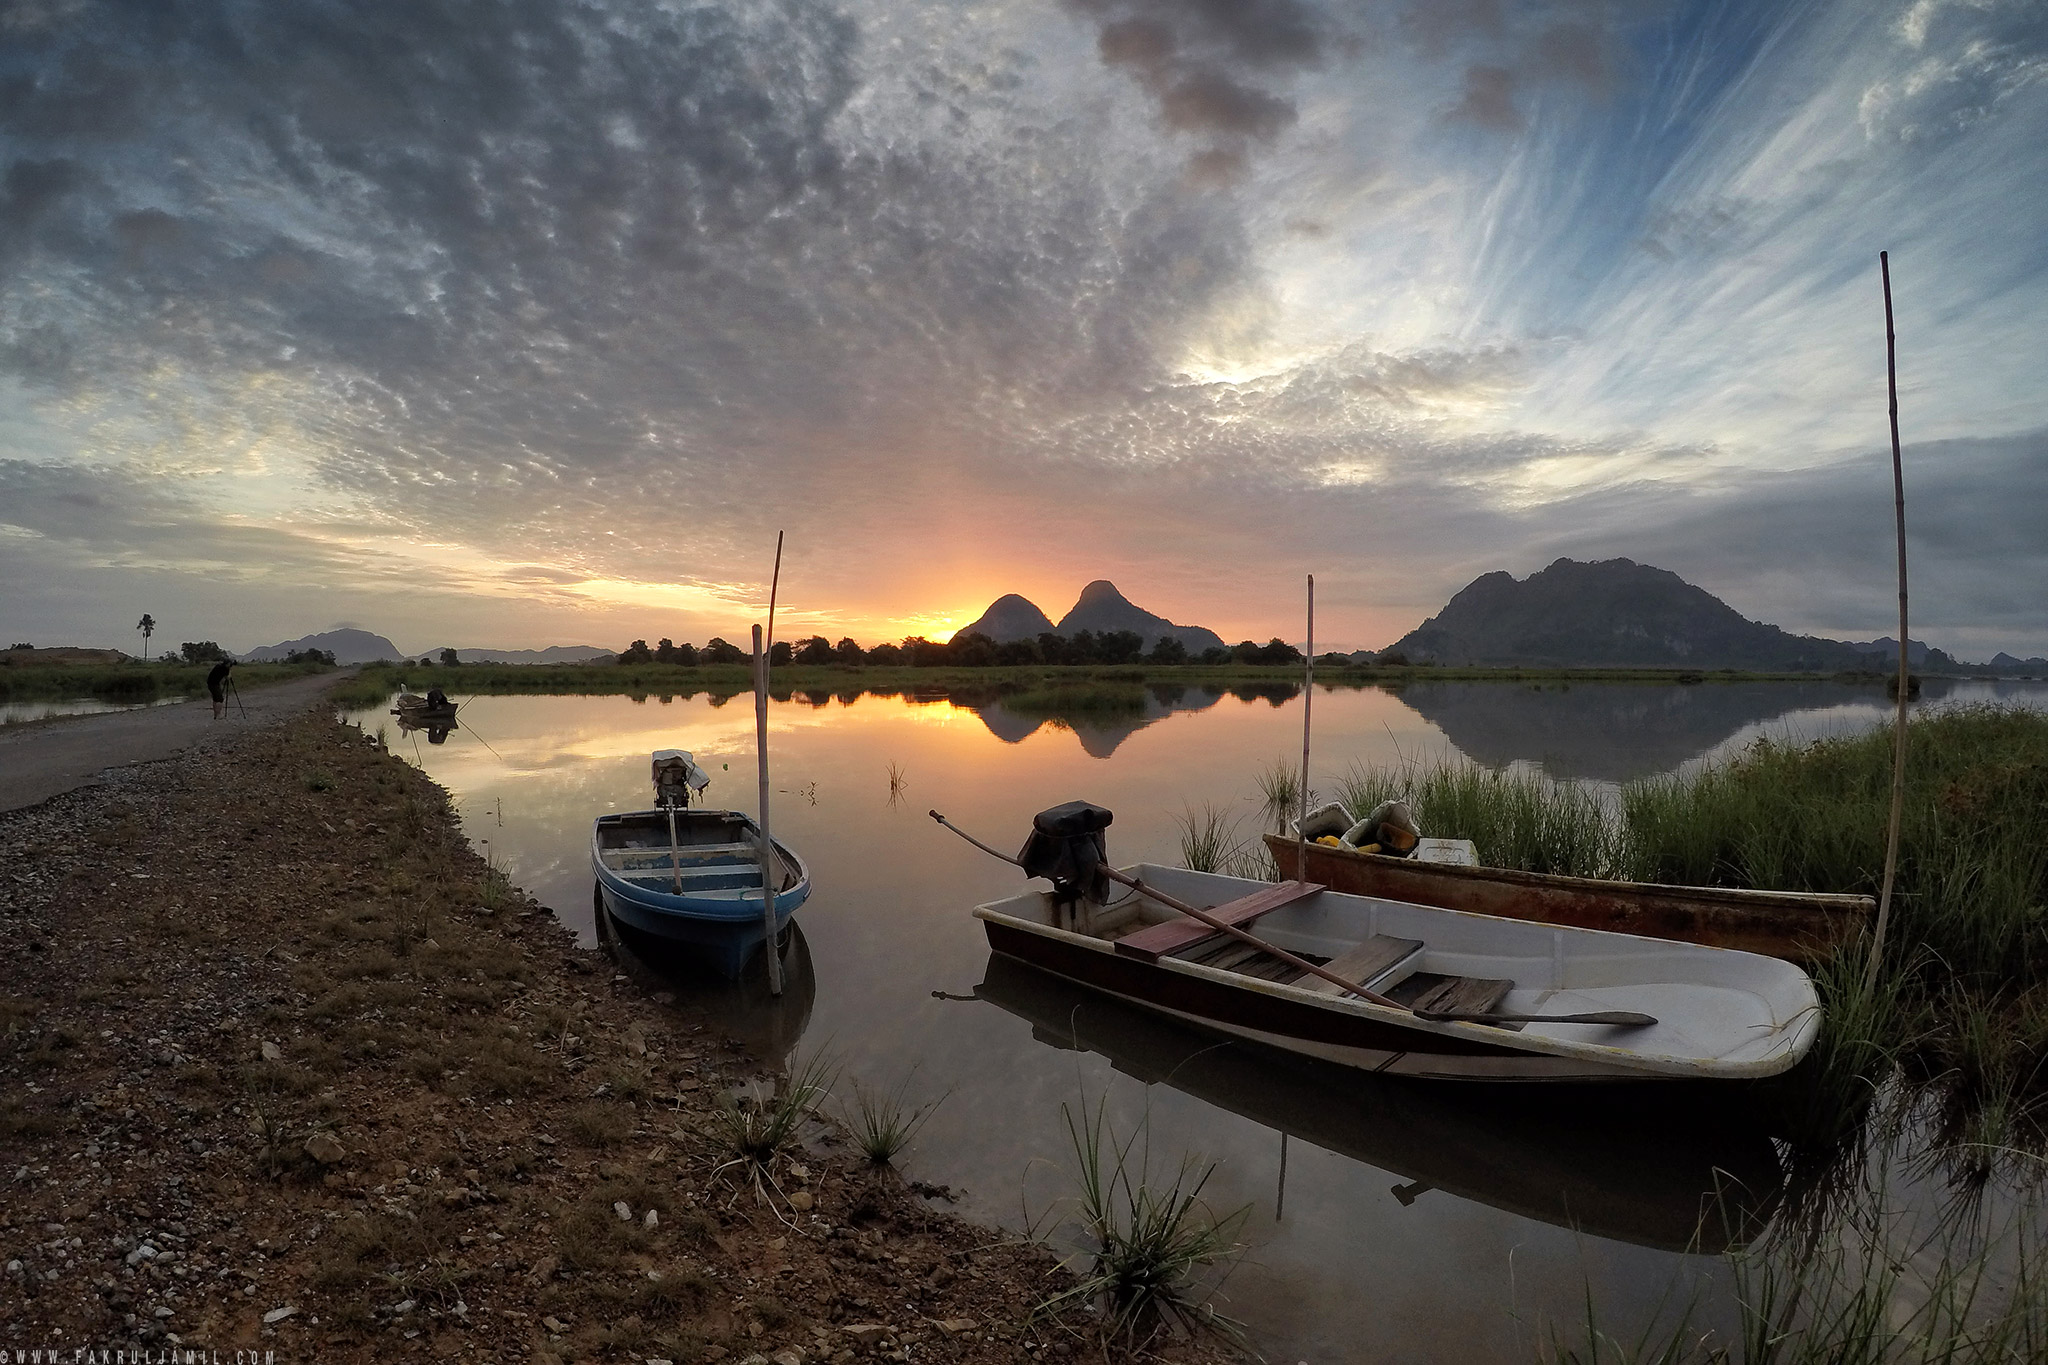
and last but not least, the result from that morning…

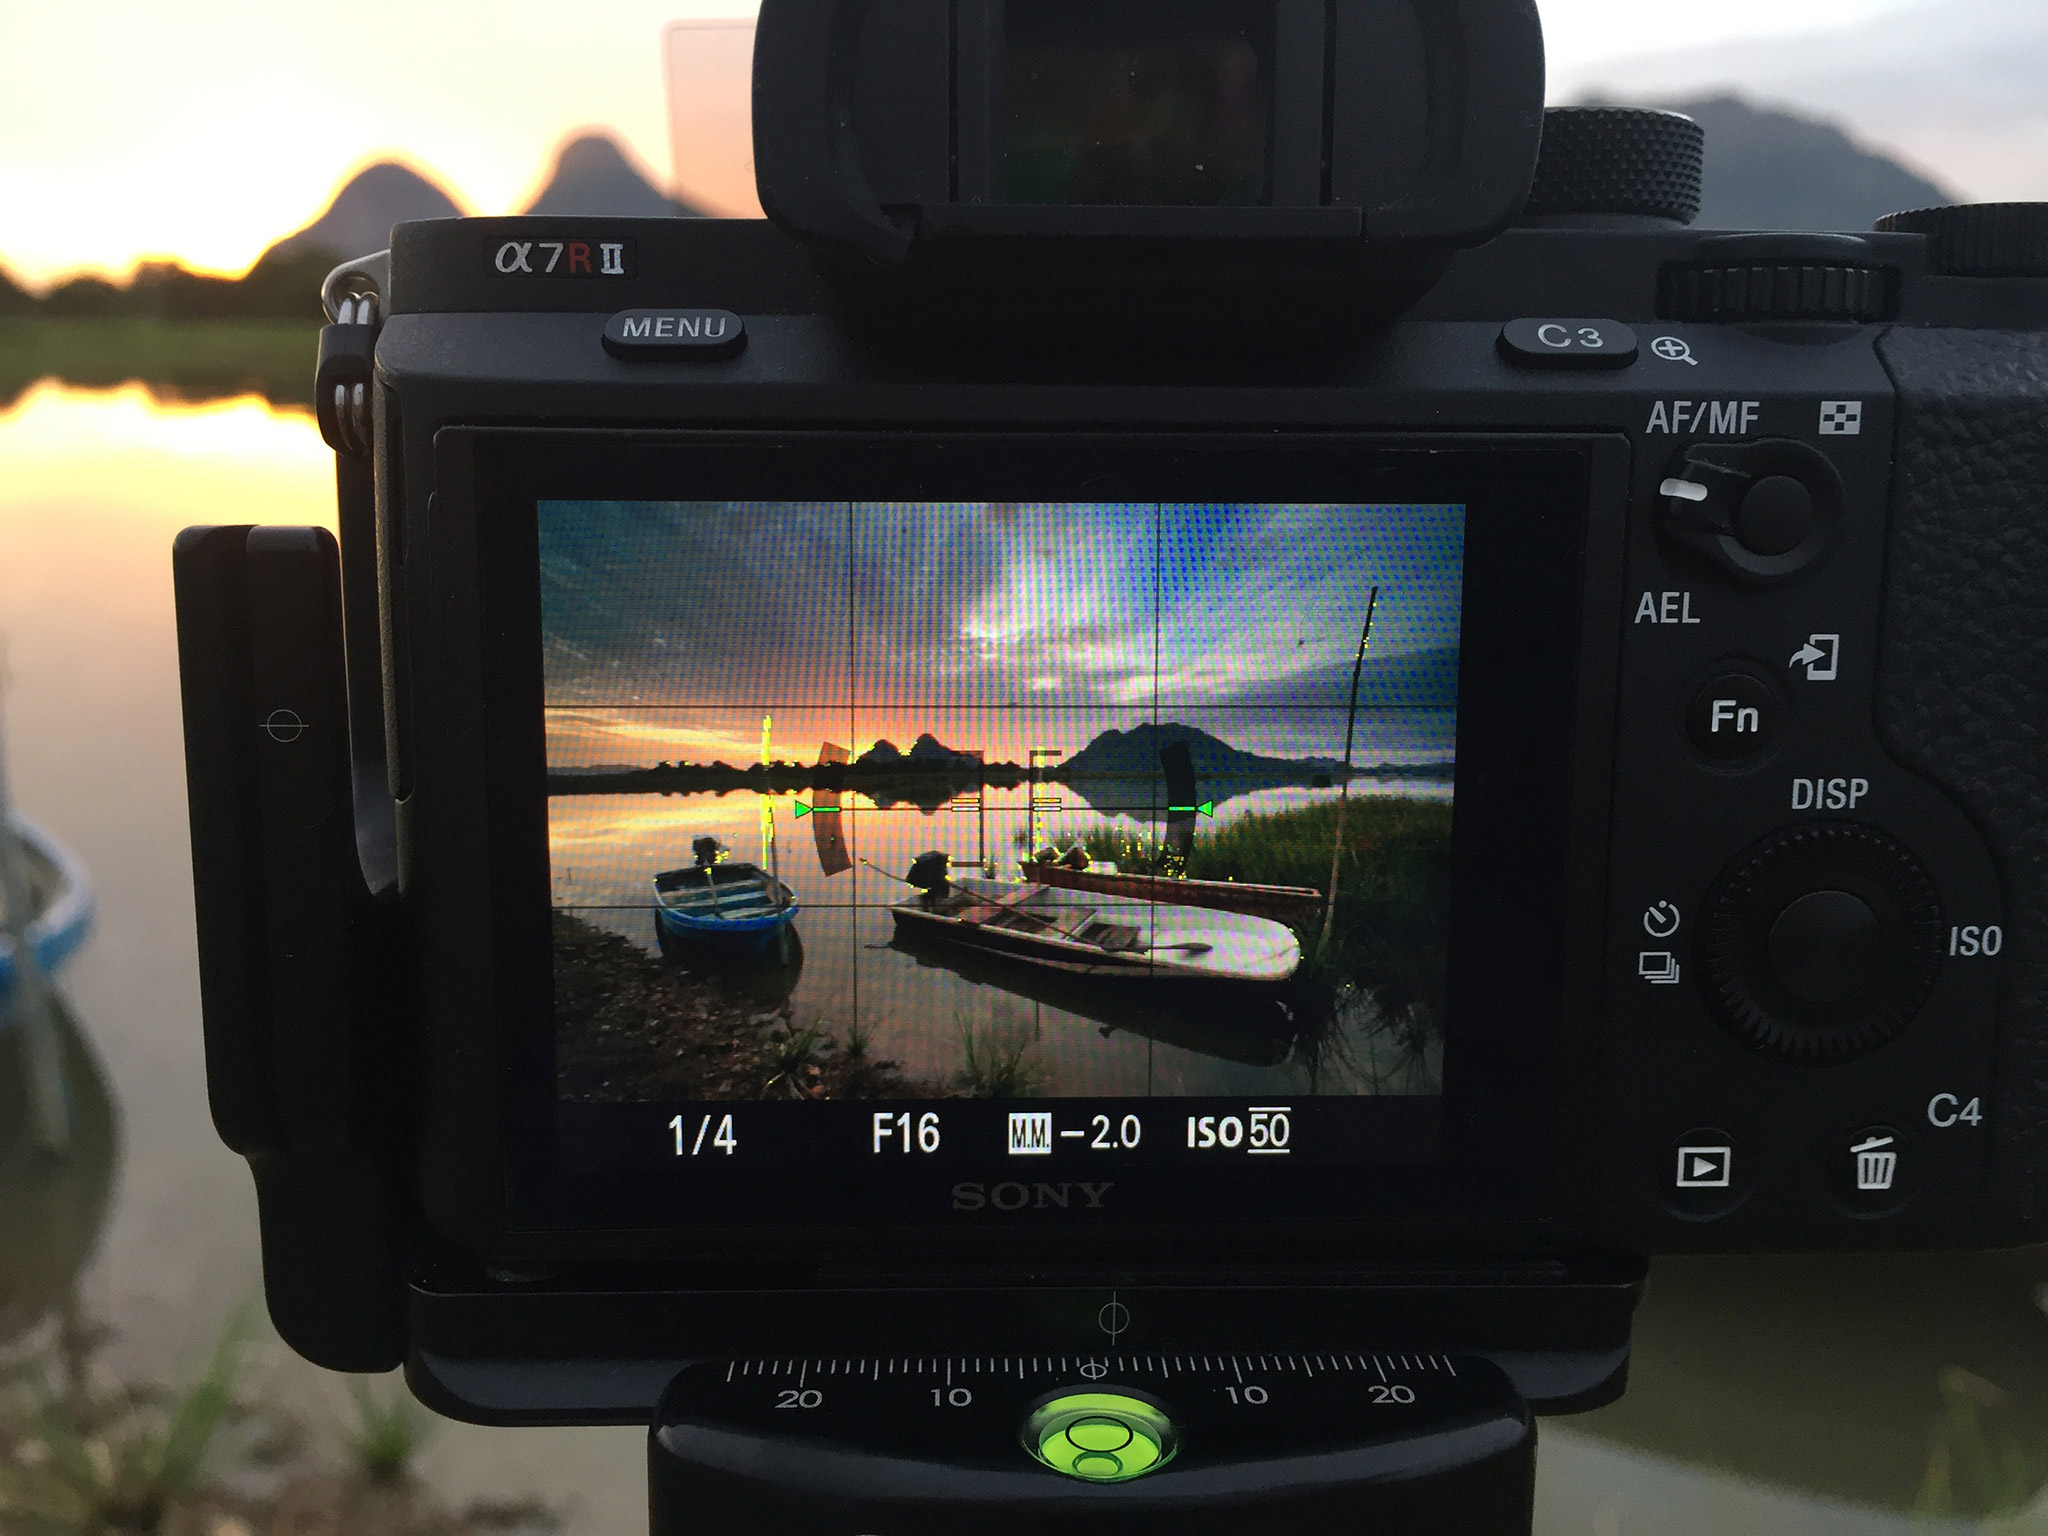
Sony A7R Mark II + FE 16-35 mm F4 || © Fakrul Jamil Photography.
Thank you for your time. Until my next post, wassalam.. 🙂
Hi everyone! I hope its not too late to wish Selamat Hari Raya, Maaf Zahir & Batin to those who celebrating Aidilfitri and I would like to apologize because it’s been a while since my last entry. I really want to write something, just couldn’t find time to do it, I guess.
So last week I went back to my hometown in northern side of Malaysia for Hari Raya. The last time I went back was during Christmas break last year. Can you believe that?! Too busy with work, travelling here and there. But its good to be back!
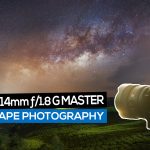
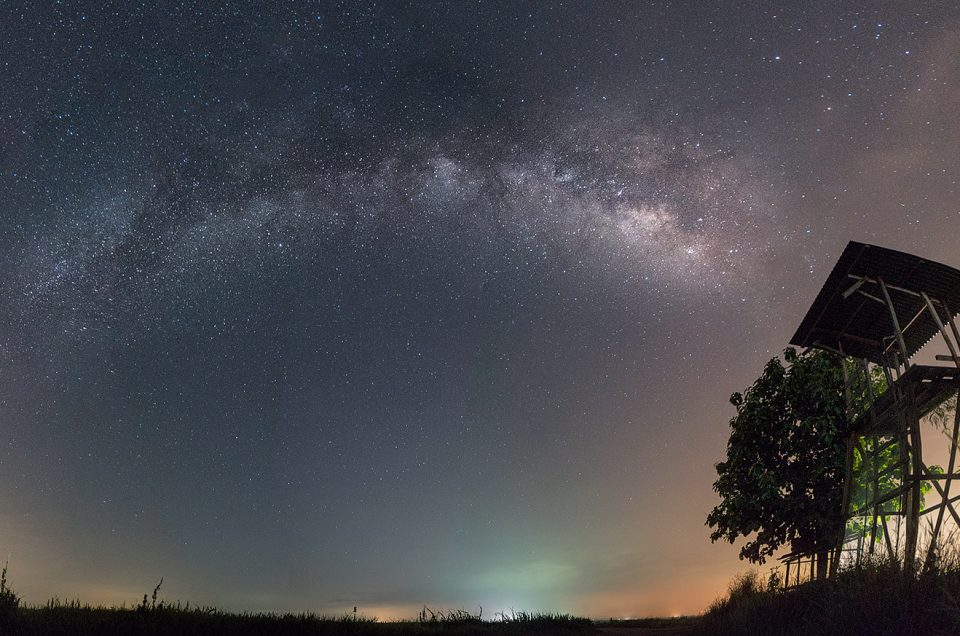
I went back a few days ahead of Aidilfitri. I have some free time to wander around and I plan to shoot the Milky Way before. The timing was just right as the moon phase just shifted to the new moon making the sky is dark enough to see the milky way. The idea was to shoot it somewhere around “Ladang Tebu Chuping” which was located in Perlis as the location have a very minimal light pollution making it suitable to do astrophotography.
The journey from Alor Setar is around 1 hour of driving. I went there with a friend and upon arriving to the location we saw the sky was partially covered with clouds but there was some stars still visible. We drove further into the darkness and until one point, we can see the milky way with our naked eyes…
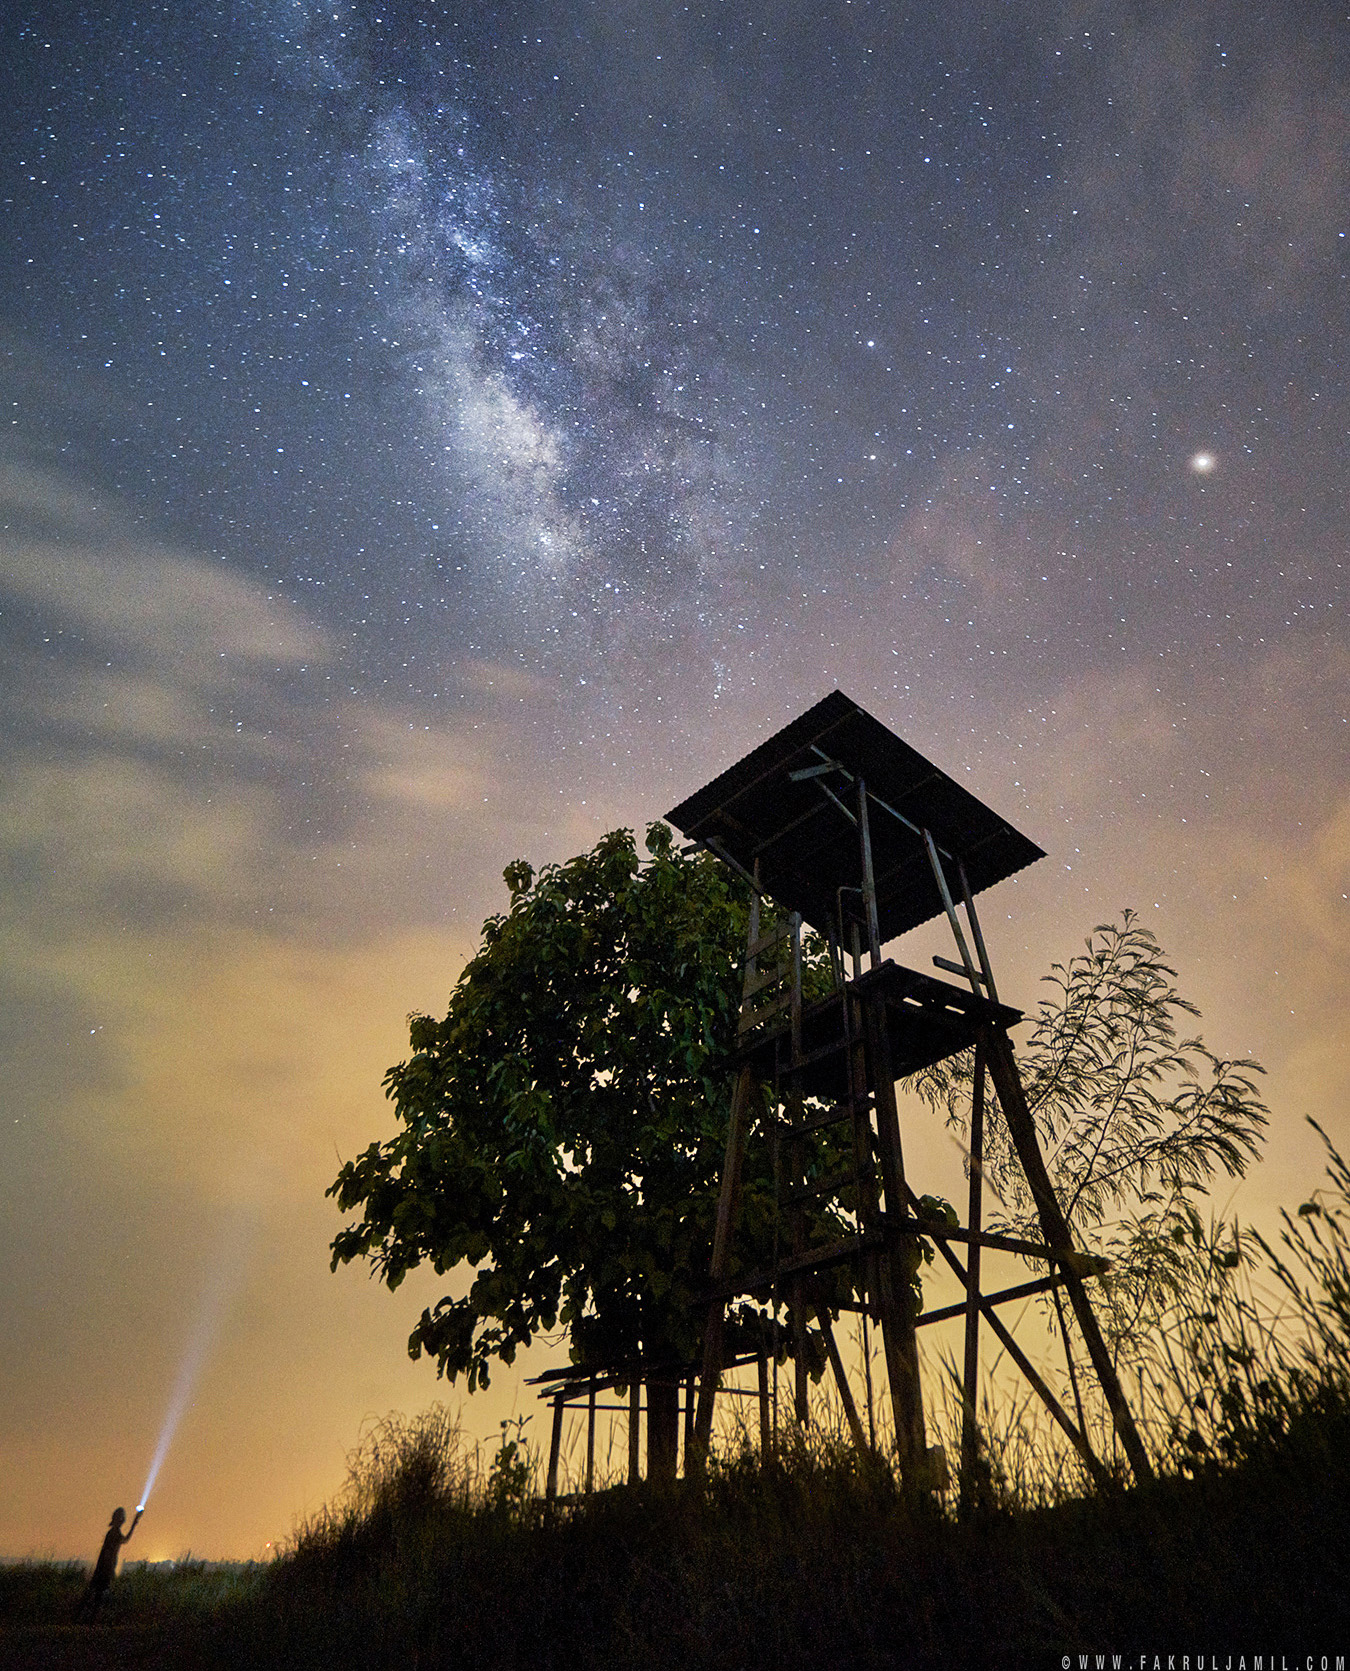
The Lightsaber | Sony A7R Mark II + FE 16-35mm F4 ZA OSS
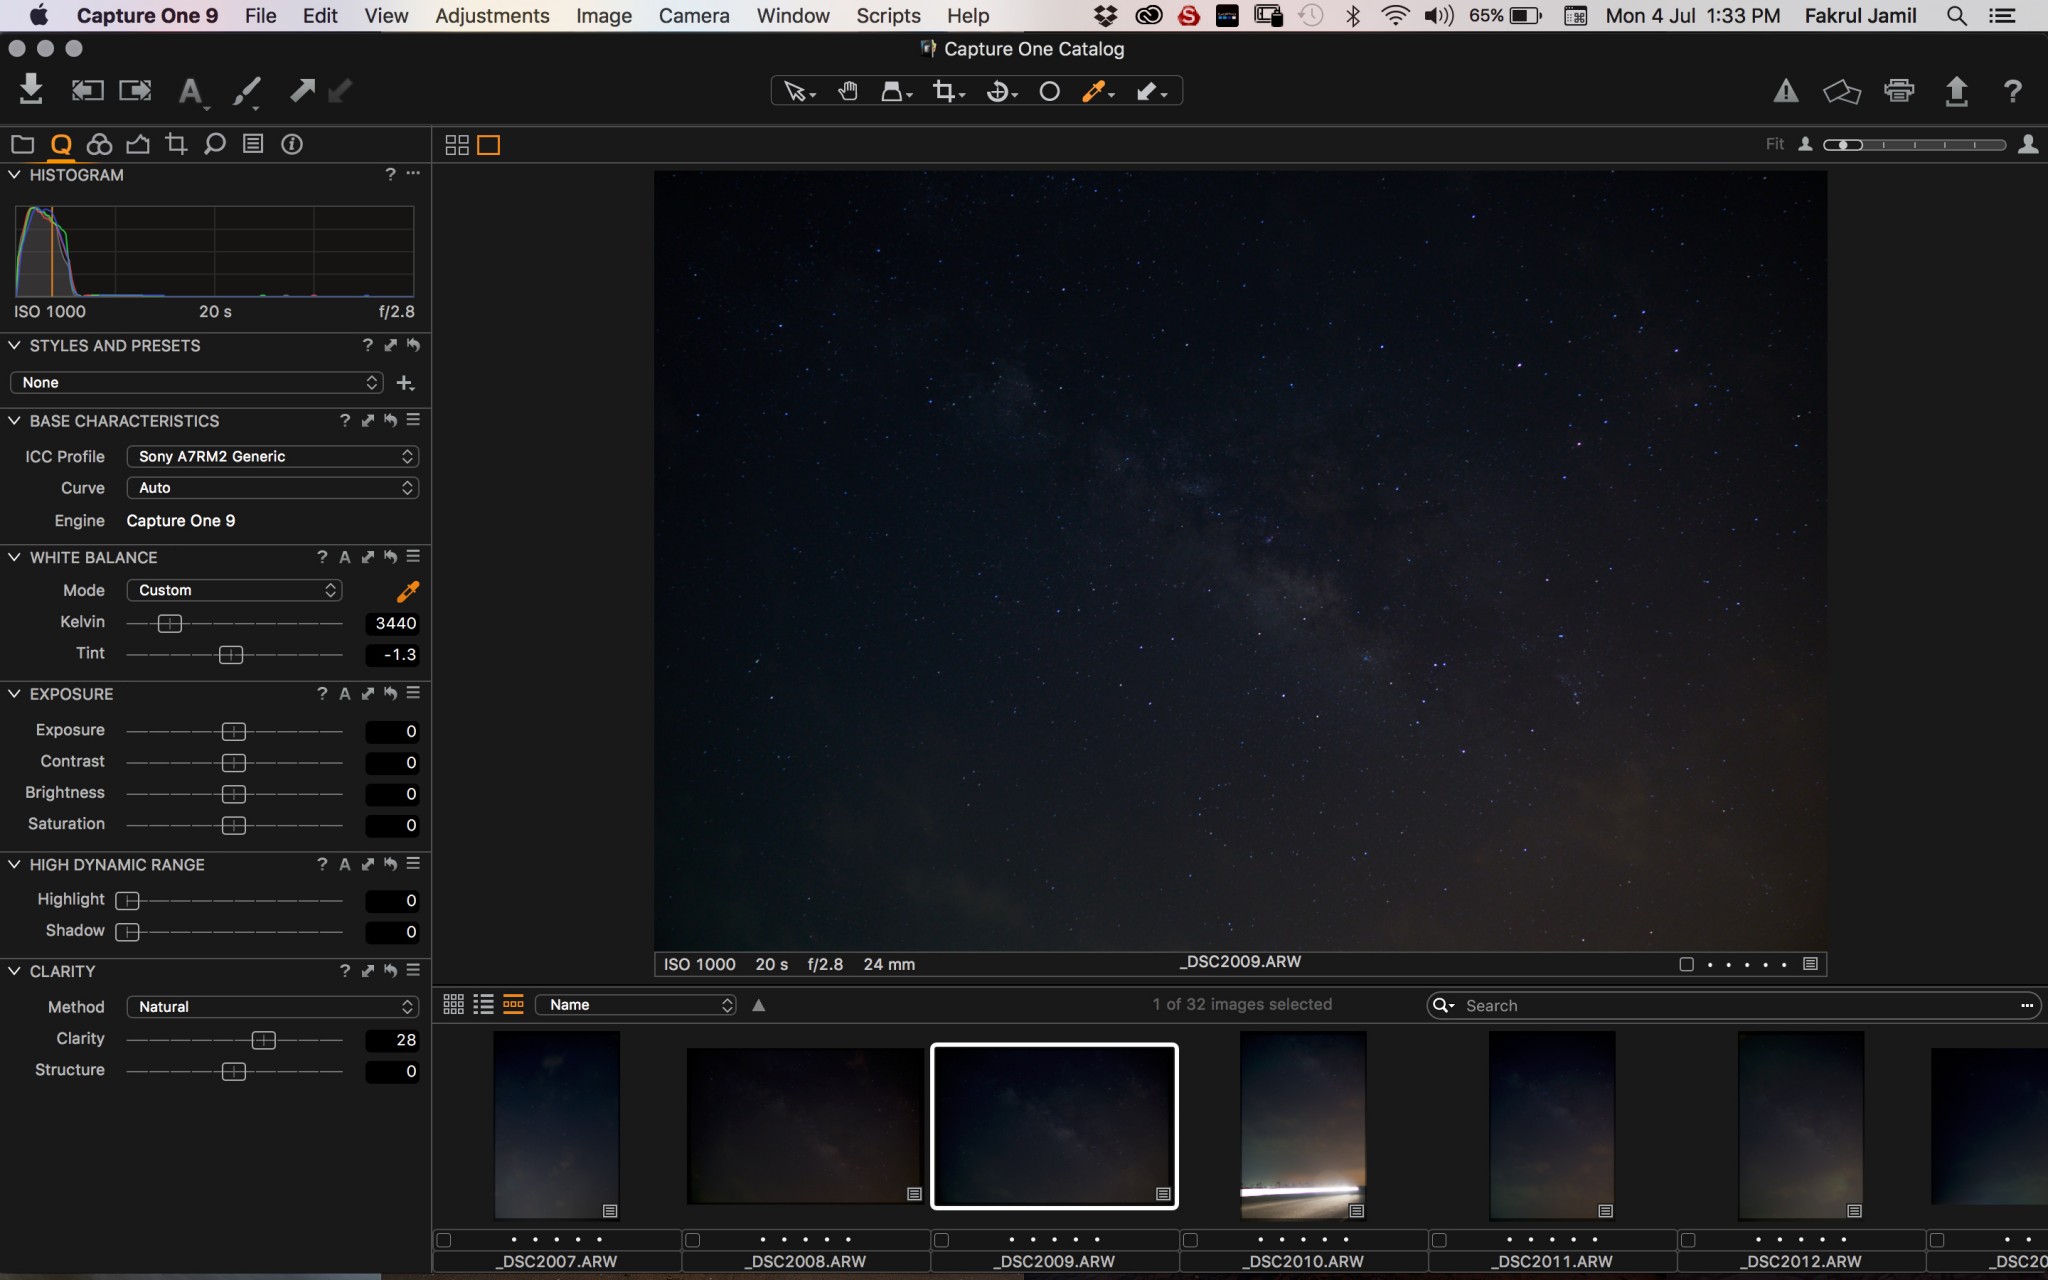
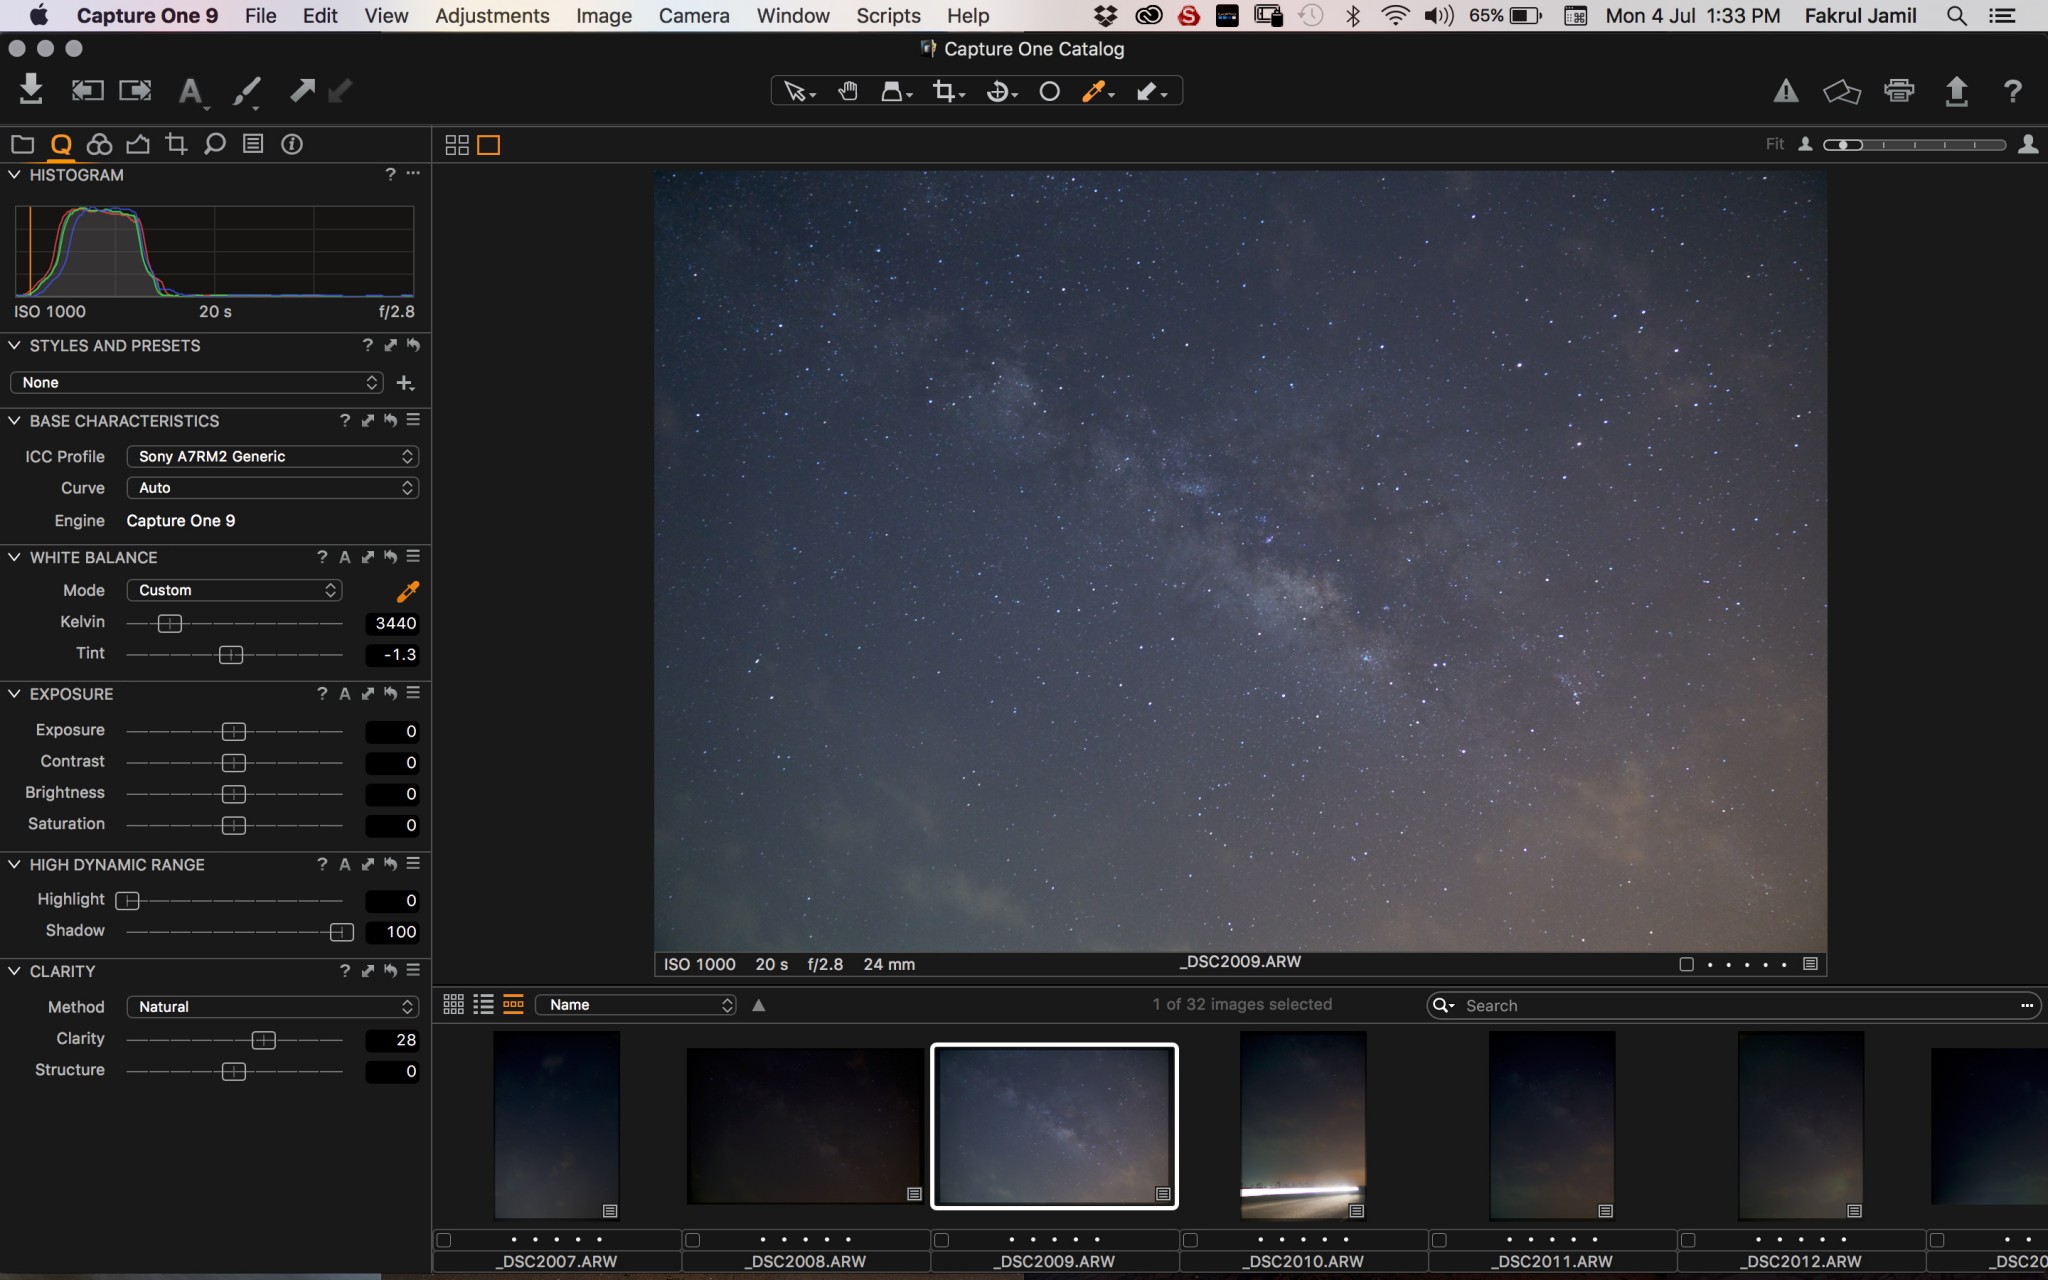
The Sony A7R Mark II shoots the Milky Way just fine despite some review saying this camera would not be able to do so. Below is before & after image taken with FE 24-70mm F2.8 GM lens. I increased the shadow part to 100% and as you can see the image quality is unaffected.
Below is few more photos from the night. We did not stay long as the Milky Way gets higher and higher making it difficult to shoot with good foreground. After all, the following day is still “puasa” so we had to go back to have our “sahur”. ☺️
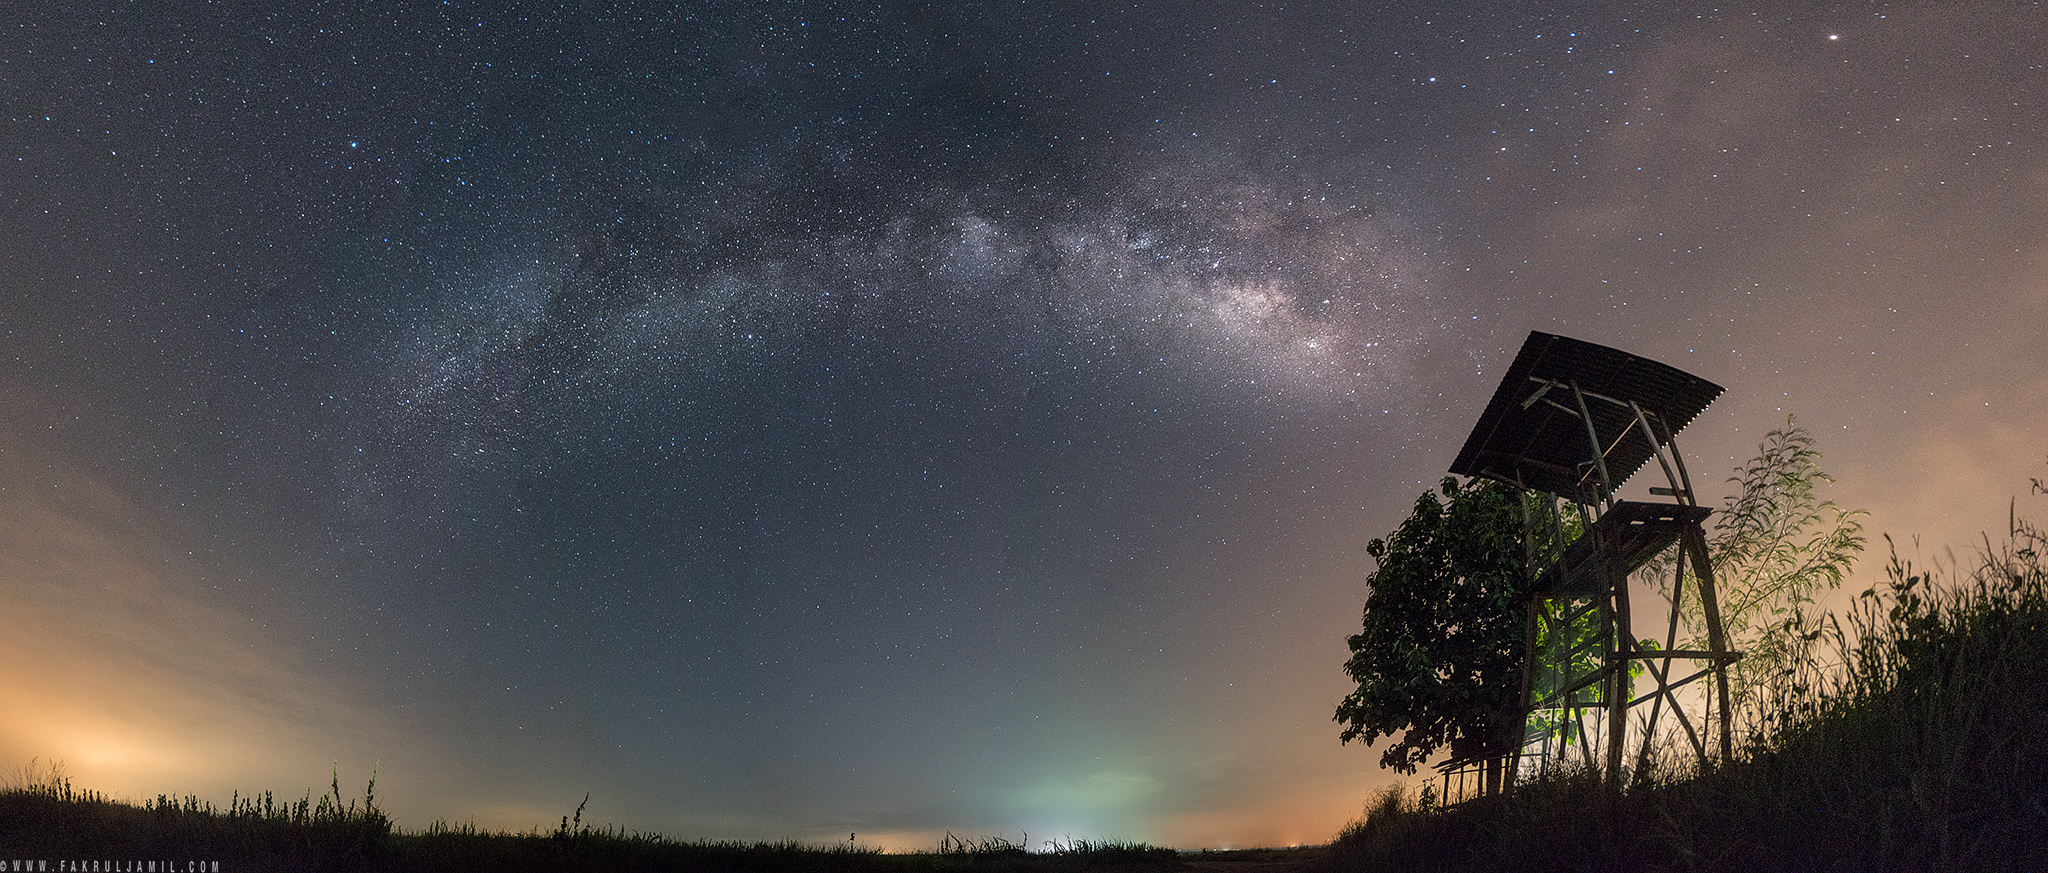
Panoramic of 7 vertical shots to capture the full length of the Milky Way. | Sony A7R Mark II + FE 16-35mm F4 ZA OSS
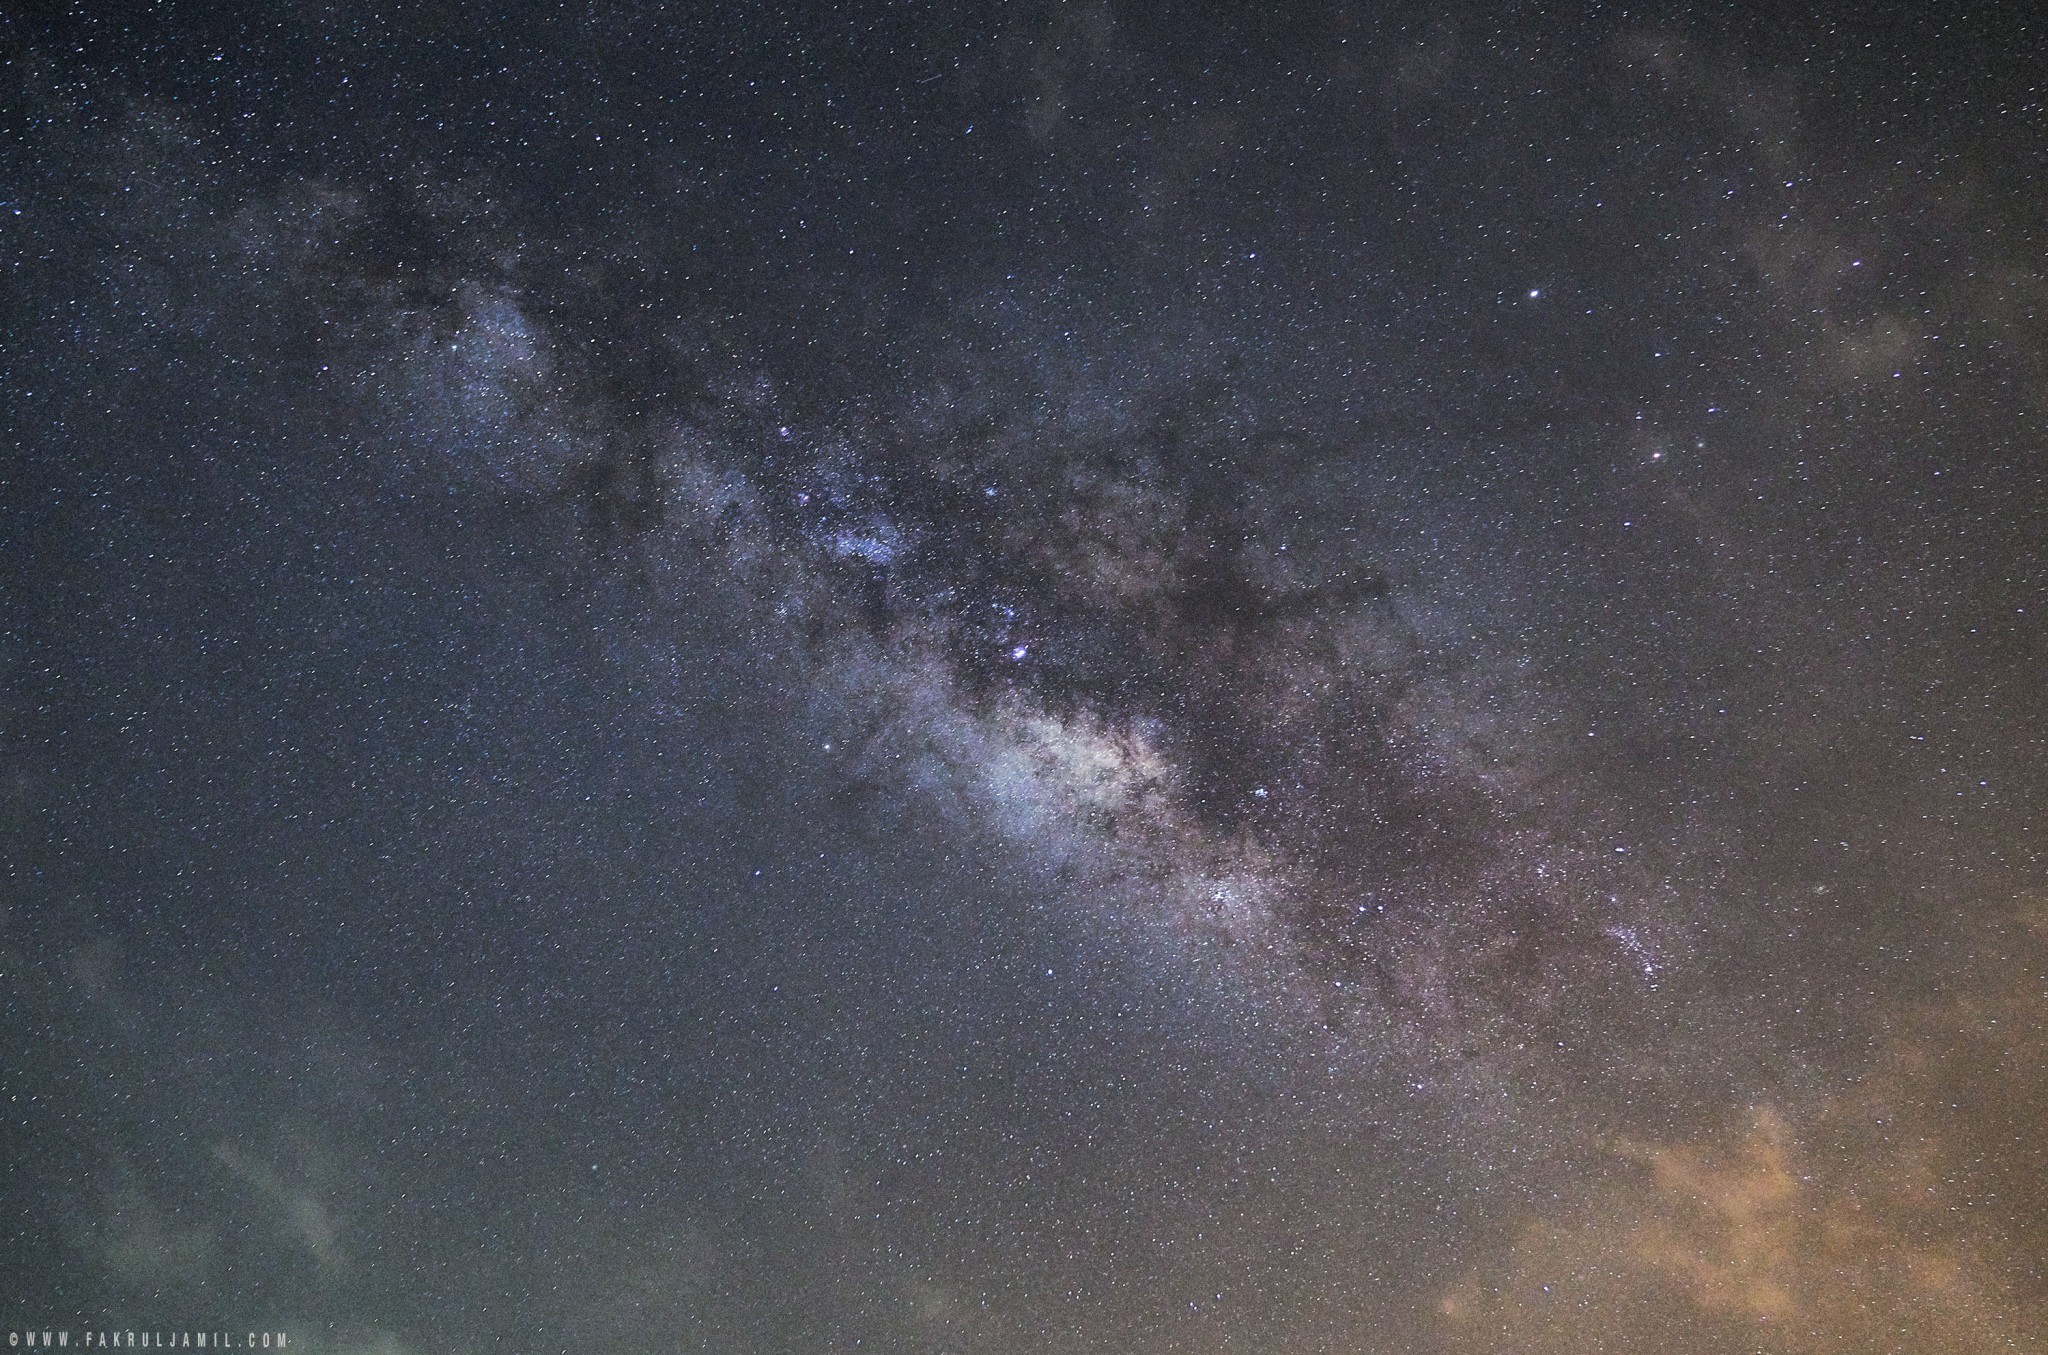
The Galactic centre of Milky Way | Sony A7R Mark II + FE 16-35mm F4 ZA OSS

Milky Way above the Tree | Sony A7R Mark II + FE 16-35mm F4 ZA OSS
Today, over 5 billion people live under vanished light polluted urban skies where the Milky Way is no longer visble. Night sky becomes a forgotten part of nature, an essential element of our environment which is disappearing.
The Milky Way is still visible in Malaysia, you just have to find a secluded area which have very minimal light pollution or easier words, a very dark area.
Timing is also important so you have to check what phase the moon is currently in. If it’s in the first quarter (half-moon) or brighter, chances are you will not be able to see the Milky Way with a naked eyes because there will be too much moonlight outshining the stars.
That’s it for this entry. I hope you’ll find this entry is somewhat useful. Feel free to share and spread the love of nature photography. ☺️